 So… at long last, the Wolverine Airsoft SMP Kit review has arrived! I would have conducted this review much sooner than it has turned out to be, but is has been a very long series of setbacks stemming from incompetent clerks screwing my HPA tank up that has prevented me from actually testing out this unit. Thankfully, I have managed to fix my tank with the gracious assistance of Guerrilla Air and have now since put close to 5000 rounds through this beast. It’s amazing how fast you can burn through a bag of BB’s when you’re having fun.
What you get
Firstly, for those unaware, the “SMP” moniker stands for “Single Moving Part” and is rather appropriately named as the air nozzle is really the only part that moves on this unit (besides the trigger switch, but I digress). The SMP Kit is an HPA powered drop-in ‘engine’ for your AEG’s gearbox. For most standard Version 2 or 3 installations, it’s a 99% drop in fit. Certain guns require different nozzle lengths, such as MP5/G3’s, FAL’s, Masada, etc. Wolverine Airsoft now offers a wide selection of nozzles and finding one for your particular application shouldn’t be hard. The one thing they do not have yet is an SMP unit designed with an offset nozzle such as found on the M14 or SVD Dragunov. This is expected to be released very soon, however.
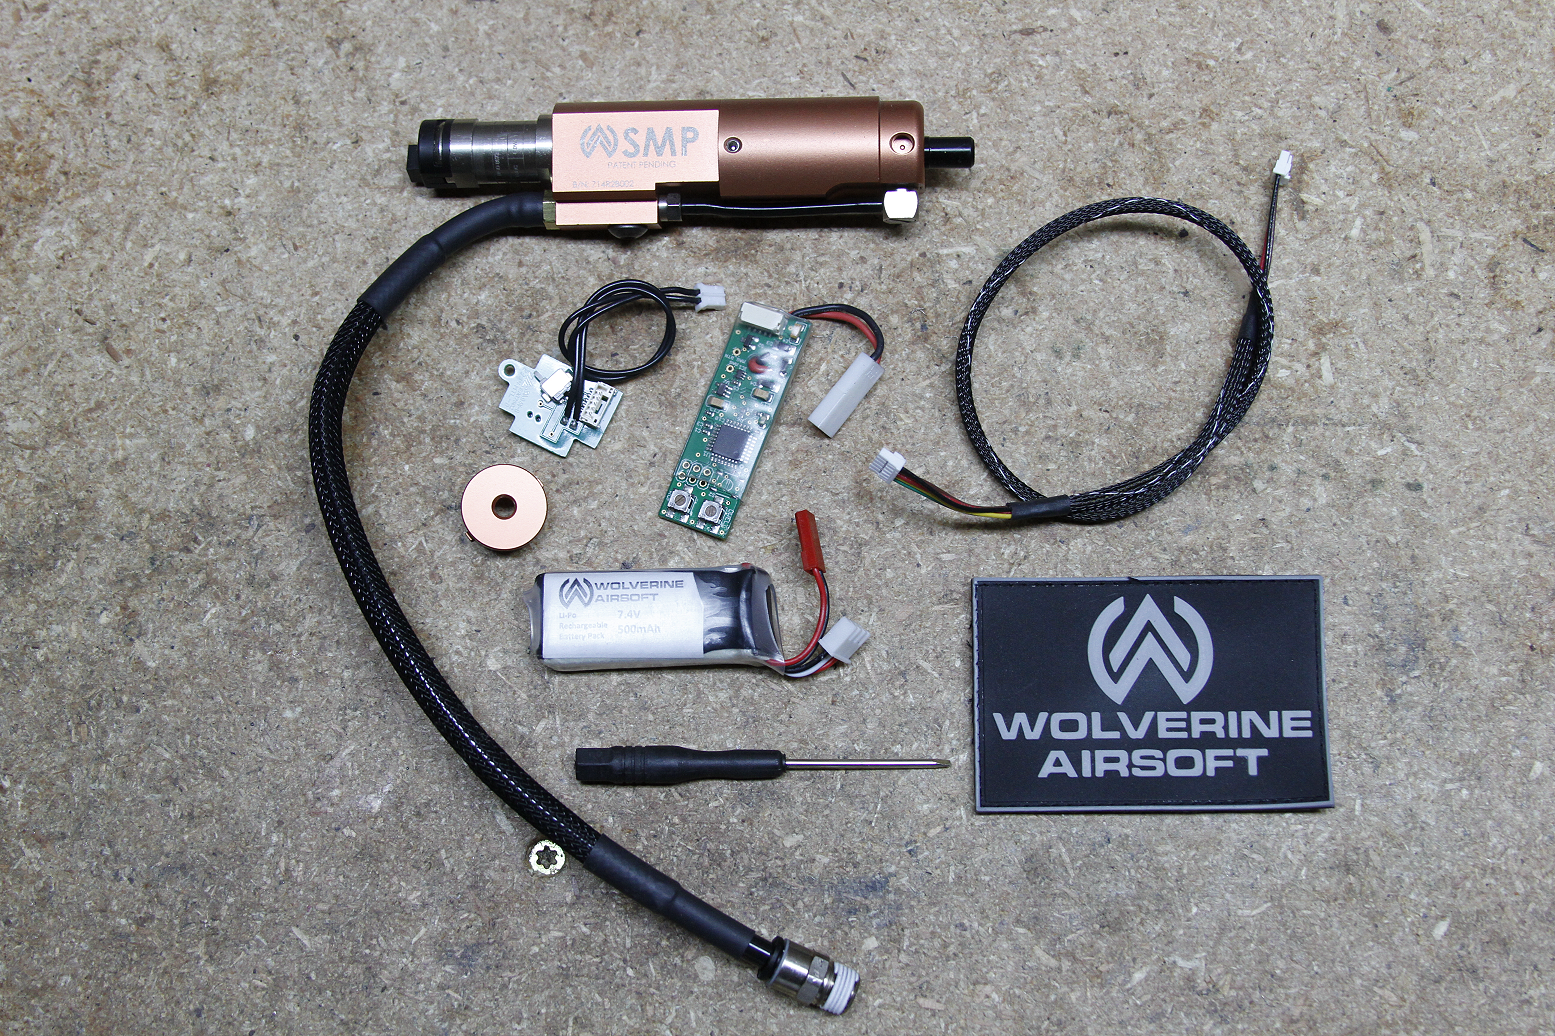
The SMP Kit contains the SMP solenoid unit, FCU (Fire Control Unit), trigger switch, 7.4v 500mah LiPO battery, wiring harness, quick connect fitting, screwdriver, PVC patch and instructions. There are few real differences between the Version 2 and the Version 3 kits besides the air nozzle and most parts are fully interchangeable between the two. In fact, the only items that need to be swapped out to convert from Version 2 to Version 3 are the wiring harness, trigger board, and air nozzle.
It should also be noted that you will need an HPA tank (never use CO2), and a high quality air regulator in order to use the SMP kit.
The SMP Kit retails at MAP for $389 which makes it among the cheapest HPA conversions to step into in comparison to the Polarstar or the newer Valken V12. HPA technology is still living in the realm of the rich airsofter, however, and you can expect your initial outlay to be around $700 – $1000+ by the time you are fully set up with a gun, the SMP kit, air tank, regulator, remote line, hop up / barrel upgrades, and any accessories you desire.
A few random specifications
- Operating Pressure: 40 – 120psi
- Velocity: Adjustable 300 – 475fps with .25′s
- ROF: Adjustable 5 – 40+ RPS
- Burst Modes: 1, 2, 3, 5, 7, auto
- Trigger Response: ~10ms (time from trigger pull until BB leaves the barrel)
- Estimated air usage: (Tank ci.) x (Tank psi)/ 50 **
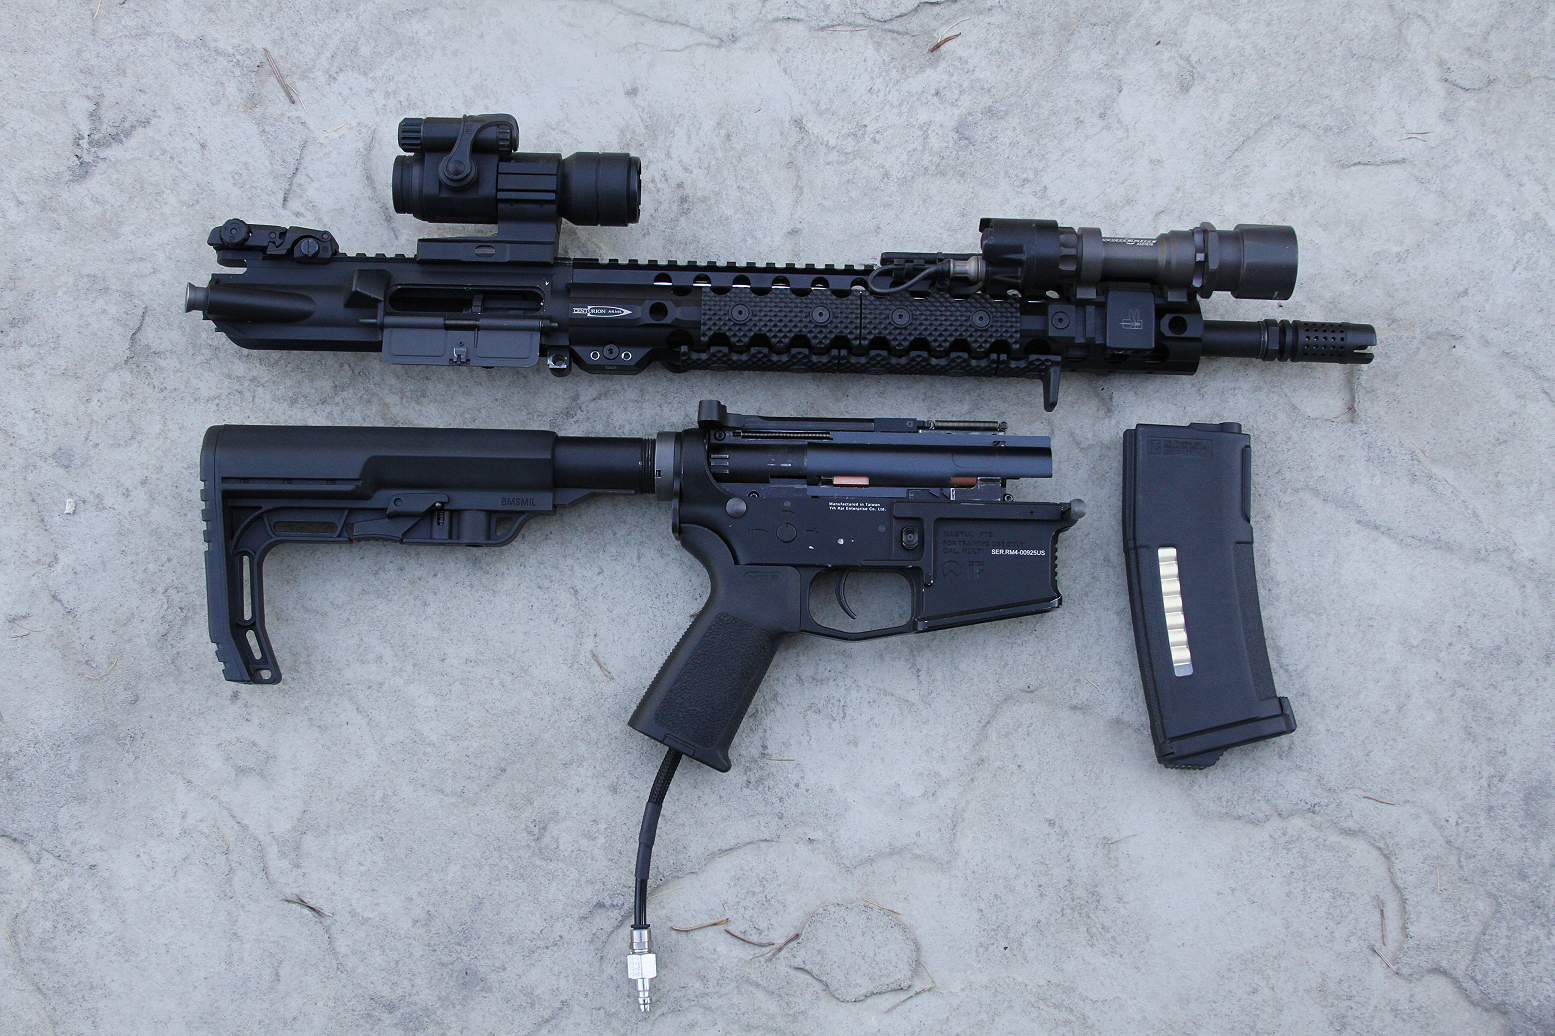
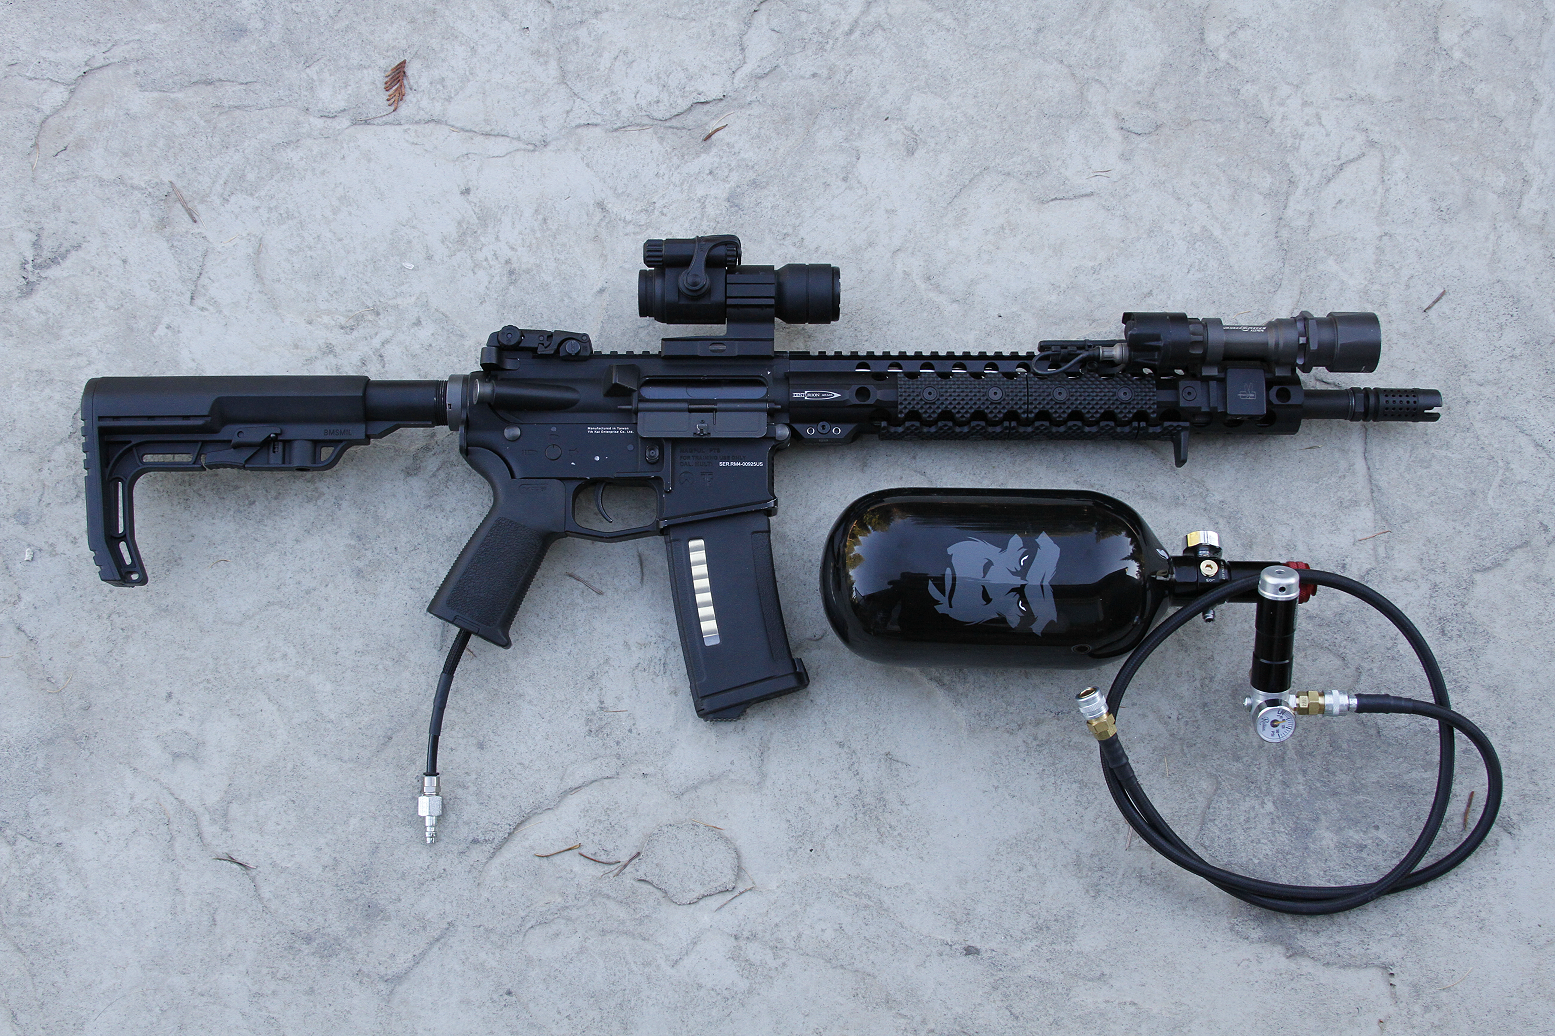
For my purposes, I chose the Version 2 setup and decided to install it in my KWA PTS RM4. The RM4 required a fair degree of custom installation due to the gearbox design being so reinforced. A standard version 2 would not obviously require this and would thus drop in without modification. A lot of people would question this particular gun choice for an SMP install but I will just say it boiled down to this:
- I already owned the gun.
- It was cheaper than buying a new host gun.
- Despite “carving up” the gearbox, a new gearbox shell is still less than a 1/4 of the cost of buying a new gun.
- I wanted to see if I could make the last-round cutoff feature work on the SMP system (sorta does… not really worth it.)
- I couldn’t find it in my heart to gut any of my Real Swords.
Installation
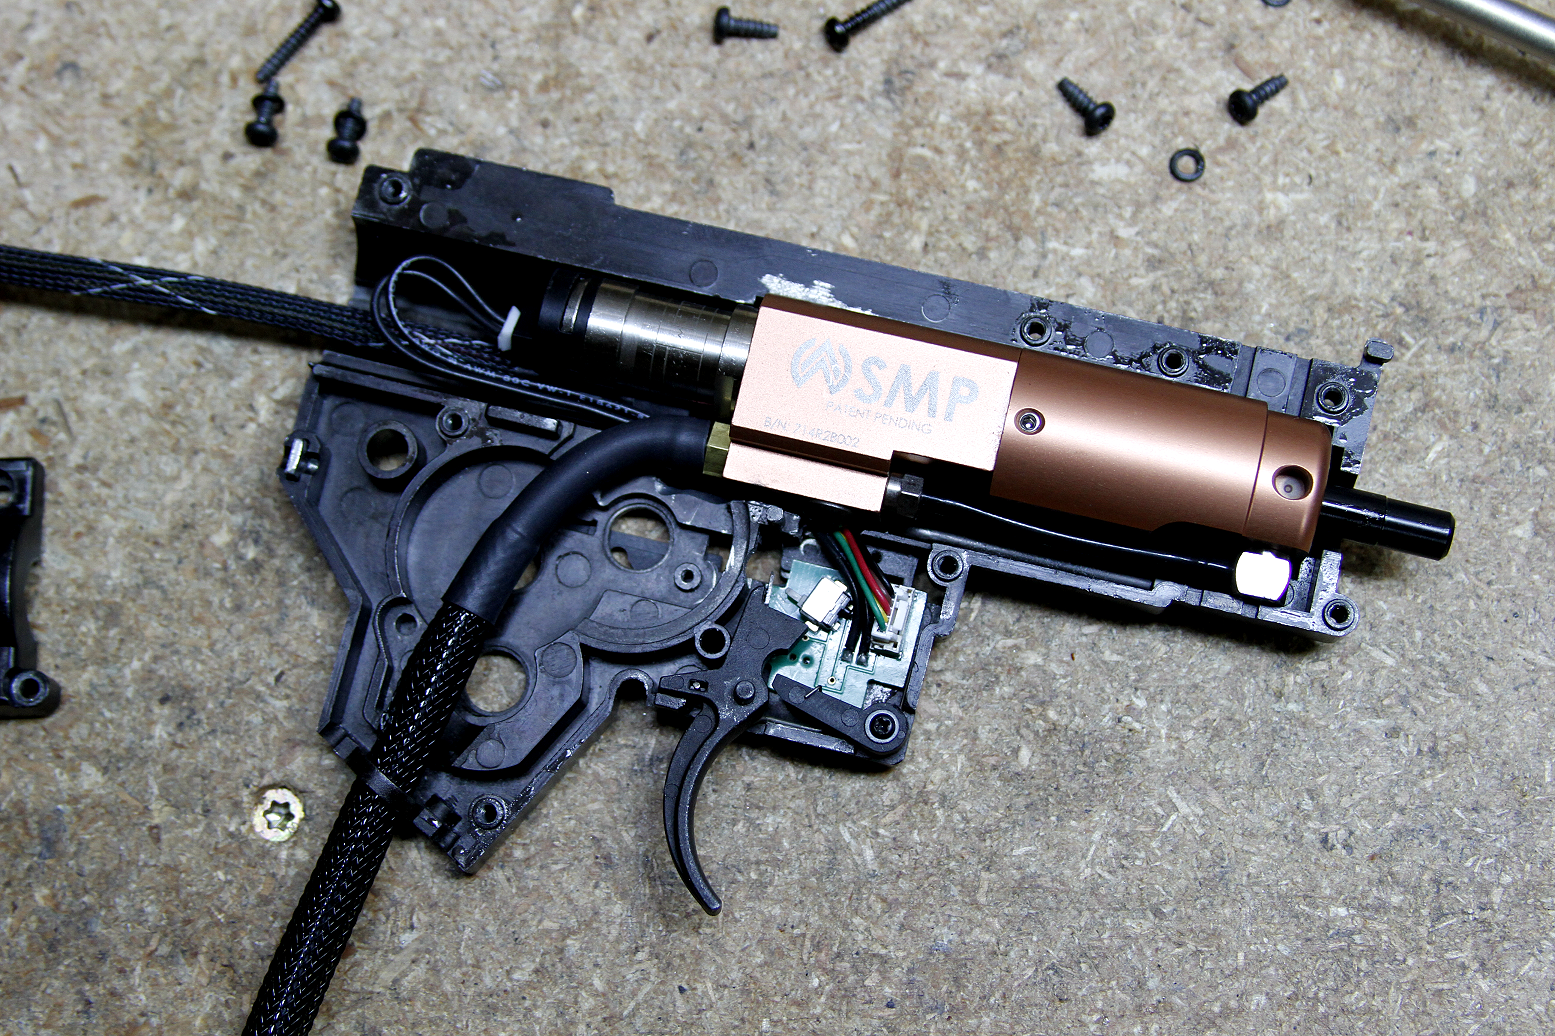
First off, you need to completely gut your gearbox. Remove all the internal gears, bushings, wiring, etc. The only items you will retain are the trigger, trigger spring, selector plate, and the manual safety lever. This last part is purely optional actually. If you prefer the trigger to feel hard resistance on safe-mode, then keep it in, otherwise it will pull like any other firing mode, albeit it simply won’t fire due to being in “safe.” Secondly, give your gearbox a good cleaning. Wipe it all down and degrease it. Third, drop in the SMP solenoid unit. It’s really that easy … unless you do what I did and try and install it into an RM4….
As I mentioned previously, the RM4 required a certain amount of “finessing” to get the SMP unit to fit. I wound up cutting away a decent chunk of the
left side gearbox shell so there would be room to route the wiring through the back of the gearbox. The RM4 shell is nice in this regard as the back of the gearbox already has a nice big hole that was designed to accommodate the Kinetic Feedback System. For my setup, I would route all the wiring through the back and into the buffer tube. This is also where I decided to house the battery and FCU. You have the option depending on preference, of routing these items into the buffer tube or the pistol grip. The components are small enough that they will fit in either location.
 |
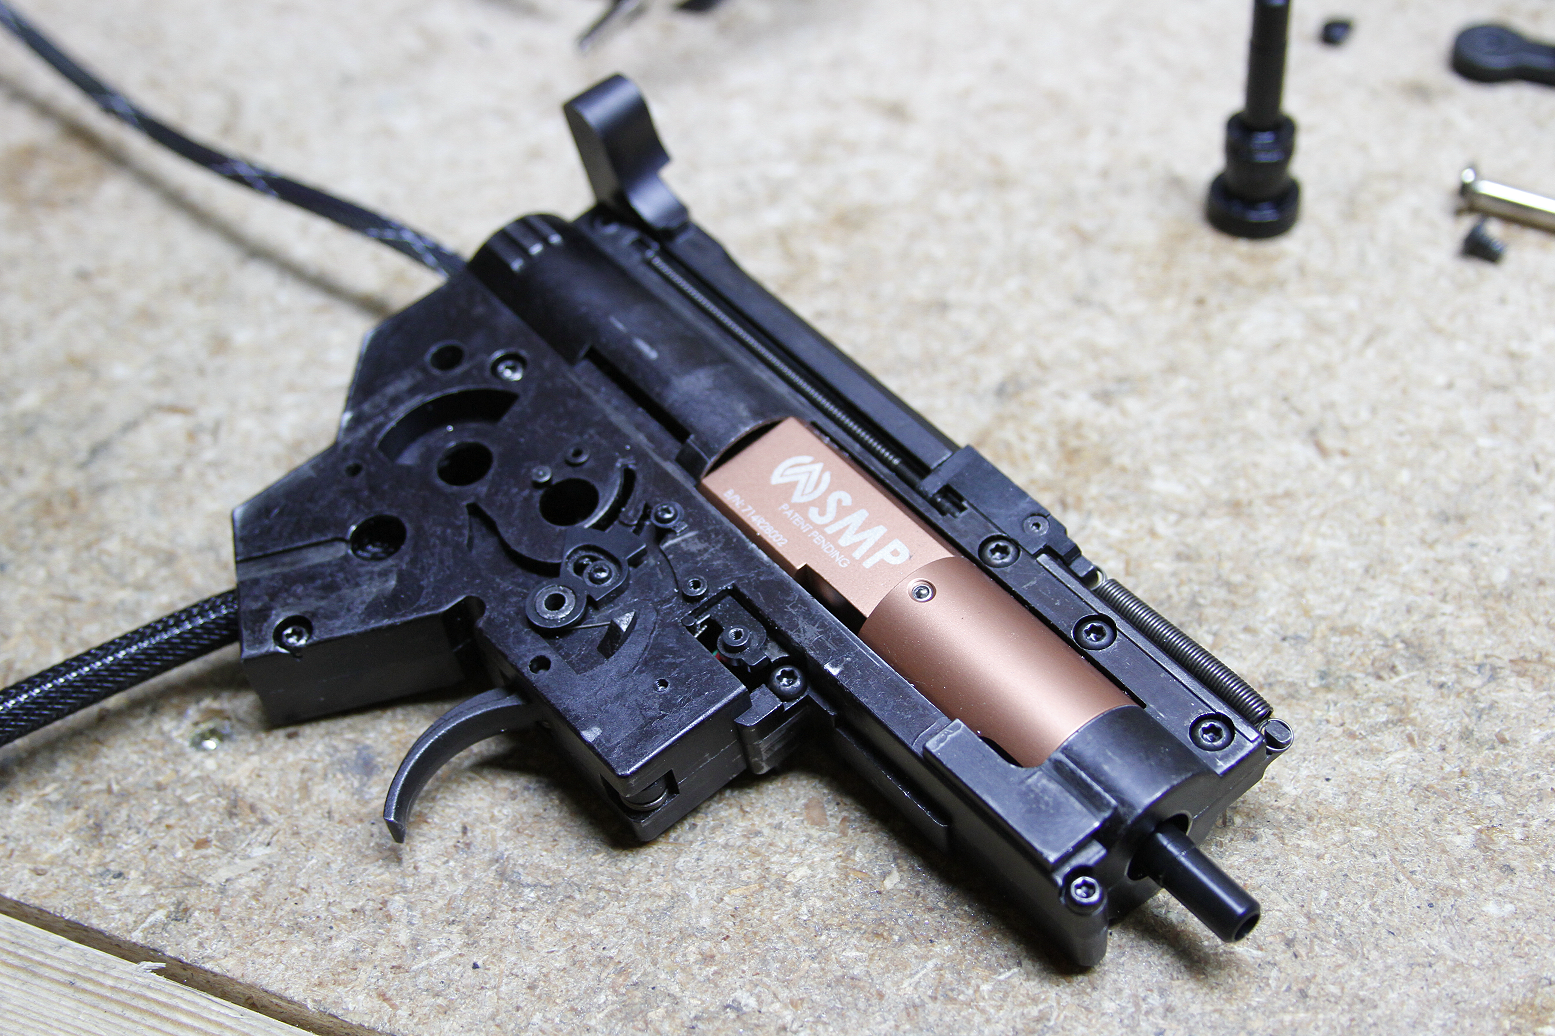
I also discovered that the trigger board was a bit too big to fit inside the gearbox shell too. I wound up trimming off the portion that would normally be affixed with a screw. The board was then super-glued to the inside of the gearbox. My next problem was figuring out how to make the trigger interact with the trigger board. The flat surface that would normally interact with your trigger trolley was too short by a few millimeters to hit the tiny micro-switch on the trigger board. Thankfully, that’s what they make JB Weld for. I cut out a small piece of aluminum, shaped it to the trigger surface and epoxied it on there – this basically extends the reach of the sear surface on the trigger. As the trigger isn’t a high-stress part in the SMP setup, it should hold up just fine.
The RM4 also required a slightly longer air nozzle than the standard Version 2 design. An FAL nozzle is the one necessary for this particular gun. Without it, you simply will not be happy with the performance as it will drop most shots way too low due to high FPS loss in the nozzle / bucking area. Replacing nozzles on the SMP unit is ridiculously easy and also serves to show how very simple this system is.
|
|

To replace a nozzle, simply remove the two stainless set screws on either side of the SMP unit, then using a flat-blade screwdriver, remove the forward air line fitting on the underside of the unit. Slide the cylinder away from the solenoid and you can now remove the air nozzle. The air nozzle should always be lubricated with a non-petroleum based lube with preferably a medium viscosity. Wolverine Airsoft recommends Tech T Gun-Save, which should be familiar to anyone with a paintball background (this also makes a good cylinder and piston lube for AEG’s). I use a Jet Lube brand product myself for most of these purposes as it does the same thing for just a few bucks extra and a boatload more product.
|
|
So how is the performance?
The first step after slapping everything together is to fine tune your FPS, dwell, and Rate Of Fire (ROF) settings. I am using a Guerrilla Air Carbon Fiber 68/4500 tank coupled with a Redline Firebase regulator. Upon first firing her up, I was cranking out about 480 FPS at 110 PSI on the regulator. As this was way too hot for my desires, I dialed the regulator down to about 75-80 PSI and this brought the FPS in line at just under 400 FPS with .20g’s.
|
|

Adjusting the dwell setting on the FCU is mostly aimed at obtaining the best air efficiency with your particular setup. Every gun is different, and barrel length and volume will also affect air usage too. To start with, dial the dwell setting all the way down then fire the gun a couple of times to check for FPS and range. Dialed all the way in, it will probably shoot like crap and your range will be abysmal. Slowly dial the dwell setting around a little until you finally just start getting some range. This is in effect the “sweet spot” for your dwell setting and represents the most efficient use of air.
Rate Of Fire adjustment is easy. Simply decide how fast you want your gun to cycle. Realistic ROF is between 15 – 20 rounds per second. The SMP is fully capable of exceeding that, however, and I was able to attain around 55 RPS on my chrono with the dial cranked all the way up. At those rates, you might as well purchase a mini-gun though. I also don’t really recommend this simply from a safety standpoint as well as it being just plain excessive. As the trigger response is so quick and the pull fairly light, it’s quite easy to hit 400+ RPM on semi-auto mode alone. Longtime paintballers who know how to feather a trigger will have no problems getting a lot of mileage on the semi-auto mode. On an aside, the PTS EPM magazines had no trouble keeping up with the extreme ROF demands I was testing out. The Mag brand magazines I had, did however, hiccup and stutter once they were pushed above the 40 RPS mark.
The SMP has an incredible FPS consistency that would make any AEG jealous. My average was within 1 – 2 FPS +/- and 90% of the time it maintained the same FPS from shot to shot. This consistency is what contributes to excellent range and accuracy. At 400 FPS, it was quite capable of reaching out to 100 yards with torso sized hits (using .25g BB’s – I’m all out of anything heavier unfortunately.) I have installed a 407mm Prometheus 6.03 EG Stainless Steel barrel with a Prometheus Purple bucking in my setup, so I couldn’t really attest to how the stock KWA barrel and bucking would do (and I wouldn’t want to use the G2X bucking abomination anyway).
Accuracy-wise, it wasn’t as tight as my Real Sword SVD, but I think with a flat hop, R-Hop, or perhaps a Maple Leaf installed, it just might reach out there and compete, though I would say the SVD certainly has the edge in total effective range and accuracy. At the very least it makes an excellent DMR platform and I could see myself installing a magnified optic, such as a short-dot replica to take advantage of this. I will more than likely be experimenting with different bucking and nub combinations in the future to see what works best.
The SMP is also very quiet – more so than an AEG even. It’s often been remarked on by end users as a “mouse fart” and I suppose that’s apt. With an appropriately built muzzle device, you could make it even quieter. For the guys who want ultimate stealth, HPA systems are something they should seriously look at.
|
|
Final thoughts
As a tech, I can appreciate the brutal simplicity of the SMP kit. It’s an elegant design that doesn’t cost as much or have as many fitment issues as the Polarstar system – it’s closest competitor. It represents perhaps a step backwards for the paintballer who’s become a reformed airsofter as you now have to carry an HPA tank and a remote line. This aside, the average user who does not like to perform tech work or maintenance on their guns will enjoy the SMP immensely as they require very little, if any of either. Given a blank check as I so often give myself, I can attain much of the same performance out of an AEG as I can an SMP, so it’s kind of a wash for me … though the SMP certainly beats an AEG on the durability scale alone. Wolverine has a test unit that’s undergone over 750,000+ continuous cycles without breakdown. I’m sure it’s much more than that now as that was several months ago when I read about it.
For airsofters without a blank check and who hate maintaining or upgrading an AEG, the SMP will take care of you rather than the inverse – which is really where the SMP finds its niche. Their tagline is “Because performance shouldn’t be complicated” and this is very true with the SMP kit. It really is that simple.
One thing I want to mention in closing that is rather cool about the SMP is the adjustment range for FPS. With one gun, you can change the FPS from field ready to CQB ready just by adjusting your regulator. No messy teardown and spring changing of a gearbox required. And furthermore, with regard to M4’s in particular; this opens up the possibility of having unique upper receivers for different roles. I could easily see myself buying another upper built expressly for CQB and outfitted with a nice short barrel. Right now, removing the upper receiver is very fast. Simply press out the forward pin and slide it off the lower receiver. No removal of a battery and handguards or careful routing of wires necessary to make this happen. Follow this up with a custom built pelican case with the appropriate foam cutouts and yeah….. 😀
I’m not an M4 guy in the slightest, but the SMP gives me a reason to own one.
|
|