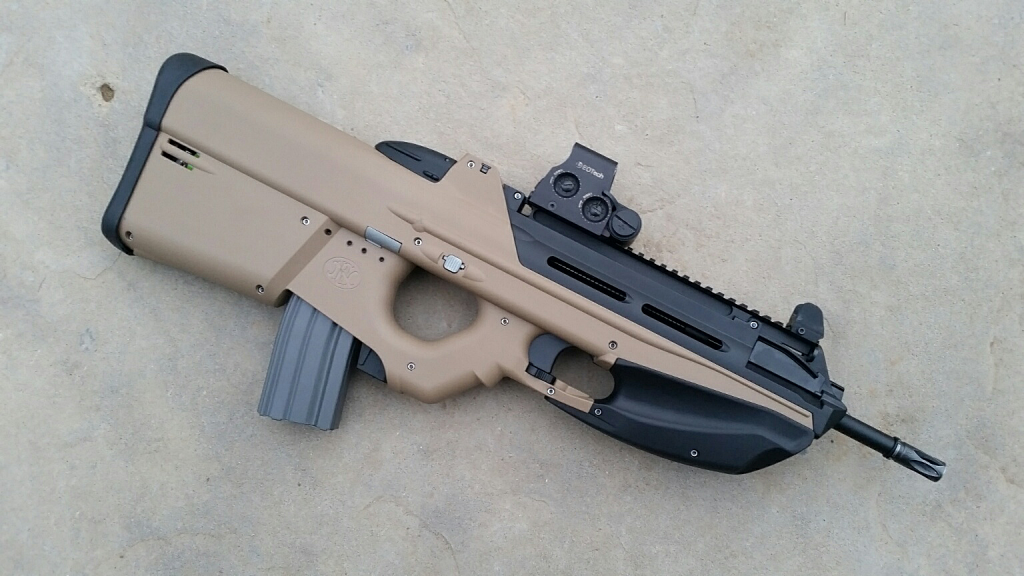
 Ask anyone who’s laid some time on the G&G FN2000 series, and they’ll tell you that they have lots of issues with semi-auto functionality and contact burnout. There are a couple of reasons for this, one of which is the overly complicated trigger mechanism; a poorly designed cutoff lever and the heavy, sluggish trigger and linkage doesn’t do it any favors either.
Ironically, despite this customers particular gun being brand new, it was having semi-auto failures straight out of the box.
Besides various YouTube tweaks of dubious reliability, and HPA conversions, there’s not a lot of hope for getting a nice trigger out of this gun. The Bingo Airsoft Works Polarstar conversion is perhaps the best known setup, which uses two micro-switches hard mounted to the body to enable semi-auto / full-auto functionality. This same setup can also be done with an AEG, a hardwired MOSFET and a little creative engineering.
That being said, I now believe there is a much more elegant solution available with the SR Designs FN2000 M-Trigger. This is a 3D printed trigger module, consisting of just 3 pieces: the trigger base, and the semi-auto and full auto trigger pieces – the latter of which aren’t included with the base and have to be purchased separately. This package is designed to be 100% drop in, and requires no permanent modifications or drilling of the gun, unlike the Bingo Design Works mod.
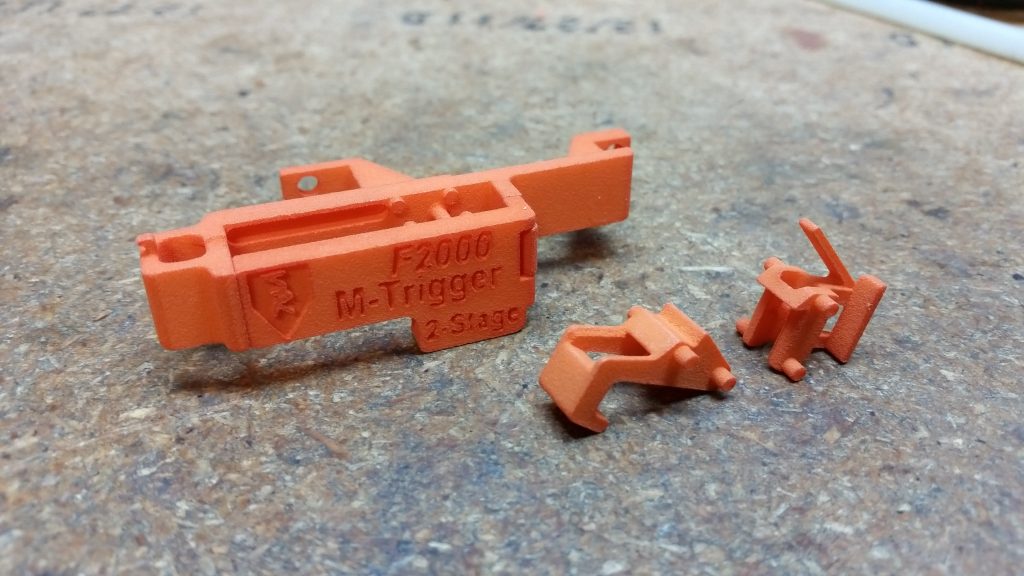
Overall construction of this module is fairly solid. The material has that typical rough 3D printed texture, but it’s also quite flexible and can be polished up nicely if so desired (more on that later). Total cost for all components is $30 + $4.99 shipping via Shapeways.
Note: This module does require that you salvage and re-install the two trigger contact springs from the FN2000’s OEM trigger mech box. SR Designs has an excellent full color manual available online that describes the install process in detail. P90 owners will also be interested to know that there is a similar module available for that gun too.
To sum up the operating principle of this trigger:
In full auto mode, the long trigger linkage arm depresses against the top full-auto trigger piece, which in turn draws back the semi-auto trigger piece which has a skinny arm that depresses the microswitch. This arm is somewhat adjustable, so you can set it up to activate the microswitch earlier or later, depending on how much trigger-travel you want.
In semi-auto mode, the cutoff lever (which is activated by the spinning sector gear) engages the semi-auto trigger unit and pulls it down away from the full auto trigger piece, which basically “cuts” the circuit, by tripping it away from the microswitch.
The real beauty of the M-Trigger is that it completely omits the troublesome trigger contacts (yes, that means no contact burnout!), and instead uses a small microswitch (that you have to provide). In the case of this customers gun, I used a 10 Amp SS-10GL13T microswitch, which fits perfectly. I did have to clip some extra length off the soldering terminals and the tip of the activation arm, which is easily accomplished with a pair of wire cutters.
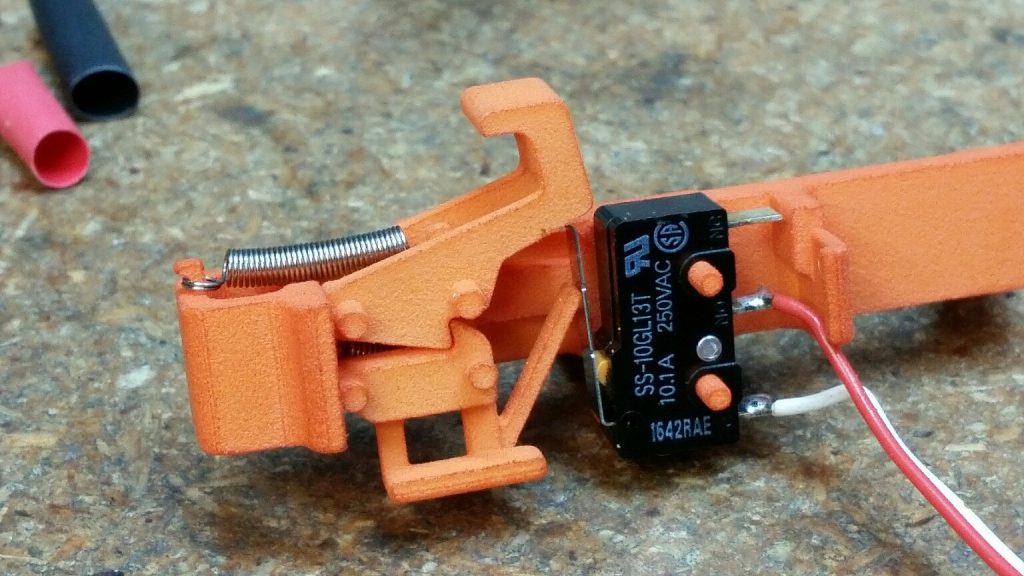
This does involve a small bit of soldering, as you can see. As well, the microswitch requires the use of a hardwired MOSFET for operation. In this installation, I used a Gate NanoAAB which is small enough to fit inside the gearbox compartment of this gun and not take up any battery space. The signal wire is what you solder to the microswitch.
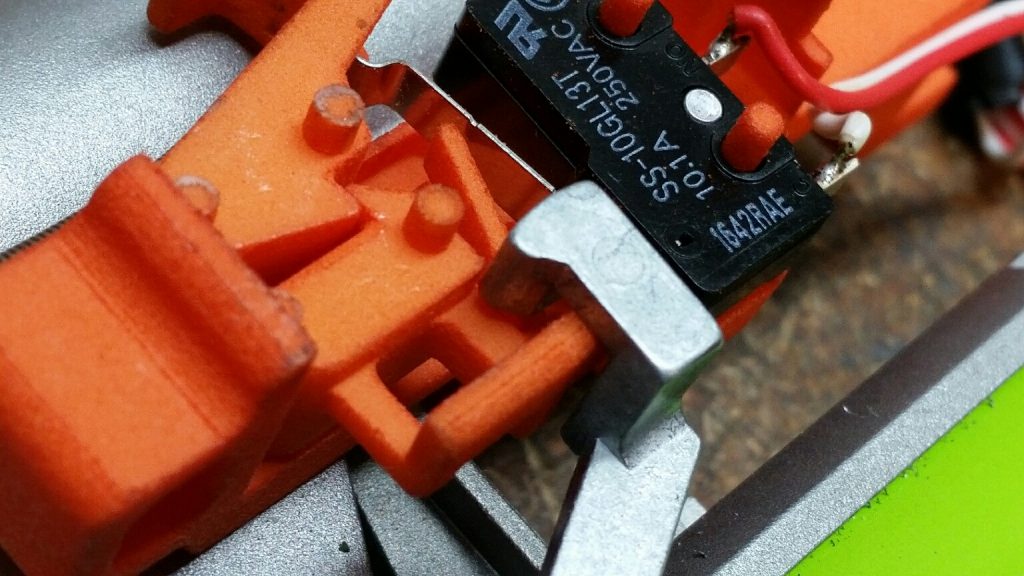
Of important note, I discovered the M-Trigger was designed for the older generation of FN2000 cutoff lever. Thus, it did not immediately work in this particular rifle as it was using the newest design from G&G. Primarily the issue lies with the design of the semi-auto trigger piece and how it was interfacing with the cutoff lever. Basically, it was getting stuck in the “off” position. That being said, I was able to modify it to work properly with the new generation cutoff lever with a little effort.
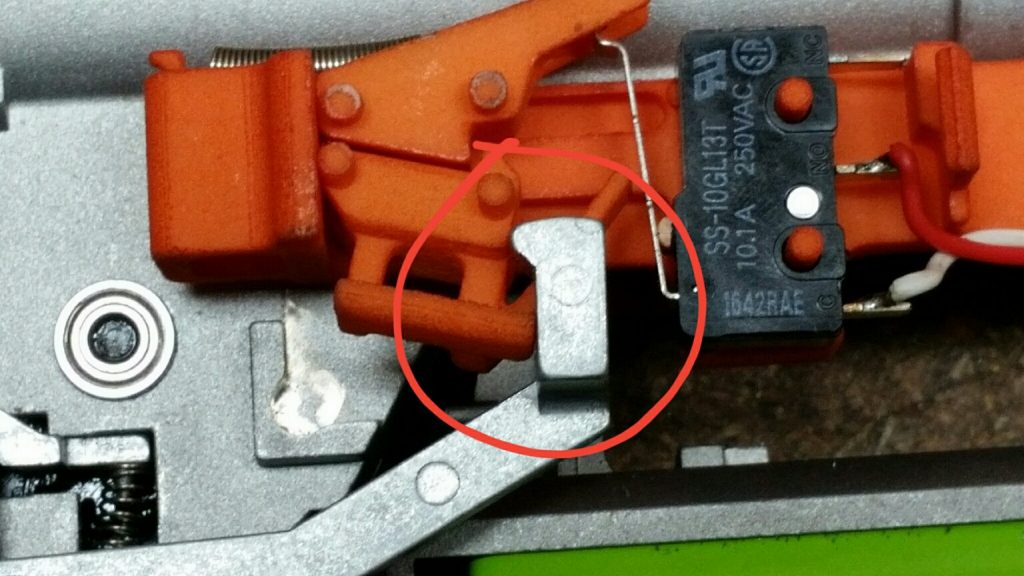
This required a little polishing on the guide rails of the M-Trigger base as well as some angles and short bevels filed into the semi-auto trigger piece specifically. The full auto trigger piece did not require modifications. I don’t imagine the older generation FN2000’s will require this level of modification as that is what the M-Trigger was designed around.
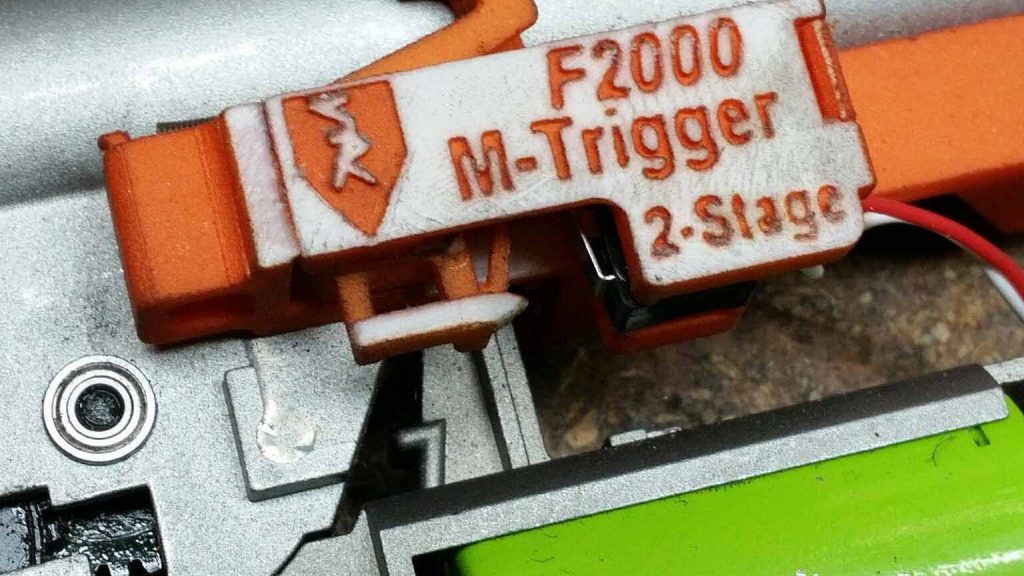
I also had to file down the width of the M-Trigger base as I discovered it was being overly compressed when install inside the body, which was preventing the trigger components from moving freely. The trigger components are held in place via what is basically a “lid” that snaps into the trigger base. This piece has a little movement, and I could potentially see where it might benefit from a more rigid mounting setup via screws instead.
Additionally, I ran into a rather troublesome issue with the trigger transfer bar on the FN2000 not returning forward fast enough. This was causing an issue where it wouldn’t release the microswitch quickly enough, so it would fire bursts in the semi-auto position. Before chasing a potential red herring, I first determined that this was not an over-spin issue with this build.
What it really turned out to be was the trigger on this gun was very ‘sticky’, and without the gearbox installed, it wouldn’t return forward under the power of the lone trigger return spring. There was also a substantial amount of trigger over-travel in the semi-auto position, so that contributed immensely to how much time the trigger transfer bar and associated components were engaging the microswitch.
I countered this by completely disassembling the body of the rifle and filing and polishing all the areas on the trigger that touched the body of the gun. I also slightly enlarged the grooves where the trigger transfer bar rode and laid down some grease on the moving surfaces. Another step was to replace the skinny trigger return spring with a motor height adjustment spring I pulled from a defunct motor. This removed the annoying “clicking” noise the stock trigger return spring was causing. I discovered that the small spring inside the trigger return unit was slipping around when it was depressed. There was also a small ridge inside that was leftover from the molding process that I ended up sanding smooth.
Lastly, I added a small square plastic shim to the selector switches’ semi-auto position to act as an over-travel stop for the trigger. The end result was I had a perfect trigger that returned forward as soon as it was released and had very minimal over-travel. This completely fixed the burst issue.
…. And in very typical G&G fashion, this gun came equipped out the box with the wrong air cylinder for the length of barrel used, which was thusly replaced. Go figure 😛
The last step was to hook up the signal wire to the MOSFET and create a small lead for the Deans plug to reach the battery compartment.
The final result was nice and snappy gun with an excellent ROF on an 11.1v LiPO. Overall, despite having to do some modifications, I am quite pleased with the design of the M-Trigger and its performance. I do think it could benefit from a revision (for the new style cutoff lever), as well as perhaps a slightly thinner width. In reality, this only means that there needs to be a separate semi-auto trigger piece offered for the new style cutoff levers.
This is a worthwhile addition to any G&G FN2000, and I would place it at the top of the “must have” upgrades for this gun.
See the video for a firing demo:
An FYI: I’ve found that Real Sword and VFC M4 style midcaps work fantastic out of the FN2000 series guns (in fact, better than the OEM G&G mags), and require no modifications to fit, unlike the majority of midcaps out there.
Build List:
- SHS 14 tooth AOE corrected piston
- 3/16″ 70D Air-Pad modified for offset nozzle
- SHS 13:1 gearset
- Lonex delayer chip
- SHS / Rocket high torque motor
- Motor height adjustment spring (for trigger)
- SR Designs M-Trigger
- 10 Amp SS-10GL13T microswitch
- Gate NanoAAB w/16 AWG low-resistance wire
- Deans plug
- OEM bucking and barrel
