 As a huge fan of H&K’s roller-locked series of weapons, I’ve always been slightly disappointed in the lack of Airsoft replicas available. While the MP5 series has always had a decent array of manufacturers and options to choose from, the G3 series has enjoyed relatively little market attention in comparison.
Previously one’s options were limited to the discontinued (and hard to find) Tokyo Marui G3’s, which were accurate as hell, but largely plastic and creaked like an aging sail ship, or the presently available JG, which was also plastic and had a plethora of self-destructing cheaply made internals. Then there was the Classic Army, which was perhaps the only serious contender for a true metal bodied G3, but suffered from a tumultuous history of availability and parts support.
With the announcement of LCT stepping into the G3 game, I was eager to get my hands on one for a firsthand examination. LCT has always had an excellent AK series, and I knew they would be one of the few manufactures to give the G3 the proper justice it deserved.
Holy hell, it’s heavy…
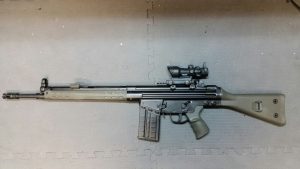
Upon first hefting this thing, that is probably going to be your first reaction. In pure stock form, the LC-3 weighs approximately 9.9lbs with the slimline style forearm, which puts it right in line with the weight of the real G3. Obviously, attachments, forearm selection (wide vs. slimeline) and stocks (SG-1, retractable, A3, etc.) will skew the measurements a little.
Externally speaking, this rifle is a solid hunk of steel. There is not even a smidgen of creakiness or wobble to be found anywhere. You could beat down a door with this thing and it would laugh in your face and demand more doors for the taking. Unlike the Classic Army or TM offerings, this is one of the few Airsoft rifles you will find that is actually made from stamped and welded steel – true to the real steel version’s design.
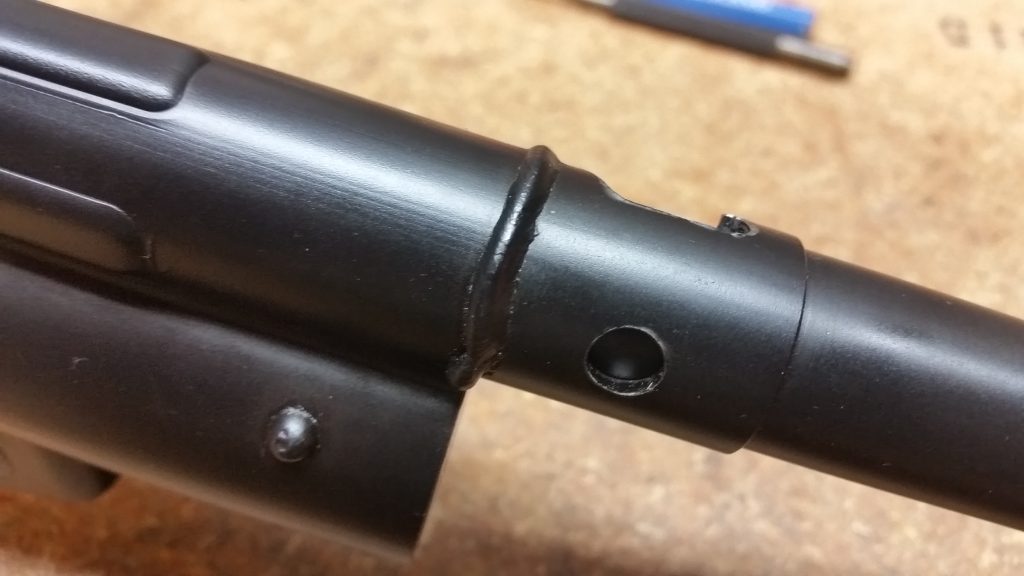
While this is technically a more accurate construction, the execution could use a little more refinement. Some of the welds are a little rough, especially up near the front sight tower, where there was clear evidence of some minor splatter. For an Airsoft company who’s prior experience was chiefly folded and riveted steel receivers to jump straight into welding, this is perhaps not surprising. I suspect as experience accrues with their craftsmen, the welds will get a lot cleaner. As an owner of real HK’s, I can attest that the real steel versions are much cleaner in their welds. That being said, how many AEG’s do you know of that are actually welded?
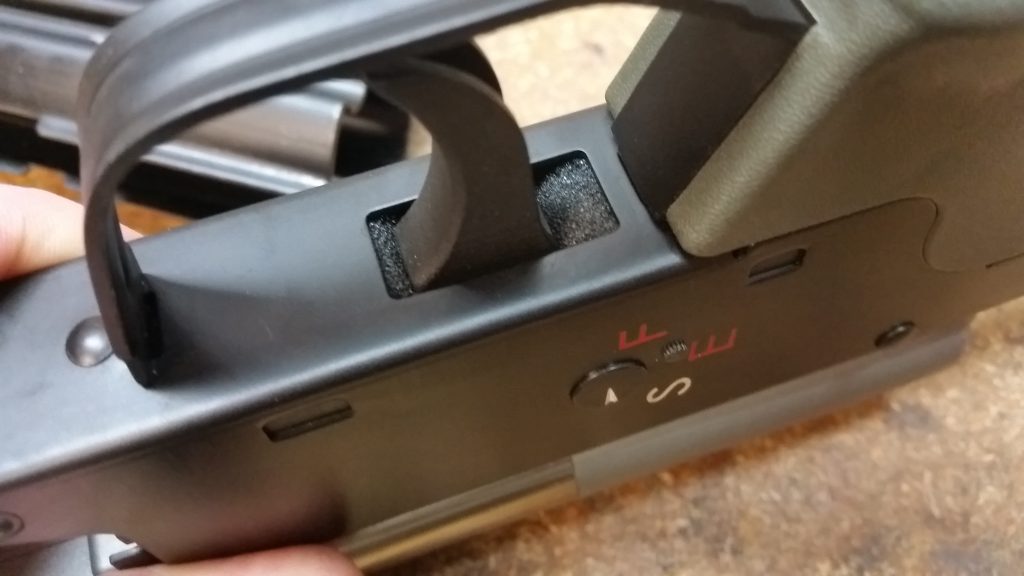
There are no trades or proof marks on this rifle, such as would be found on the real version. Outside of the selector switch markings, it’s essentially a blank canvas. An enterprising soul could have their receiver done up with a good engraver or laser, however.
The stock features an easily removed butt-pad and internally there is ample space for all manner of batteries. The two circular holes found on the stock are for the storage of the buttstock push pins during field-stripping. The polymer feels of high quality, and seems quite strong. I forgot to get close up shots of this, unfortunately.
I was a little disappointed with the motor grip. The polymer is of good quality, but aesthetically speaking it is lacking the right side mounting screw, which could have been included. I also find the thumb swells to be over-emphasized (especially on the right hand side), and located too far down, which is in contradiction to the real steel version where they are located inline with the trigger guard. I would be interested to see if the Classic Army motor grip would fit as that version is more correct.
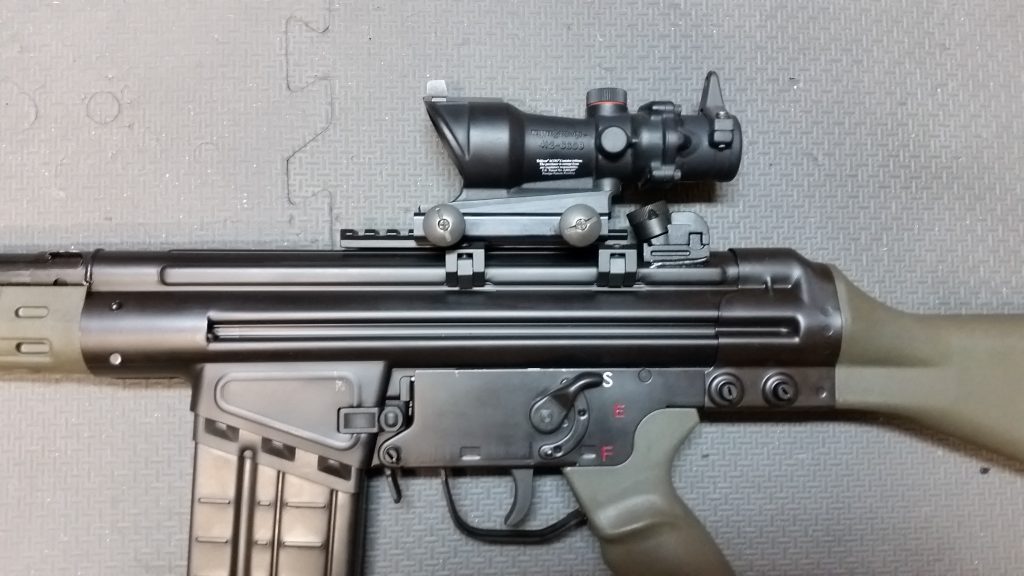
Unlike the CA or TM series G3’s, the LCT will also accept real steel optics mounts. On this rifle, I dropped an MFI low-profile mount on top which fit perfectly.

The magazine release is a push button and paddle style, either of which can be used to release the mag depending on user preference. It’s not quite accurate to the real steel version and the button sticks up higher too, but it’s solid and functional.
Presently (in the US at least) there isn’t much to be said of magazine availability. Which is unfortunate, as the LCT magazines are among the best made G3 mags I’ve seen. I suspect it will only be a matter of time before these become more readily available. I unfortunately neglected to take close-up photos of the magazine when I had this rifle in my shop.
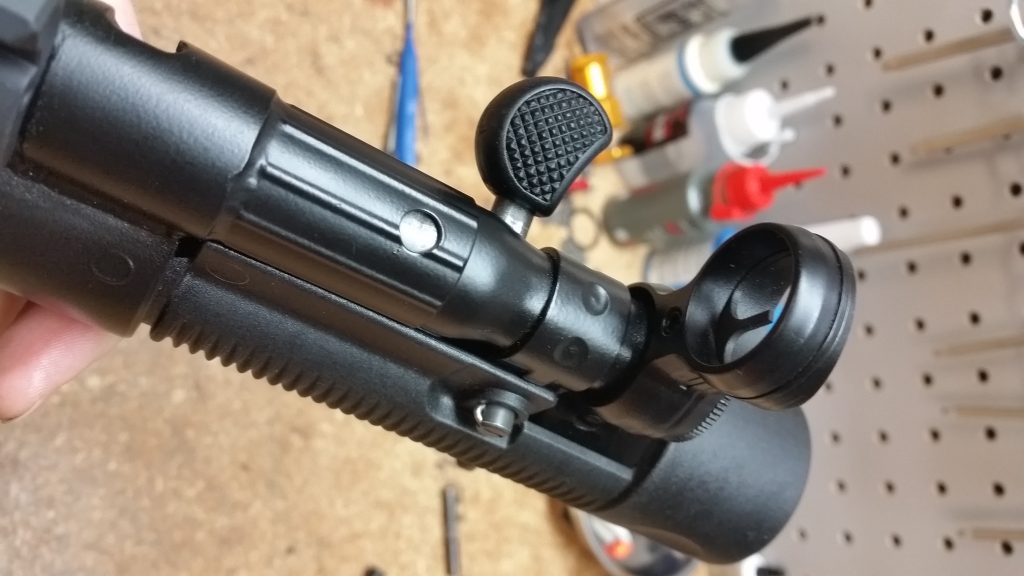
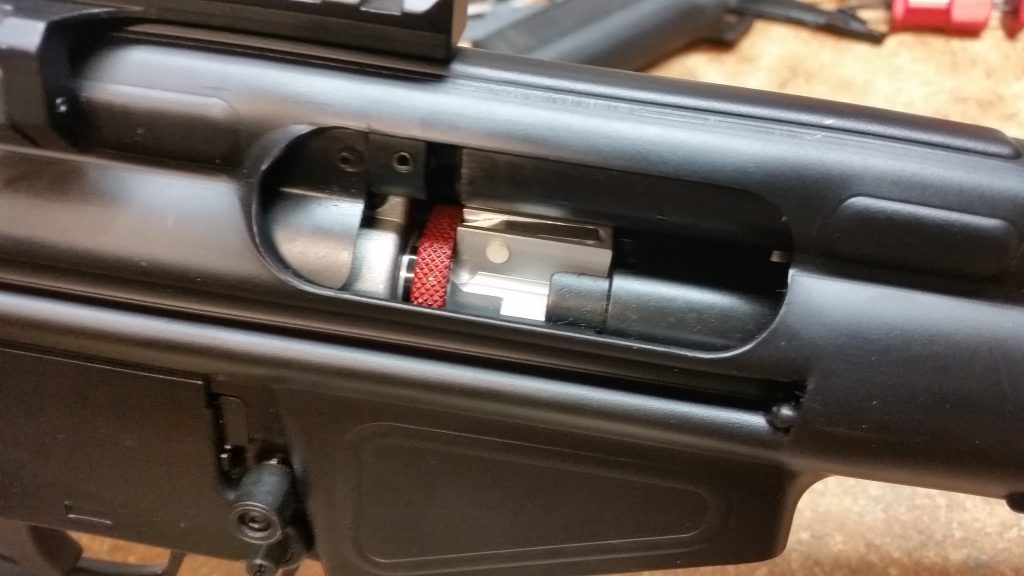
The cocking handle is built very similar to the real steel version, and can be locked to the rear to allow access to the hop up chamber adjustments. I suspect a real steel version would possibly fit with little to no modification.
Disassembly and Takedown
Much like the real steel version, this rifle disassembles in the same fashion, which makes accessing the inner barrel assembly a breeze.
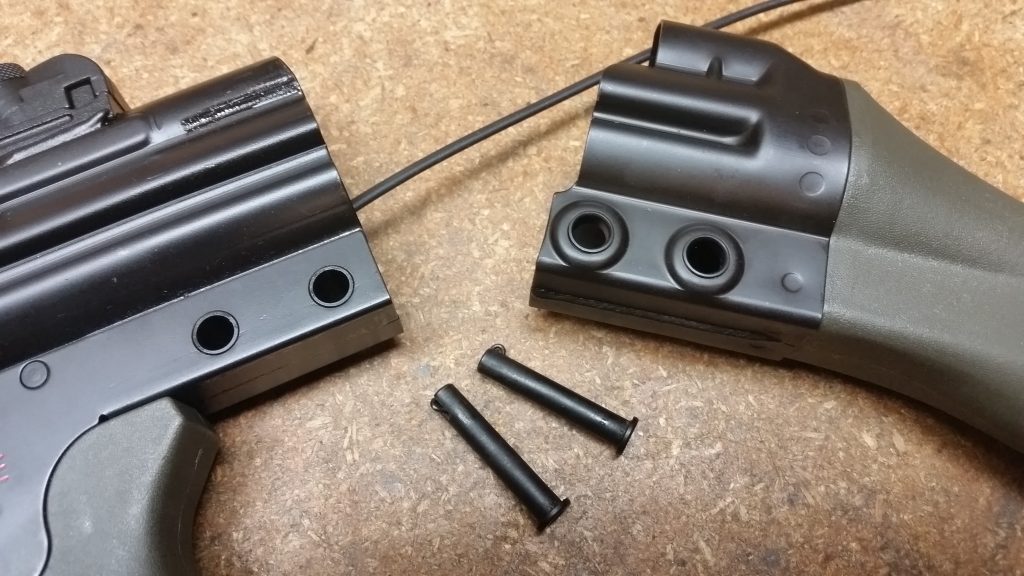
To start, press out the two retainer pins in the buttstock, then slide the buttstock assembly off the receiver. I have confirmed that real steel HK pins fit in this rifle too.
On an aside, I strongly suspect it would be a relatively simple matter to adapt a retractable A3 style stock to this rifle. I believe one might only need to remove the recoil rod.
What is interesting about this design is it would allow for a Quick Change Spring style gearbox, such as a Retro Arms shell, to be installed, with extremely easy access to the QCS function.
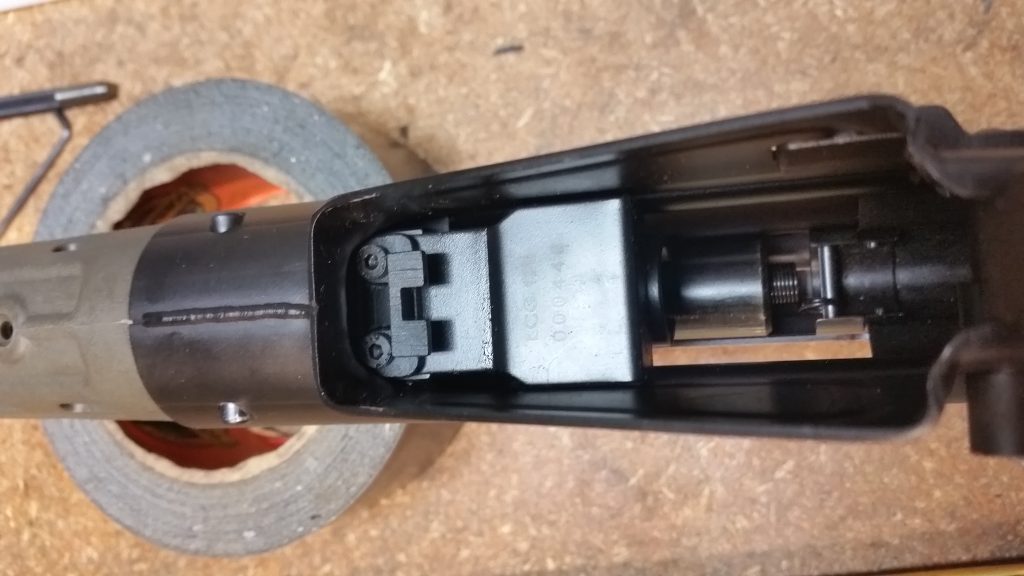
The lower grip frame assembly is best removed by removing the push-pin, then cocking the housing downward and sliding it out rearward.
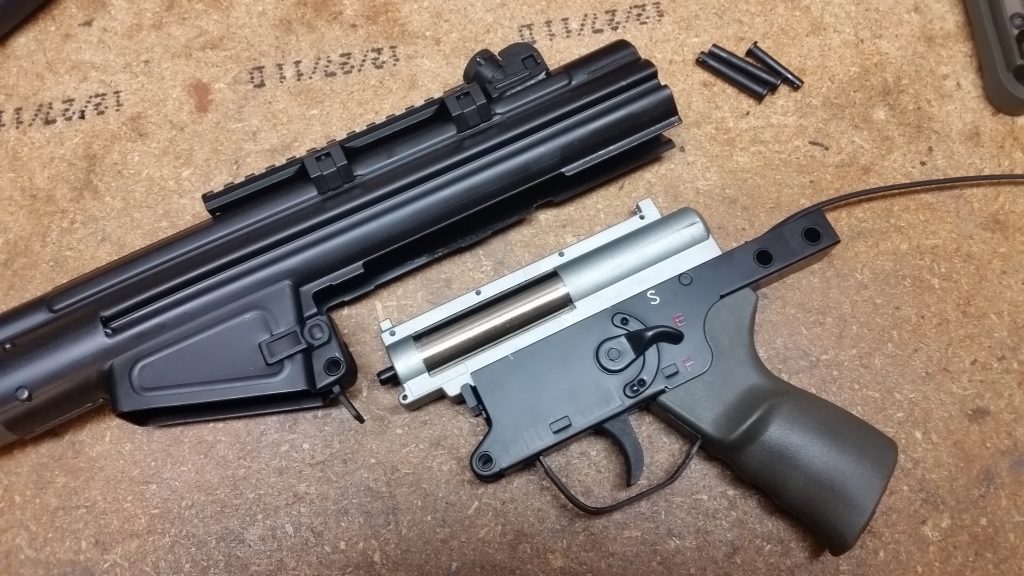
With the lower grip frame assembly removed, the outer barrel will now freely slide out the receiver.
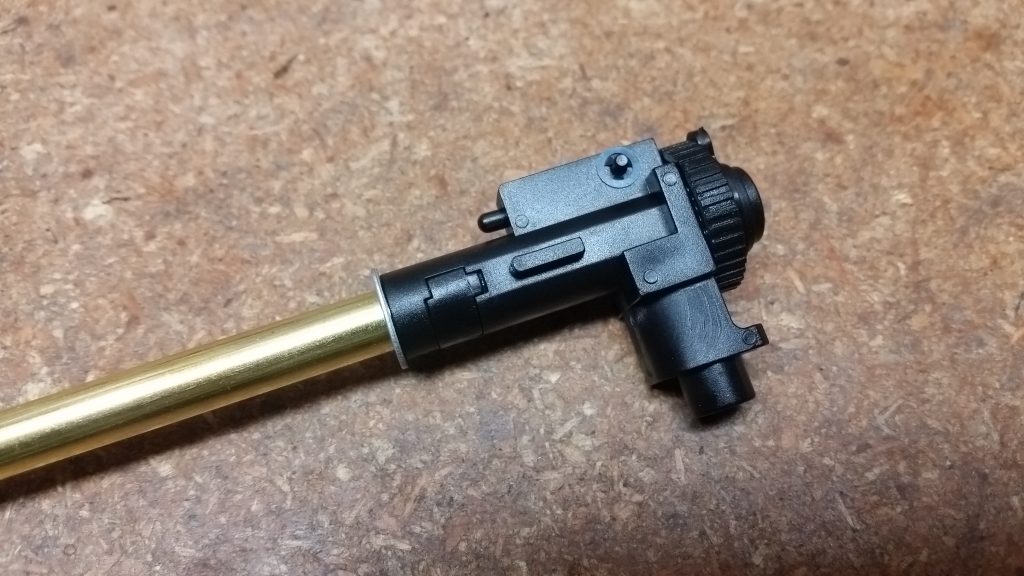
The hop up chamber is a nicely made rotary style chamber. It has positive – and audible – clicking adjustments. It is also essentially a rotary M4 chamber in specification, and I was able to succeed in dropping in a Retro Arms CNC rotary chamber and a ProWin chamber. That being said, I do not think it necessary to swap this chamber out as it’s a high quality unit.
Conventional non-rotary style hop up chambers such as the Lonex will not fit as they will hit the cocking tube assembly inside the receiver.
The inner barrel is a 6.03mm diameter bore and is approximately 515mm long and when paired with an R-Hopped G&G green bucking produced quite good accuracy.
This would generally be the extent of disassembly required to access the hop up chamber and / or conduct maintenance on the gearbox. For the purposes of this review (and curiosity), I went a few steps further.
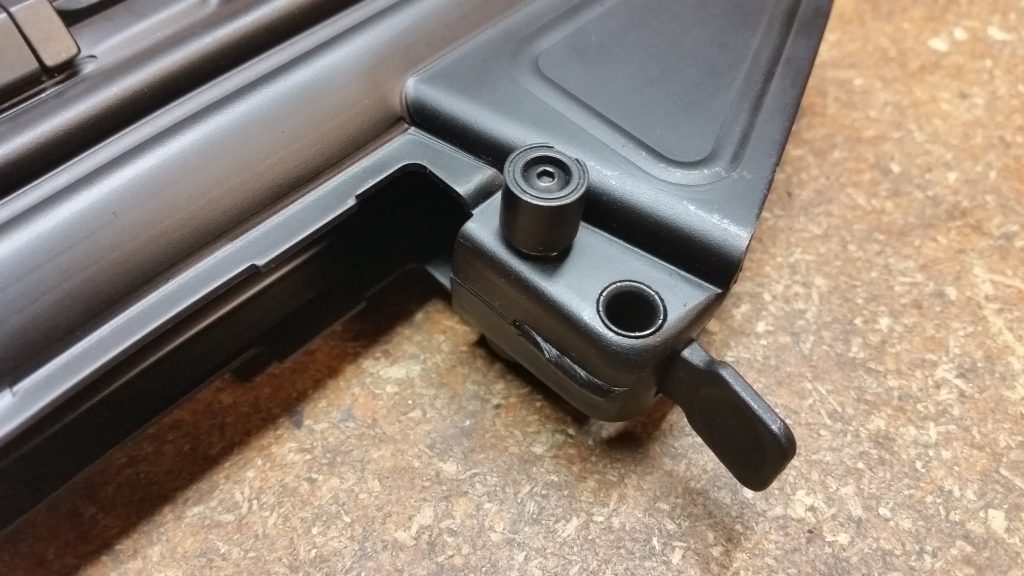
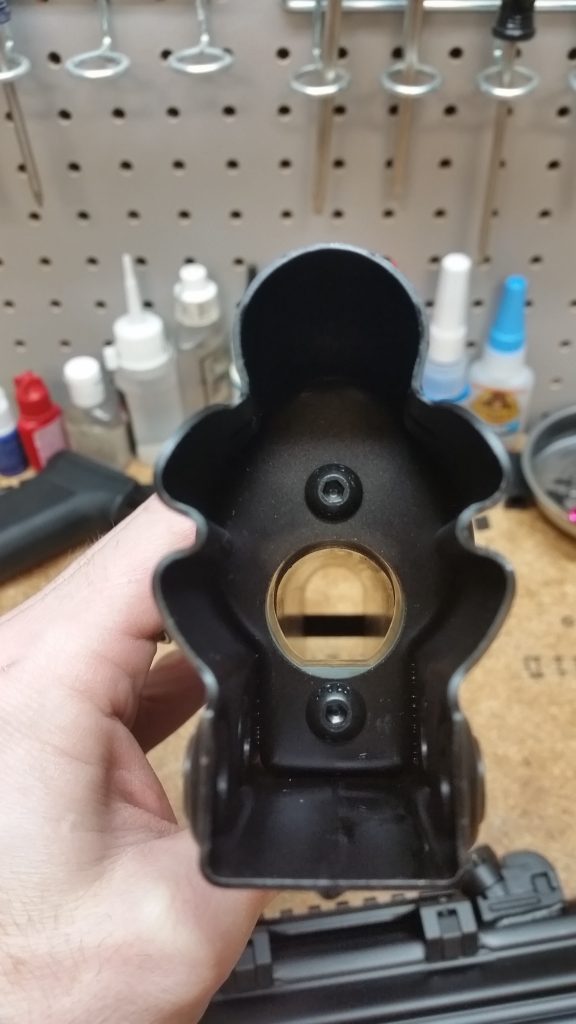
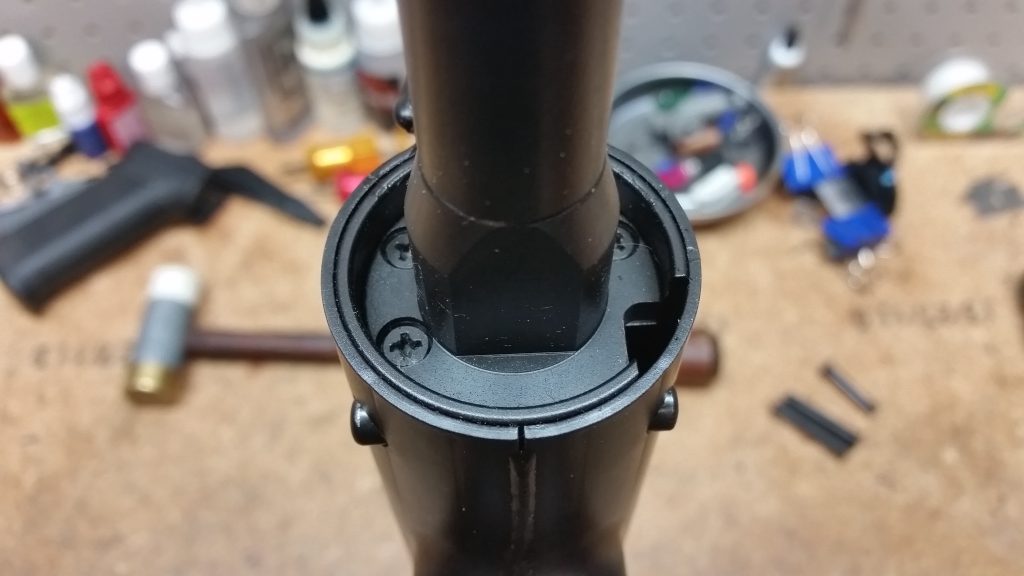
The outer barrel is easily removed by first popping out the handguard push-pin and removing the handguard.
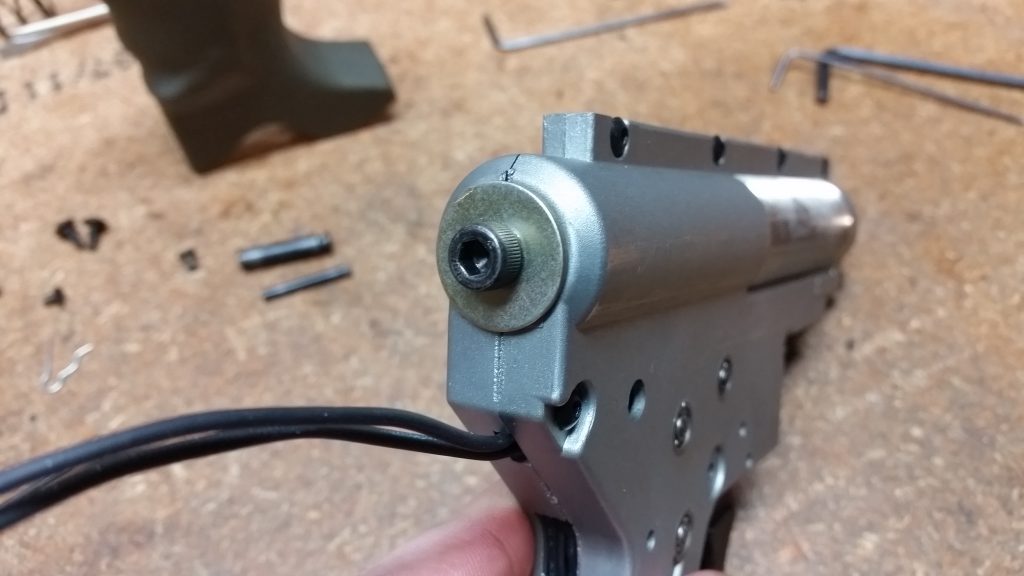
Near the front trunion of the rifle, there are three screws that will have to be removed. Here you can also see a small access hole that would allow for a front-wiring option to the handguard (the wide version or a railed system with a PEQ battery box). It’s not large enough to allow the passage of a plug, so one would need to install some quick-disconnects on their wiring harness to make it work, although a mini-Tamiya could be used if you use a pin-tool to remove the plug body.
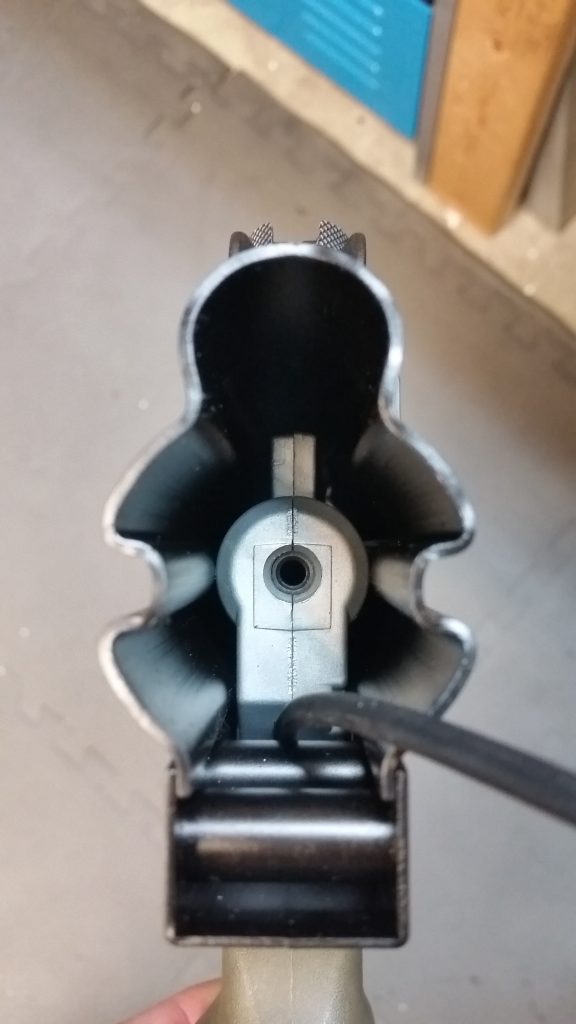
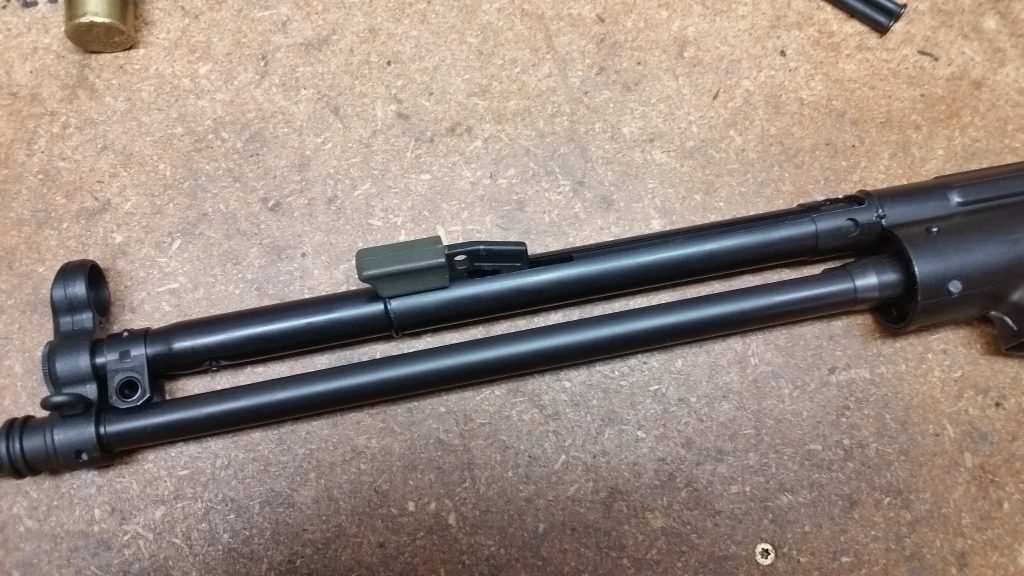
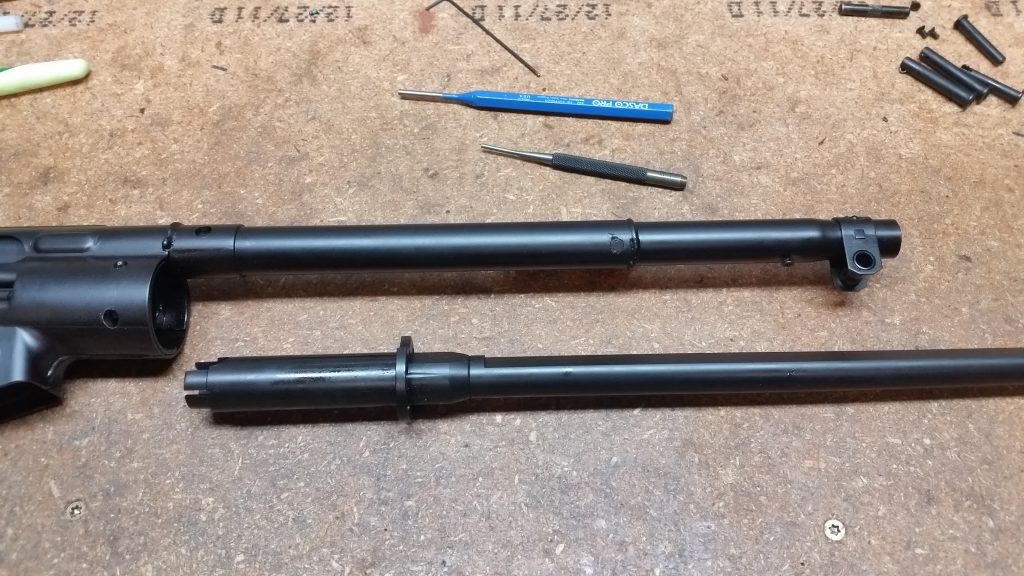
The next step is to punch out the large cross-pin that’s located in the receiver. The barrel assembly can now be removed by sliding it forward. I had to use a nylon hammer to tap it out as the fit is quite tight.
The outer barrel is likely a two-piece affair, with the thick ‘chamber’ section possibly screwed or pressed into the rest of the barrel assembly. It is very solid and has no wobble anywhere. The ease of which this can be removed opens up some interesting options for potentially different outer barrel lengths. I would like to see a G3K version or possibly a heavy contour PSG-1 style outer barrel offered by LCT as an example.
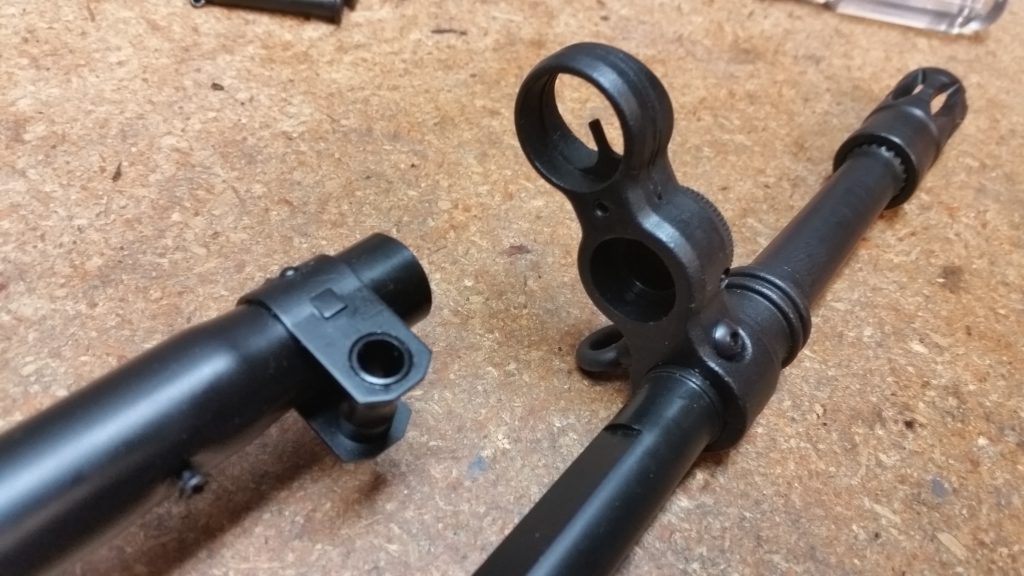
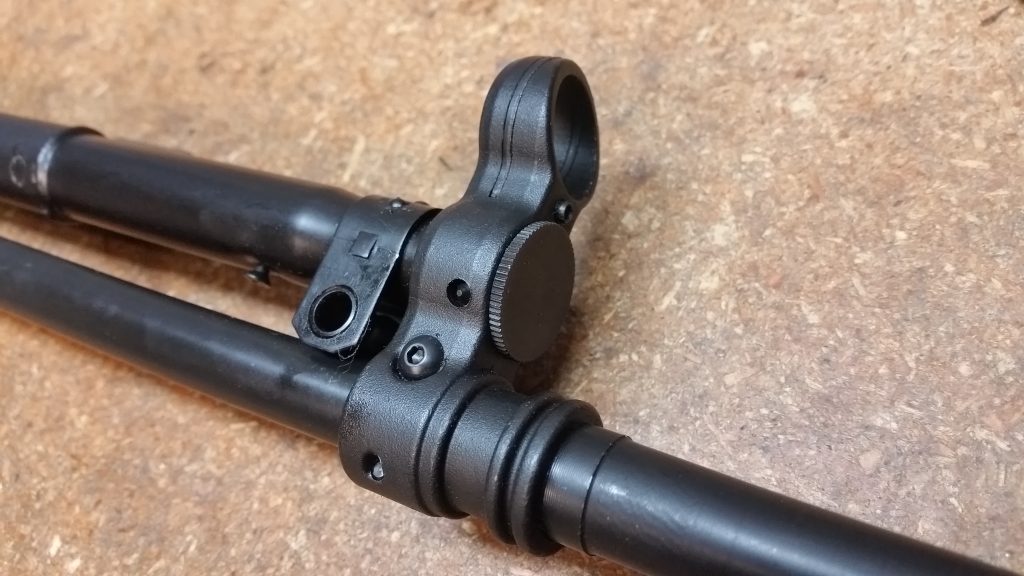
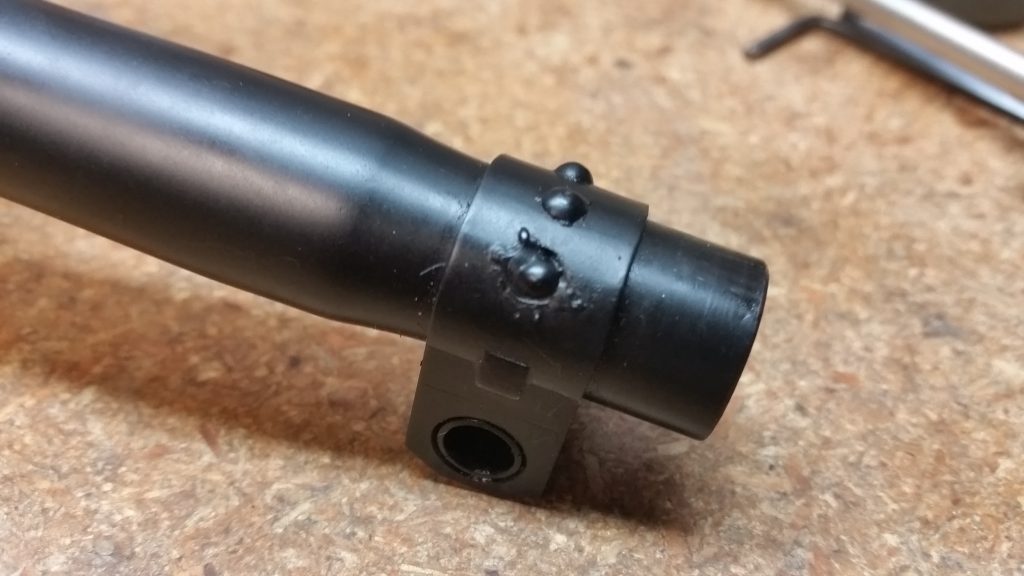
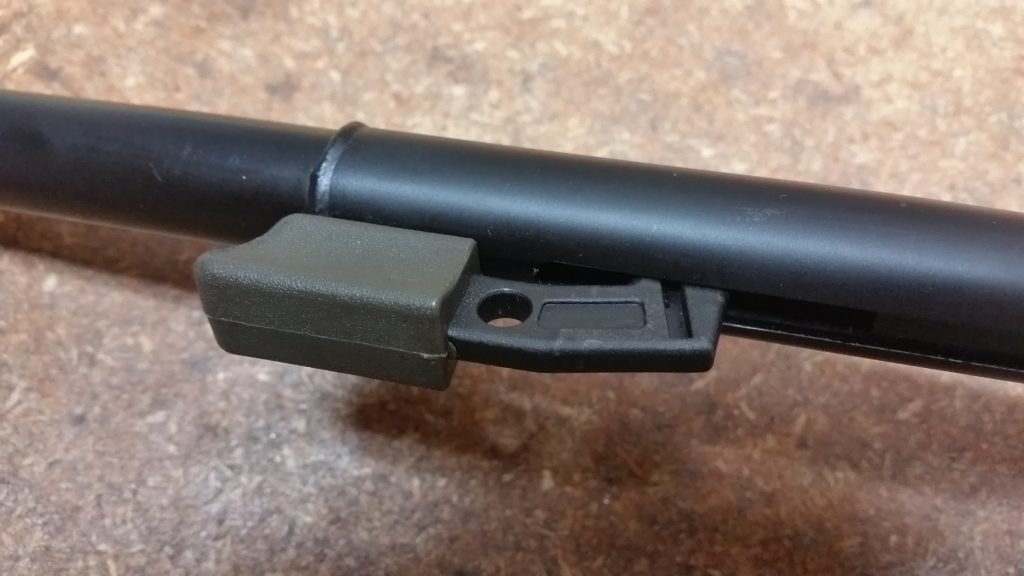
A somewhat curious design decision in light of this being based off a military G3 rifle, is to use a early version US made style cocking tube cap in lieu of the more correct bayonet mount version or current non-bayonet style cap. I suspect a real steel cap will easily fit, however.
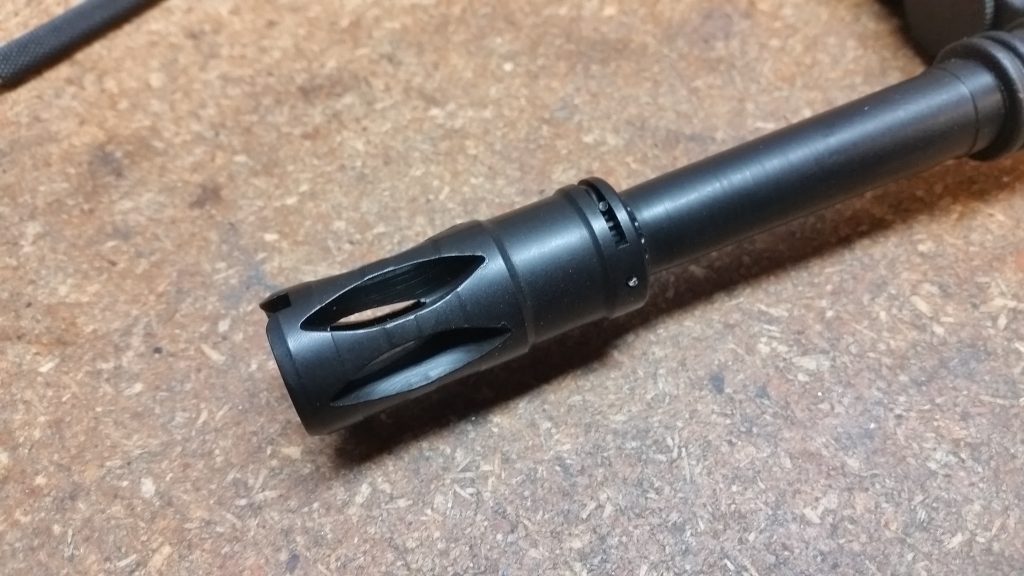
The LC-3 ships with a nicely made steel flash hider that’s fortunately not coated in orange paint. It features a small spring which effectively locks it in place on some splines on the outer barrel which has standard 14mm CCW threads.
Gearbox Disassembly
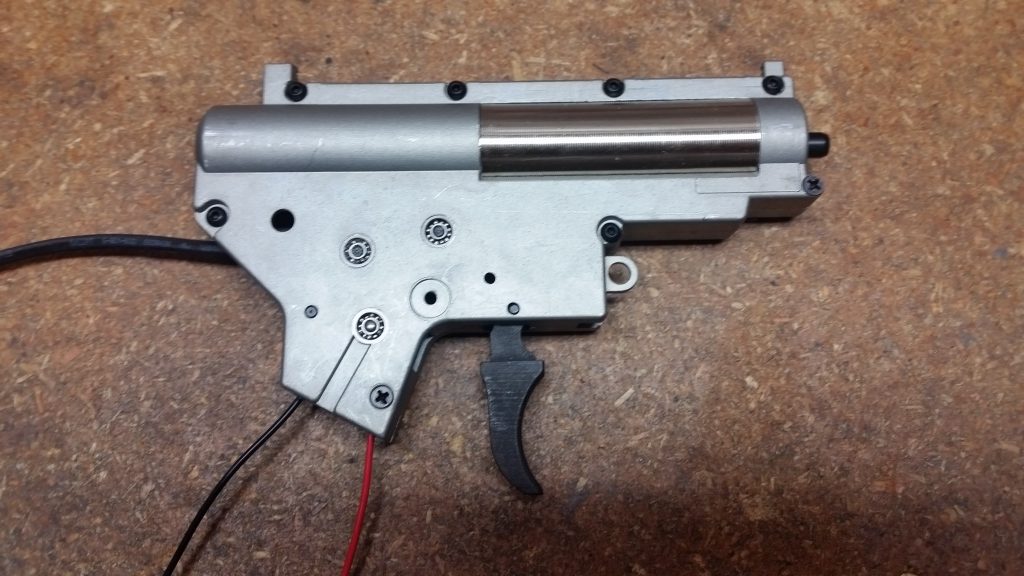
Removing the gearbox from the grip frame housing will be immediately familiar to anyone who’s worked on a Version 2 design, and that’s because LCT has chosen to use a standard Version 2 gearbox for this rifle.
To start, remove the motor grip housing first, then locate the two pins on the grip frame. The first is right next to the selector switch and the second is located near the rear. This latter one is retained by a small spring that will have to be removed first.
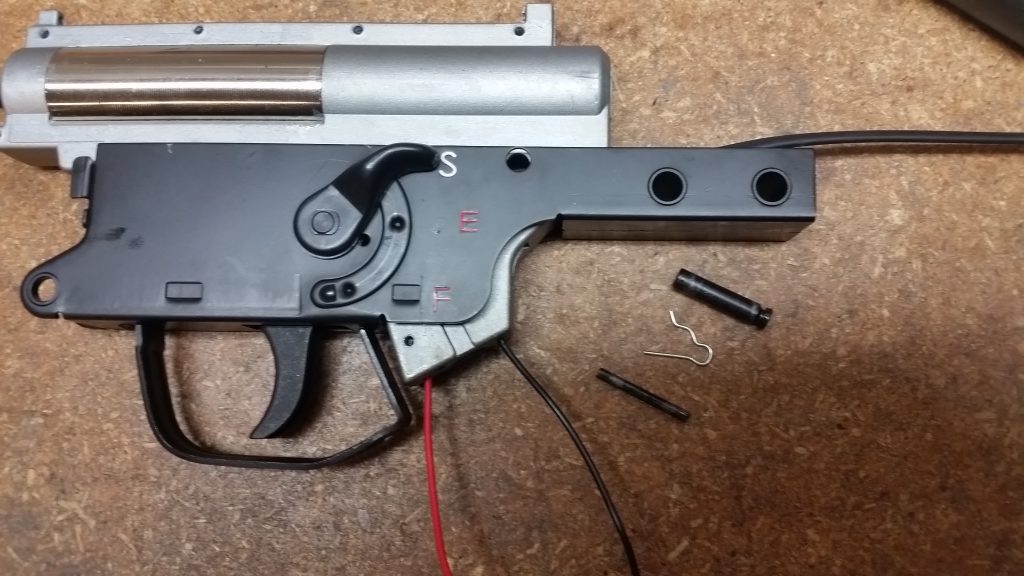
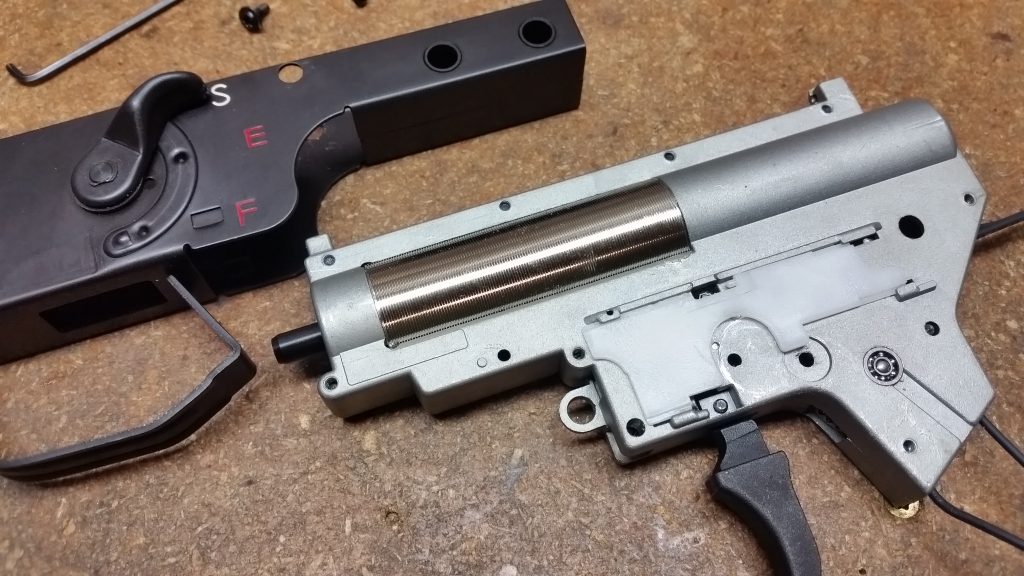
Once you have these out, the gearbox is free to be removed. Unlike the TM or CA design, the selector switch is retained by the grip frame housing and does not need to be removed for disassembly purposes. This particular design decision is in my opinion a superior choice. Say goodbye to those tiny selector switch screws that are always stripping!
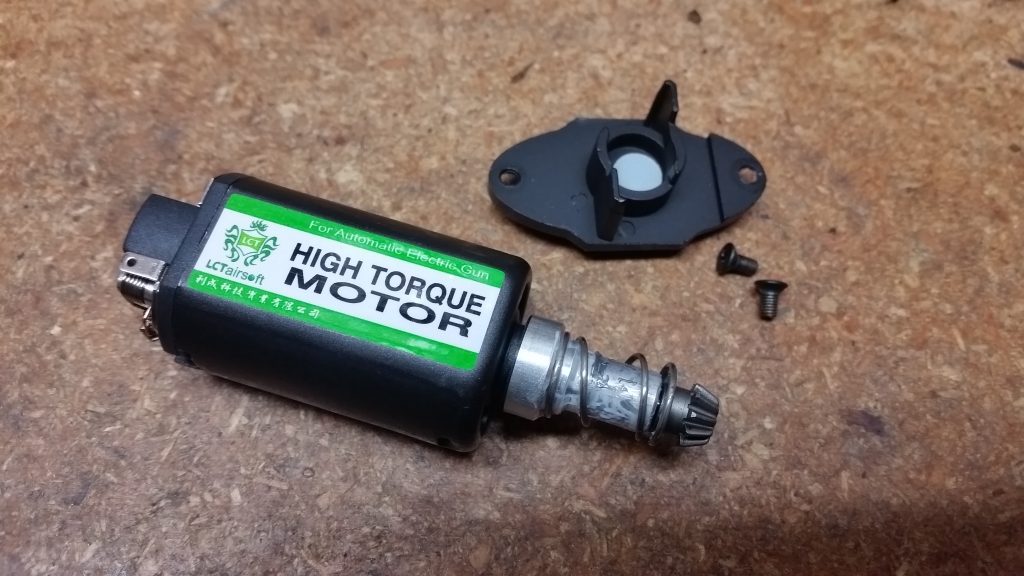
The motor is a standard long-type, and appears to be a new offering from LCT. It is definitely more ‘torquier’ feeling than their AK series motors. I suspect it uses ferrous magnets, however. I did not disassemble it for examination or to determine TPA.
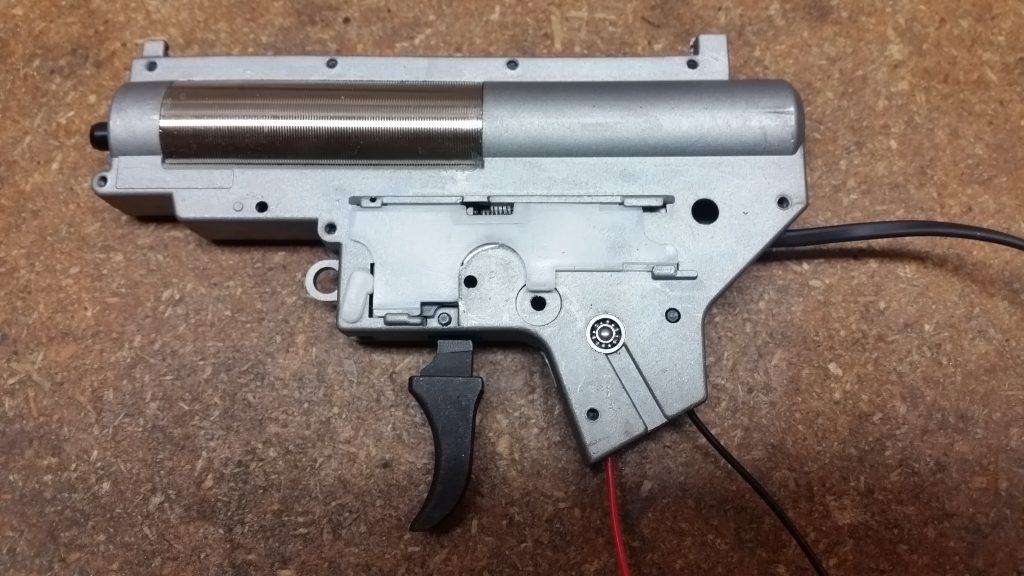
The gearbox shell is basically a standard Version 2 with 9mm bearings that appears to be taken from LCT’s M4 line that nobody has ever seen. It has two tabs peeking over the top that don’t serve a particular function in this rifle. These can actually be cut off, which will allow one to slide in a small stick battery over the top of the gearbox, such as a Firefox 11.1v 1200mah LiPO, which would be an effective option for retractable stock users.
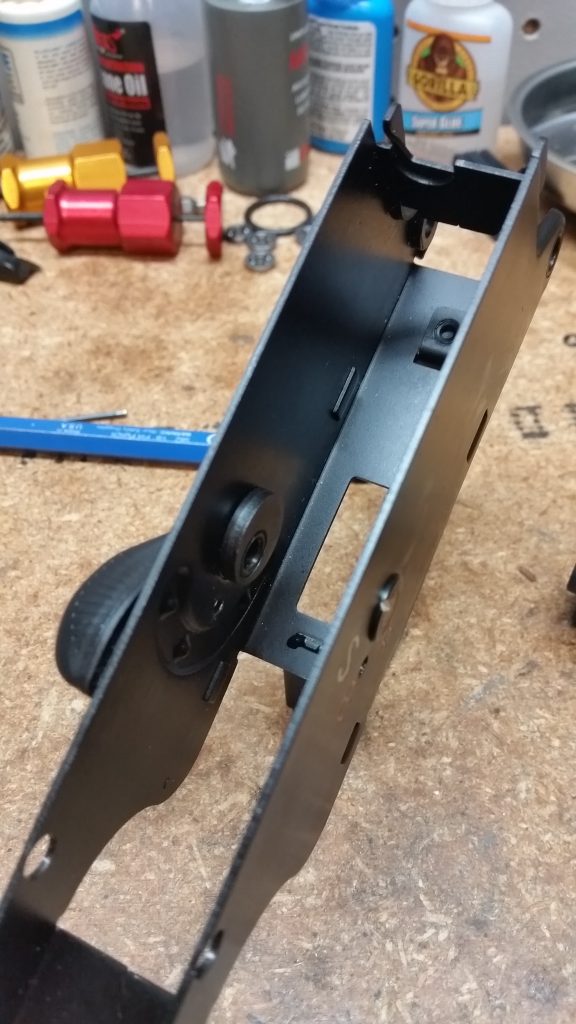
The left side of the box has a proprietary selector plate, which is made from the same material that LCT uses for their tappet plates. Alongside the trigger itself, these are the only proprietary parts to found inside the gearbox. I would have liked to have seen the trigger feature a more rounded front face like the real steel version. As it is, it’s a little squared off. But again, this is a minor quibble.
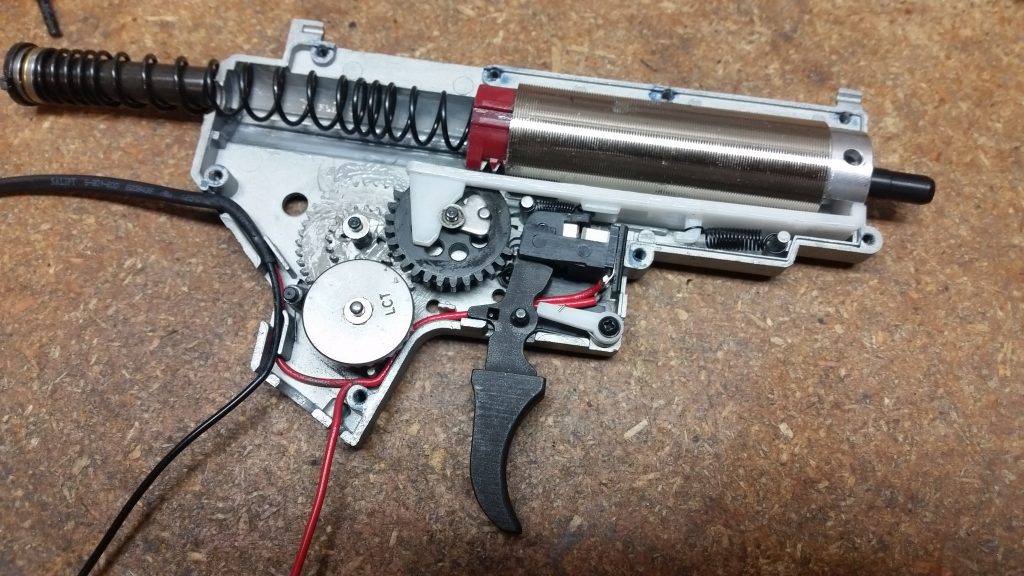
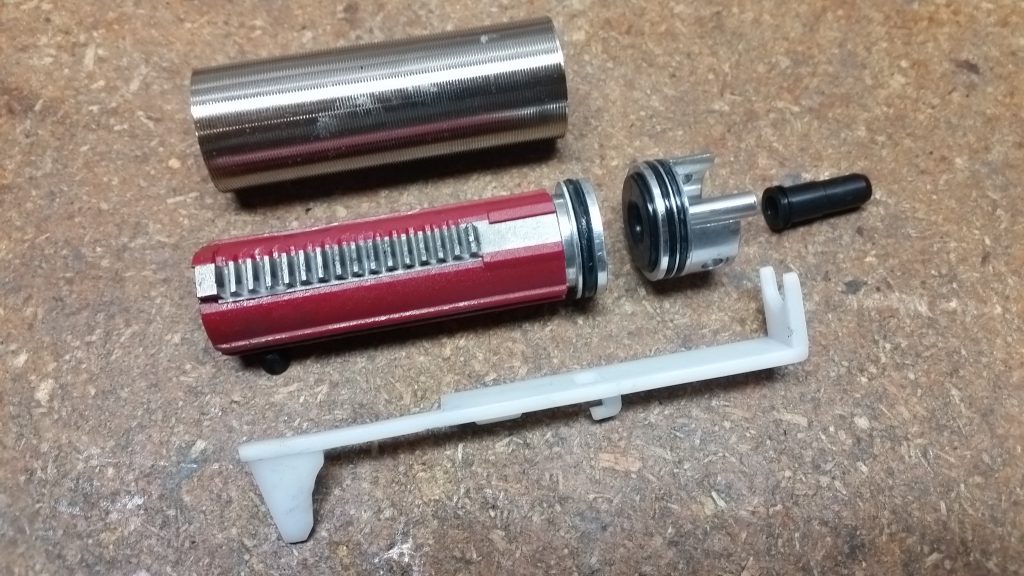
Internally, the gearbox features a nicely made gearset, full metal rack piston, unported cylinder, an aluminum ported piston head, aluminum double o-ring cylinder head and ball bearing spring guide. These components are largely the same as found in LCT’s AK series. The air nozzle is an M4 length nozzle with an o-ring. It leans towards the long side at 21.35mm. The tappet is a standard Version 2 type. With the exception of the trigger, essentially everything is Version 2 compatible inside this gearbox.
I did encounter a serious issue with the tappet plate on this particular rifle. No matter what bucking / hop up chamber / barrel combination I tried, it just would not shoot a good grouping. I eventually traced the issue back to the tappet plate having a poor rearward angle, which was causing the air nozzle to seat badly against the bucking. After replacing it with a Lonex Ultimate tappet plate, it went to shooting beautifully.

The gears in this particular example were shimmed too tight from the factory and did not spin freely upon testing. True to form, most manufacturers only seem to have one size of shim in their inventory. For some reason LCT’s current generation bevel gears have somewhat thick shafts and tend to get stuck in the bearings, which makes reshimming a bit difficult. I usually have to take a bit of sandpaper to the shafts and clean them up so they slide in and out freely.
I would suggest radiusing the gearbox shell and AOE correcting the piston as well for preventative maintenance and longevity.
The spring in this particular rifle was delivering 426 FPS out of the box, which will be considered too hot for most fields unless the rifle is locked to semi-auto only.
Lastly, I would highly recommend installing a washer and screw on the back of the gearbox into the spring guide to prevent it from cocking out at an angle. After installing this, I found it helped decrease the gearbox noise a lot as previously the spring guide was cocking downward and the spring was rubbing against the sector gear.
Since this rifle was going to be setup as a DMR platform, I would be installing a Gate TITAN MOSFET into it. This was a pretty easy install for the most part. Like most Version 2 gearboxes, you will have to file down the small tabs that run inside the wiring channel.
I did run into an issue with the selector plate being too reflective for the optical sensors on the TITAN. Hat tip goes to Bob Kay on the TITAN Build Group for informing me of thus. To solve this, one can either RIT dye the plate or paint it black. Then affix the small white sticker that you need and calibrate the selector switch with the Gate Control Station program.
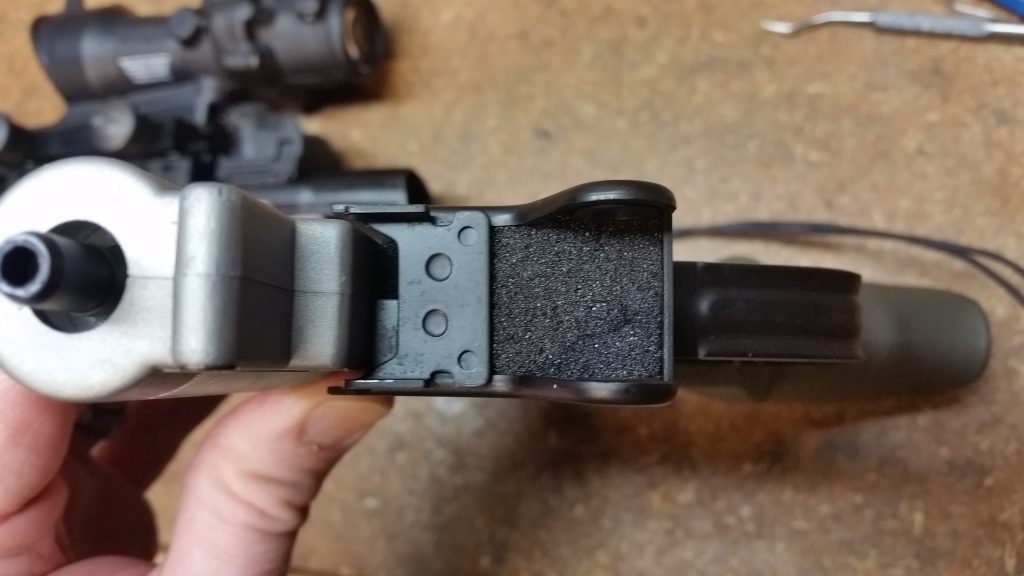
There is also the issue that the grip frame housing has some large holes in it, which allow too much external light to shine through and confuse the optical sensors. This can be fixed by installing some foam around these gaps to prevent light transmission.
Conclusions
On the whole, this is a very nice rifle. There are some minor quibbles to be had with certain aesthetics, but these are things that only someone who might be intimately familiar with the real version might notice. Your average layman-Airsofter most likely won’t.
I do believe some of the design choices to be much superior to the older CA / TM style – especially with regard to the selector switch mechanism. The overall construction of the body is vastly more solid compared to the CA / TM rifles. The takedown pins are also nicely made from steel, and are a big step up from the old TM style screw-in pins, and definitely feel better made than the CA pins.
If a gen. 2 is ever released, I would like to see a short list of improvements made, such as the motor grip, cleaner welds, reduced magazine release button height, and a flusher fitting outer barrel takedown pin.
That being said, I would not let these quibbles distract you from getting this rifle if you’ve ever desired a quality G3. I honestly believe this rifle slays the current Classic Army reprisal in many facets, and the JG has never really been a serious contender in my book. I have my fingers crossed in the hopes that LCT will turn their attention to the HK33, 53 and MP5 series next. And in a market absolutely saturated in an endless parade of M4/AR-15 variants, this is a refreshing reminder that there are a handful of companies doing something different out there.