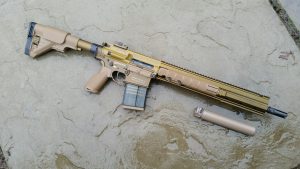
 This was one of the more interesting projects to cross my bench this year. This is a limited edition VFC HK G28 that I modified a Wolverine Airsoft Wraith CO2 stock to fit in conjunction with a Gen. 2 Inferno.
Converting this gun over to a Wolverine Airsoft Wraith system presented a few technical challenges. The main one being that the buffer tube on the G28 is substantially larger than the diameter of the Wraith tube, which is designed for a standard M4 profile. So much so that even the one-off built adapter that was purchased as a work-around also proved to be too small. That being said, the downfall of even using a correctly threaded adapter would mean that you could no longer use the G28 stock which was designed explicitly to use the larger diameter buffer tube. And part of what makes the G28 the G28 is the adjustable stock it ships with, so that wouldn’t do.
The G28 also requires a bit of a creative solution for its trigger mechanism, which is housed in a separate unit outside of the main gearbox body. Wolverine Airsoft offers a ‘universal wire adapter’ kit that will work, but I wasn’t too keen on using this off the bat for a couple of reasons. Some searching on Google turned up Black Site Customs who offer a nifty trigger unit for the 417/G28 series rifles.
Installation is a fairly simple affair: de-solder the stock wiring harness from the existing trigger contacts and solder on the two leads from the BSC trigger to your contacts. The body of the BSC trigger appears to be attached to a 3D printed circular plate that nestles perfect inside the space for the spur gear, preventing the micro-switch from rotating out of position. The micro-switch is actuated by the cutoff lever which is itself actuated by the trigger trolley. All in all, a pretty slick setup that also takes care of the common wear points in a normal AEG.
And speaking of slick, BSC offers an excellent color photo series of instructions that’s so concise that even a drunken monkey could follow it. I wish more Airsoft outfits gave out quality instructions in this fashion.

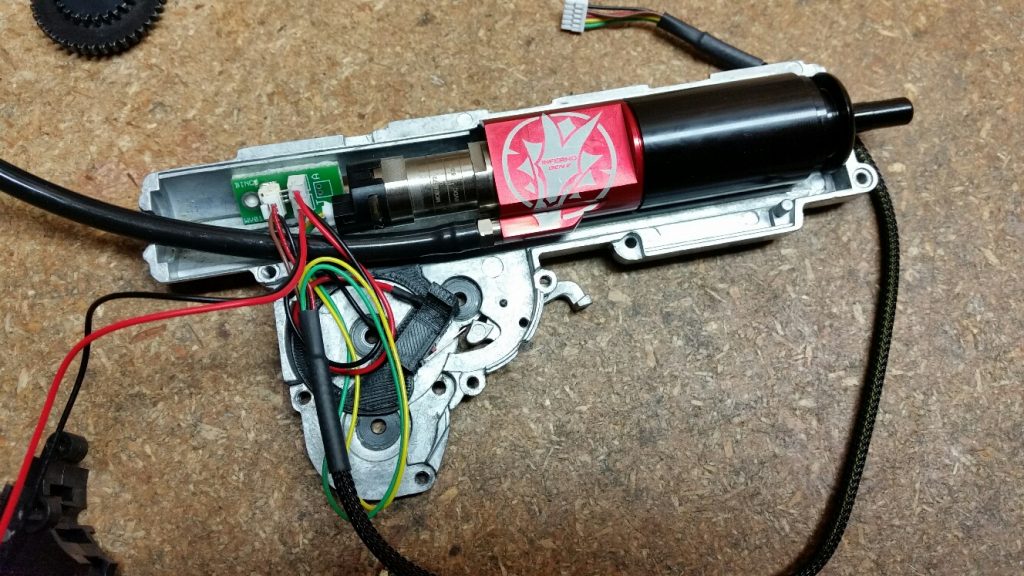 The trigger contact leads plug into the green header board which also accepts the control lead from the Inferno unit. My original plan was to place the header board in the area where the spur gear would normally sit. Upon closing the gearbox halves together, I determined that this wouldn’t allow enough room for the wiring to lay comfortably, so I wound up moving it behind the Inferno in the spring guide area.
In this installation, I drilled a larger hole for the air line out the back of the gearbox. Fortunately this was the only modification to the gearbox that was really necessary to make the Wraith stock work. For most typical M4 installations you have to cut off a sizeable chunk from the back of the gearbox, which is a fairly extreme mod, and also a one-way street to boot.
The FCU board and 7.4v battery are housed inside the motor grip. I could technically get away with a shorter wiring lead, but coiling it up carefully still allows all items to fit.
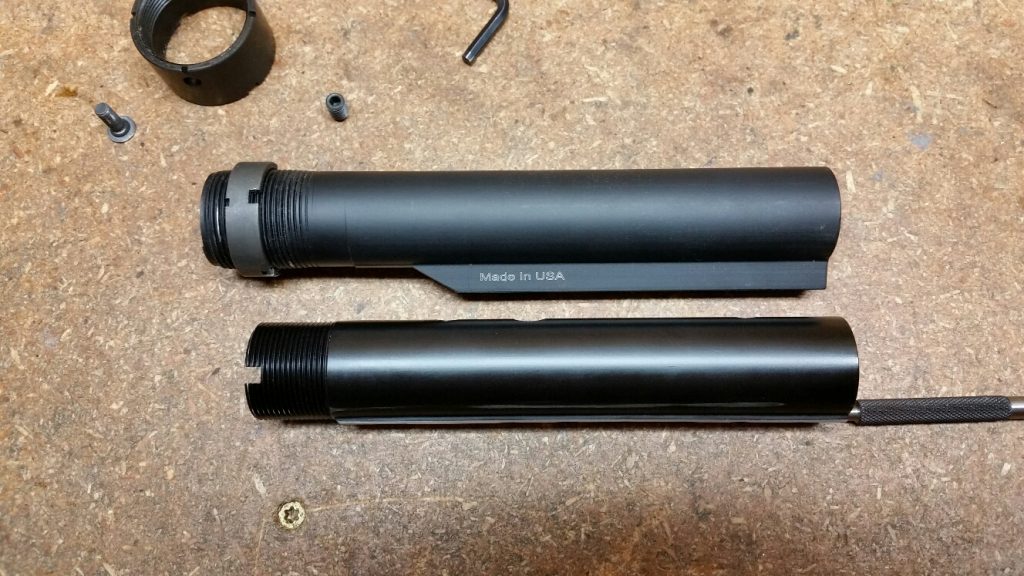
The next step (and the harder one) was to modify the Wraith tube to work. After giving up on the adapter piece, the idea here had eventually evolved into “what if we could slide the Wraith into the G28 buffer….”
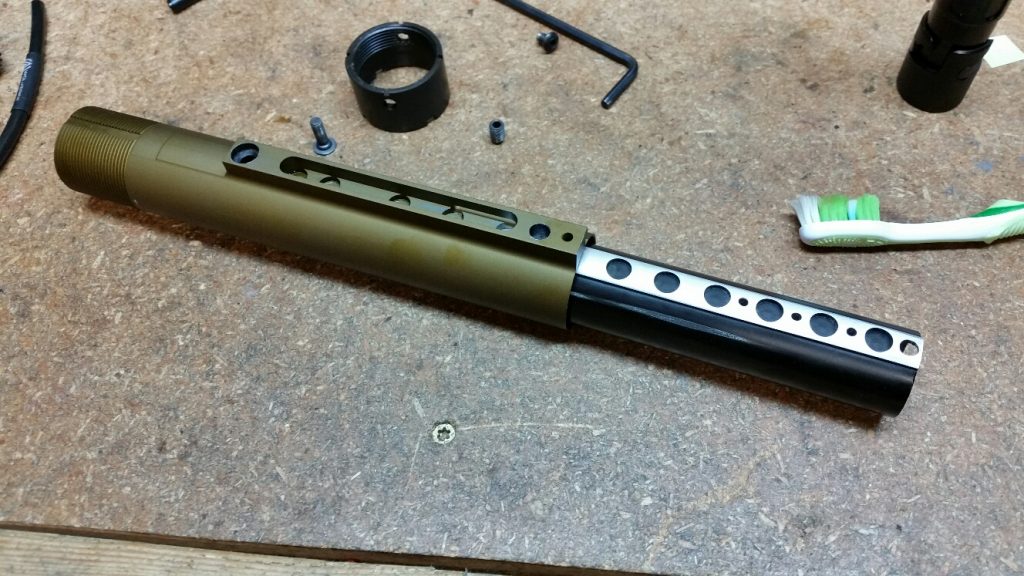
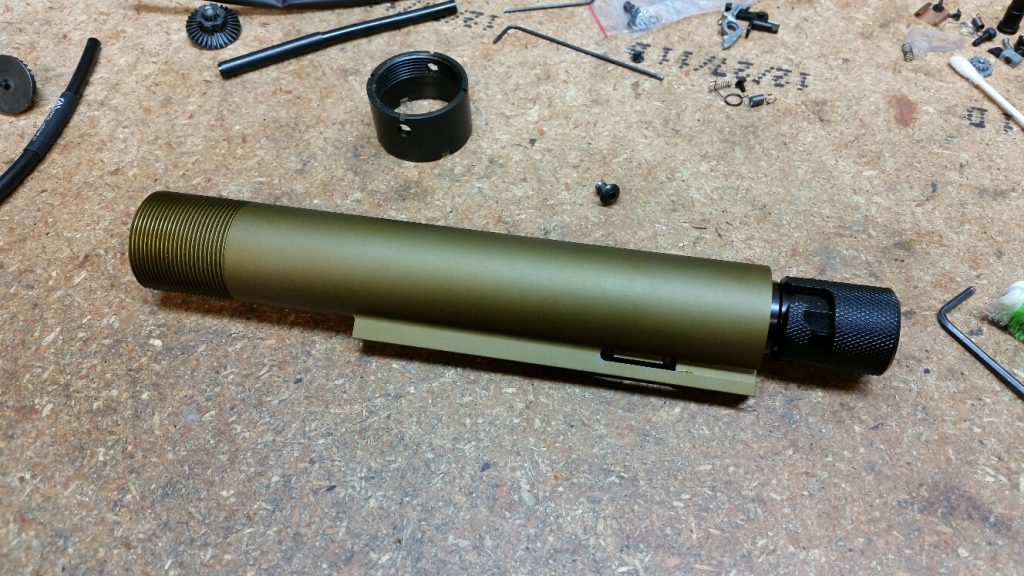
To make that happen, I had to basically remove the bottom fin entirely from the buffer tube. You can see a comparison between a real steel M4 buffer tube and the modified Wraith tube below to get an idea of how much material needed to be removed.
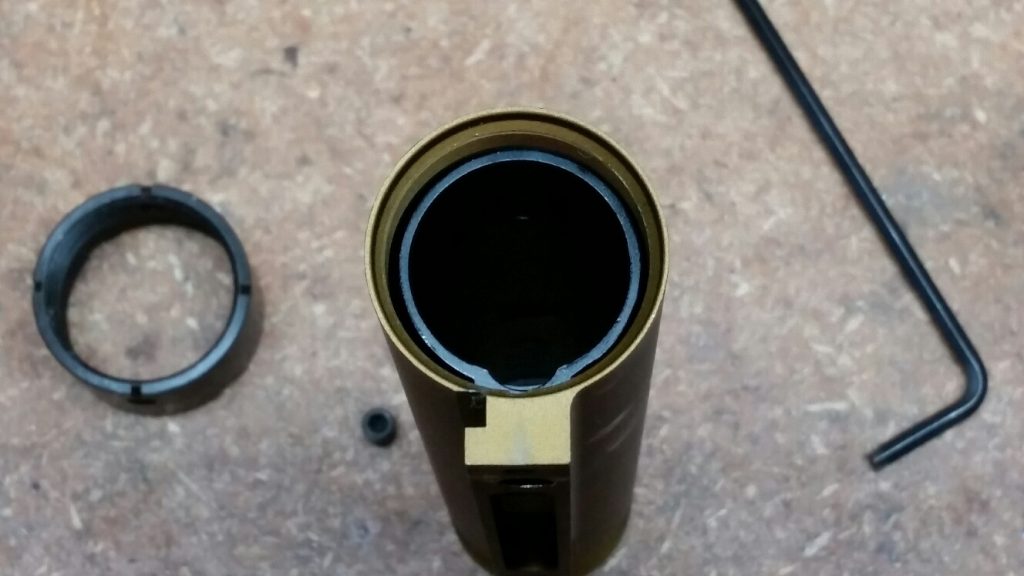
 The next step was checking for fit. I wanted the unit to be somewhat snug, not too loose, not too tight, and also be removable for servicing.
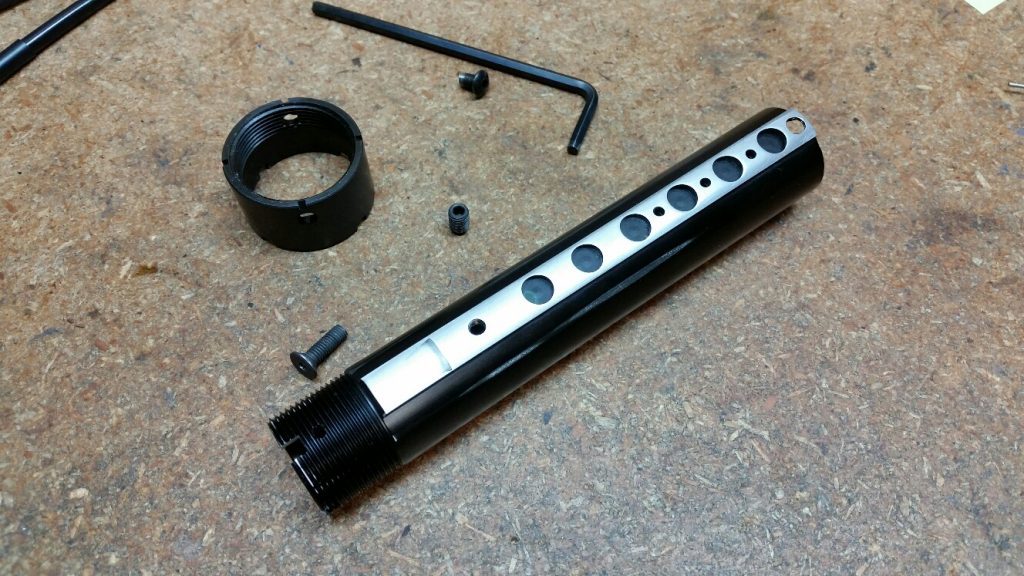
 Due to the design of the Wraith, this also necessitated drilling a few holes into the G28 buffer tube. One of which was the set screw for the CO2 cartridge adjustment, the other for the screw that retains the internal guts of the Wraith inside the buffer tube, and the last one being the access hole for the FPS adjustment on top of the tube.
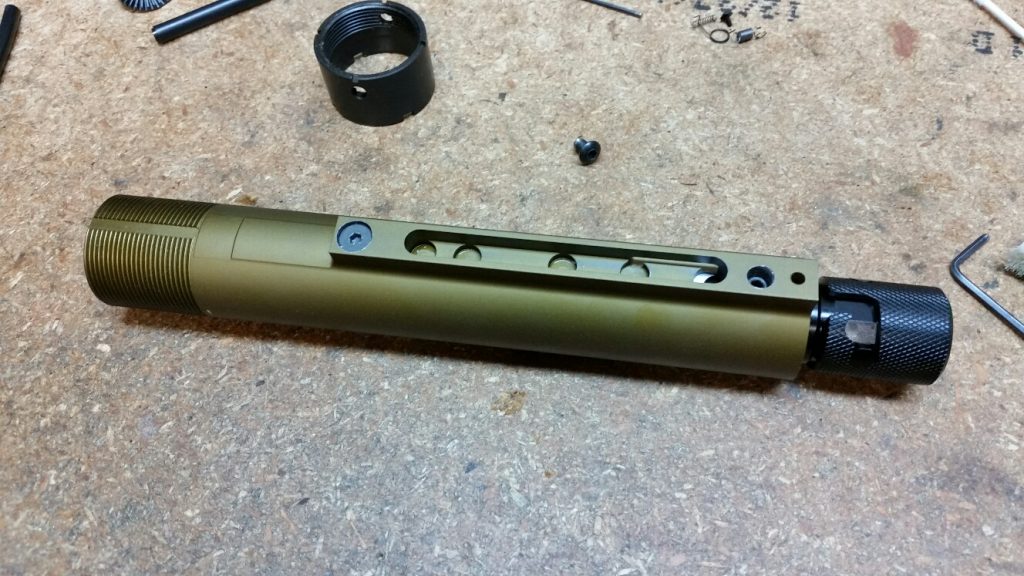 I wound up having to use a longer machine screw for retaining the guts of the Wraith. The CO2 length adjustment screw was kept.
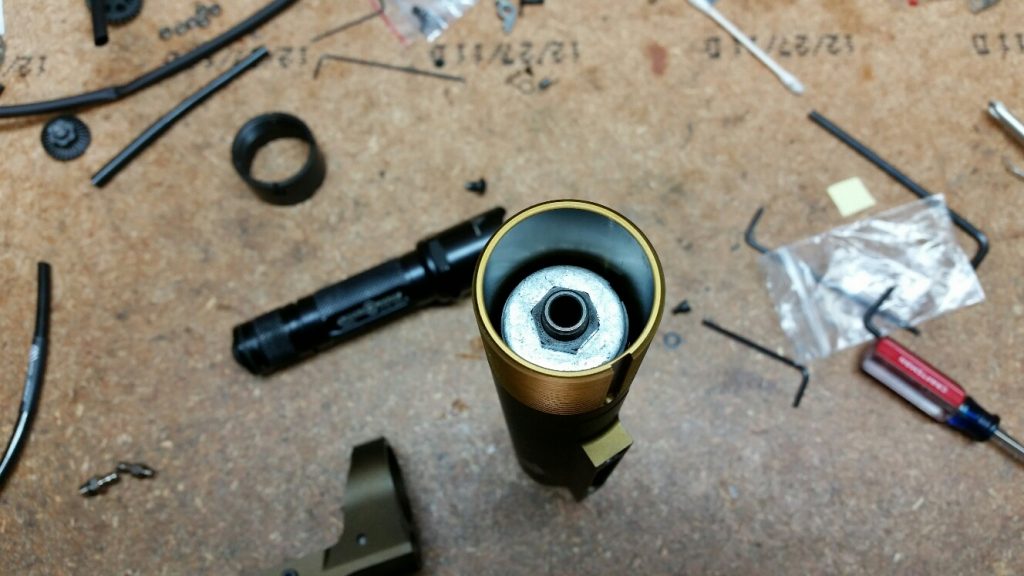
Another small technicality I ran into was that the air inlet for the Wraith wasn’t remotely close to being able to be attached to the inside of the lower receiver. This was simply due to where the unit was positioned inside the G28 buffer tube, of which I had little choice based on the available real estate to work with. I used a large washer that rests on top of the threaded portion of the Wraith buffer tube and is clamped in place with the provided nut that comes with the Wraith kit to solve this.
At this point, I still had a fairly long air line leading off from the Inferno unit, which I now cut to proper length and plugged into the inlet on the Wraith.
 The completed installation:
 One of my few criticisms of the Wraith system that I would like to see rectified in the future is there isn’t quite enough milled flats for the CO2 cartridge length adjustment screw. With certain brand cartridges (Crossman in particular), you sometimes have too much or too little (making it excessively hard to twist the cap on, or it doesn’t puncture properly and vents out – however, these cartridges have huge length tolerances), and it seems the ‘sweet spot’ rests in the unmilled area with these. Granted, you could simply crank down the set screw on the unmilled spots and it would probably still work…
Adjusting the FPS is very easy, and involves simply moving a set screw set in the 12 o’clock position up (increase FPS) or down (decrease FPS). I took it out to 500 FPS w/.20g BB’s and suspect I could increase this a bit further, but I was a little worried about backing out the adjustment screw too far. Consistency was on par with other HPA based (and well tuned AEG) systems I’ve used, with a minor 1 – 2 FPS variance, but often shooting strings of shots that had zero change in FPS.
The final steps were to install an EdGI 6.03 inner barrel in conjunction with an R-Hopped Prometheus purple bucking. I do have to say that this gun is sublimely quiet while shooting. I would even say it’s slightly quieter than the older SMP kits I have installed. Overall, this is a very cool package that is perfectly suited for DMR or sniping use.
