The small fleet of Airsoft replica M240B GPMG’s represents a fairly robust internal and external design, but it is plagued by a major weakness: the box magazine.
This is a large and cumbersome protrusion erupting from the left side of the weapon that nearly precludes the possibility of adequately muscling the front end around from anywhere but the prone. Funnily enough, it is built of flimsy cardboard (yes, you read that right) and then wrapped in Cordura. The two small mounting screws that attach the feed adapter to the box support often shear off, which means you need to get an easy-out – or failing that – trash the whole assembly and start over. The feed tube and electrical wiring for the servo come out the side and are exposed to the elements, which often means one gets contaminated with dirt, whereas the other gets snagged and short circuits.
Considering the cost of some of these guns can exceed upwards of $1200 (in the case of the Trigger Happy M240), dropping a piece of crappy cardboard off the side of the weapon seems like an insult.
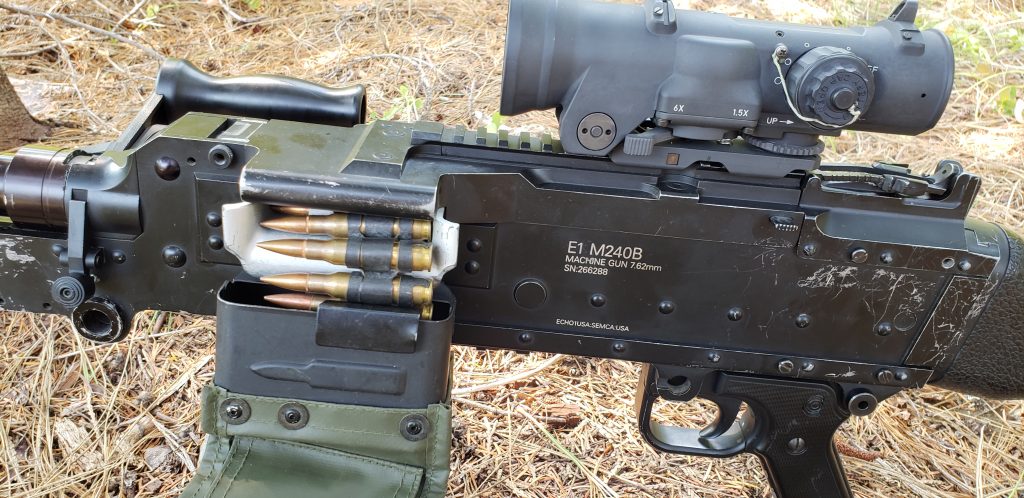
One musn’t despair too much, as fortunately the 240 will allow for real steel magazine pouches to clip on to the side of the receiver. On this Echo1 M240B, I will be modifying a real steel 100 round “nutsuck” magazine using components harvested from the old cardboard box mag. This particular ammunition carrier is made from a heavy duty steel mounting bracket and some sort of waterproof rubbery material with large grommets for drainage purposes in the bottom. Due the large amount of contact the mounting bracket has with the receiver of the weapon, it is significantly more stable off the side of the weapon than the old box magazine is.
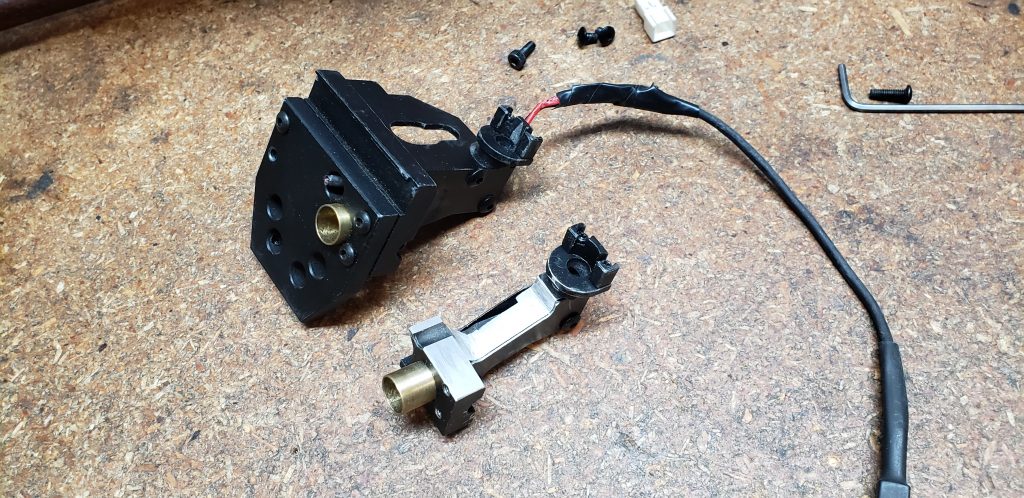
The first steps to getting started with modifying the new magazine carrier is to completely gut your cardboard box mag down to the feed hopper, servo and mounting tray. You will also need to retain the feed tube and the bit that attaches to the top and clips into the side of the weapon.
I initially made the mistake of starting modification of the nutsack first, whereas I should have attempted modification of the feeding assembly first. This meant that I actually made the cut on the right side of the nutsuck a little wider than necessary. In retrospect, however, there does seem to be the need for a little wiggle room to remove the feed tube assembly, so it actually worked out alright in the end.
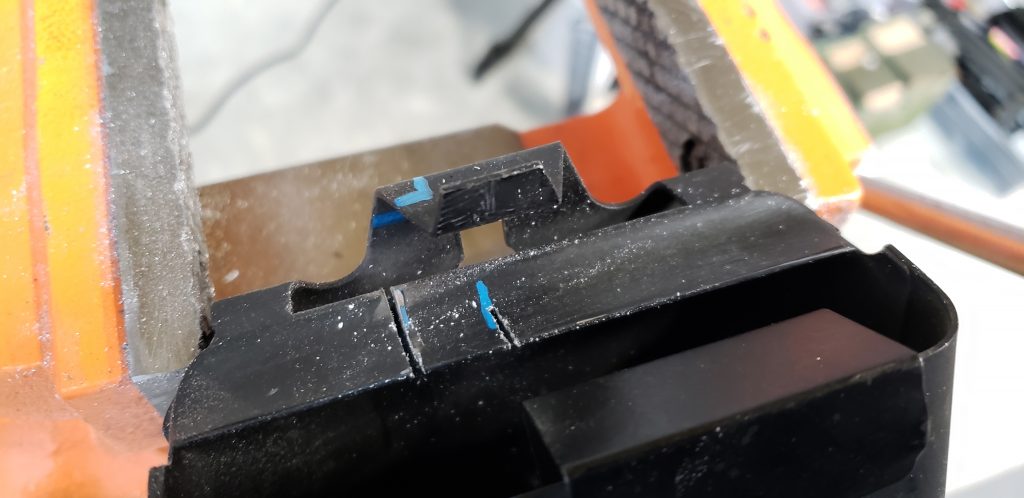
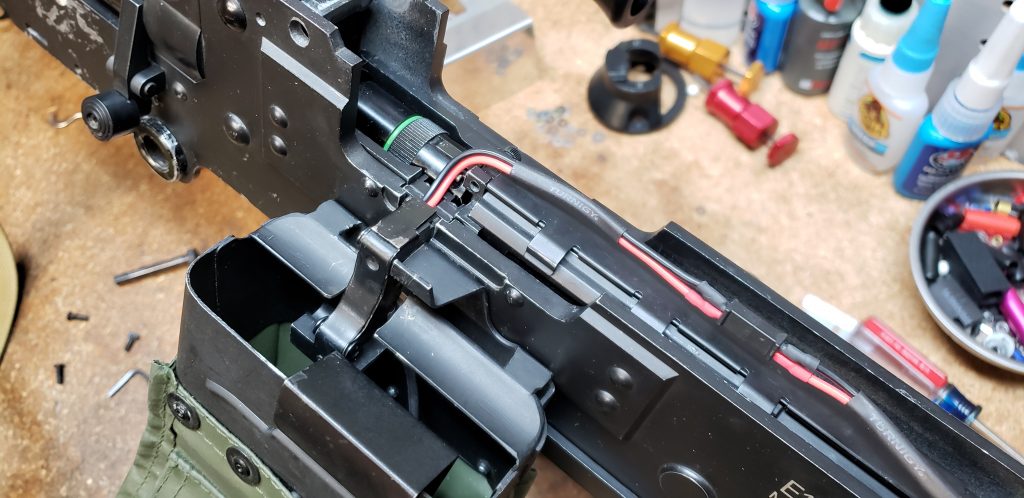
Essentially, you need to cut away some material to allow the passage of the feed tube assembly and to let it clip into the U-Shaped notch on the side of the receiver. I fiddled around for quite a bit to see if I could come up with an alternative method of mounting, including spacing out the hanger screw and sandwiching the original feed assembly and the nutsack together… this would have ended in a far more complicated series of cuts, some of which had me perplexed as to how to pull off. In the end I opted for the simplest solution as being the best solution.
The feed tube assembly requires a fair bit of modification. There are some major clearance issues to contend with, and I realized pretty quickly that cutting the steel on the nutsack (which has some folded areas to contend with too) was a lot harder than cutting the soft aluminum on the feed assembly.
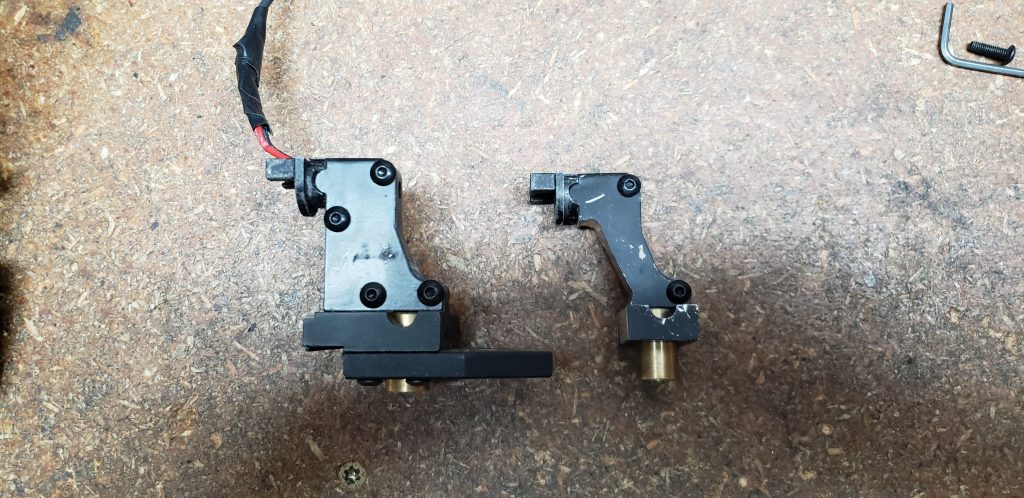
Here you can see a side by side comparison of an original feed assembly next to the fully modified unit:
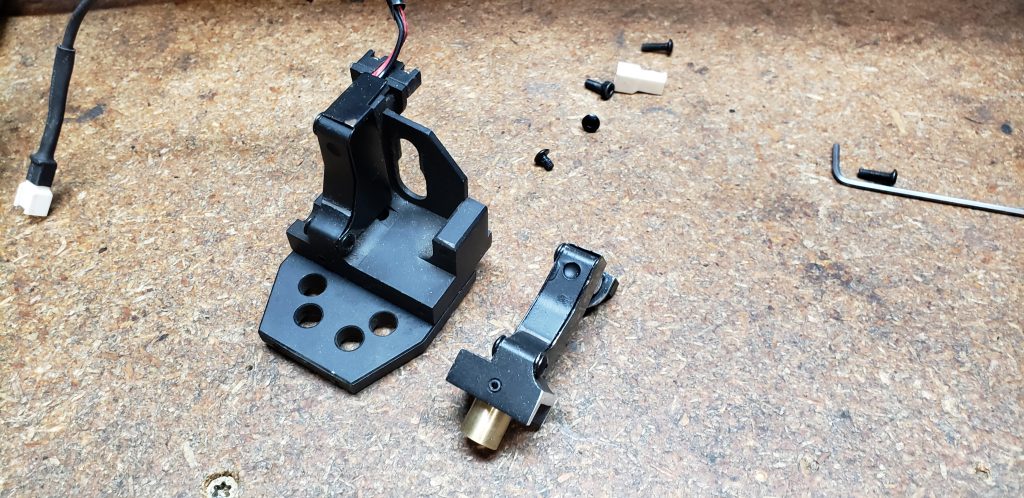
As previously stated, the material is quite mild and a Dremel cutoff wheel and file go through it like a hot knife through butter. Cut off pretty much everything to the right of the feed tube passage. You will also need to discard the thick mounting plate that affixes to the bottom.
The more critical component is profiling the backside. This is to allow it to clear the steel mounting bracket on the nutsack.
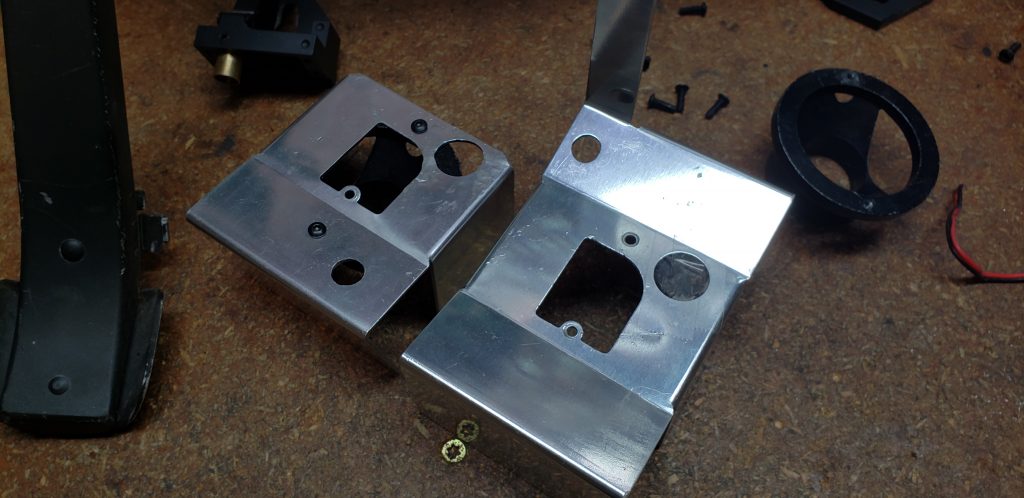
Once you have this finished out, you can turn your attention to the feed hopper and mounting plate. The mounting plate is that large folded silver tray that keeps the BB’s funneled into the hopper. This is pretty easy to modify and you can actually just bend the extra flange up and down on the fold a few times and it will snap off. Clean it up with a file afterwards though.
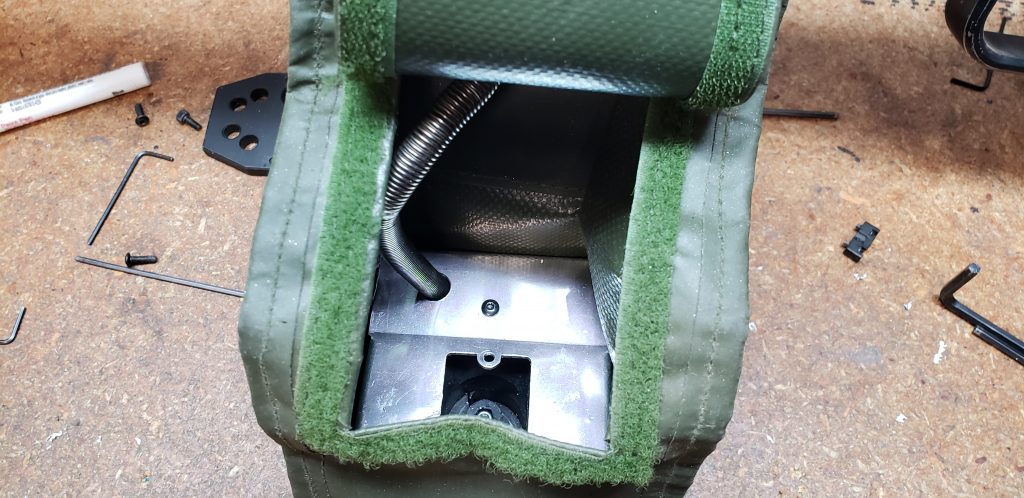
I drilled a hole for the passage of the feed tube through the flat plate on the bottom right of the modified tray. I ended up adding in a small notch to this so the servo wires could route through alongside the feed tube. The other thing I did was drill a small hole so the feed hopper had a second screw to keep it mounted to the tray. This is something that’s always bothered me with the standard box mags. The large hole on the upper right will still need to be taped over just as it is normally. Or you can take some of the leftover metal from the tray and make a cover for it.
I took the large square chunk from the disused portion of the tray and made it into a protective plate for the bottom of the hopper. This is to keep the otherwise exposed hopper and servo wheels and o-ring protected from dings and drops, or even when you set the gun on the ground.
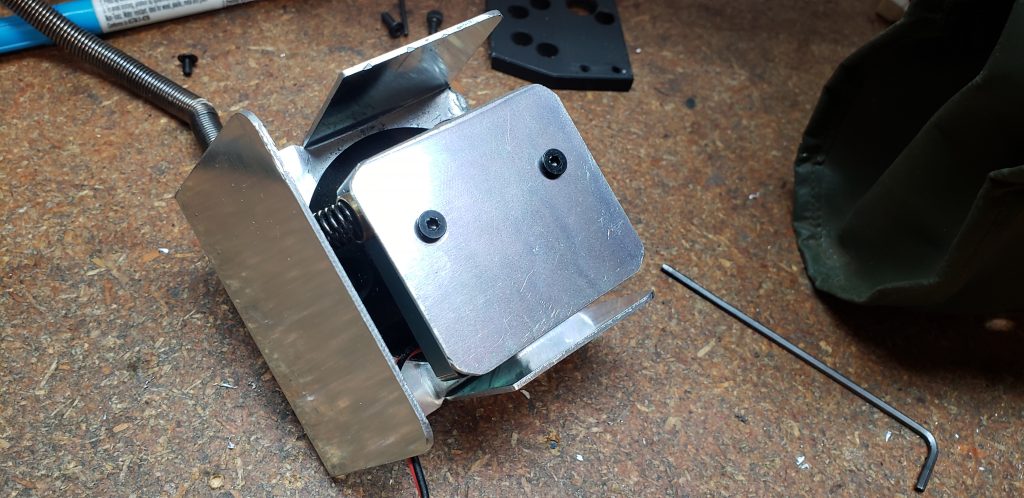
The other thing I did was round off all the square corners to reduce the chance of the tray rubbing through the material on the nutsack. I affixed some industrial grade adhesive velcro to the side plates of the tray to keep it situated in place on the bottom of the nutsuck. Technically speaking, it would be possible to drill and rivet it in place, similar to how the the rubbery material is attached to the mounting bracket. But this would greatly hamper the possibility of easily servicing the components in the future.
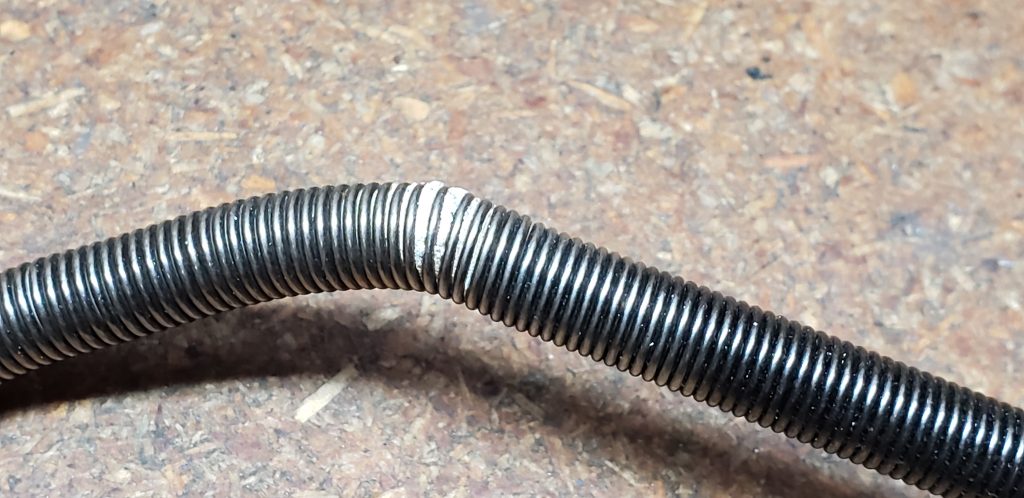
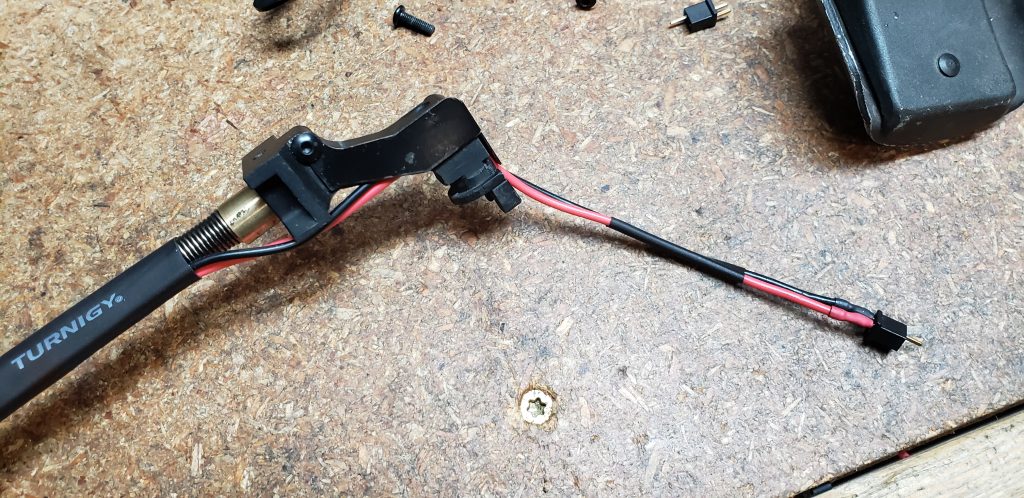
The next step was to replace the feed tube that had melted BB’s in it with one that did not. I also replaced all of the ruined wiring from the servo with brand new wires and installed a micro-Deans plug.
Originally I had the wires and the feed tube wrapped in heat shrink together to make a cleaner setup. But this proved to make the whole assembly too stiff to manipulate and I ended up removing it and heat shrinking just the wires separately. At any rate, as the feed tube is housed inside the nutsuck, it’ll stay a lot cleaner than it would exposed to the elements.
Total capacity is somewhere north of 5,000 rounds. The best way to fill it is from the very top, while mounted in place. All-in-all, the whole assembly is vastly more stable than the old cardboard box mag and makes managing the front end from the standing position a lot easier too. The inert rounds really complete the look in my opinion. While it is a fair amount of work to pull off, it’s definitely a worthwhile upgrade to the M240B platform.