The Tokyo Marui AK-47 is an age-old workhouse among AK AEG’s. While it has perhaps been superseded by more advanced designs, it continues to be found in many an airsofter’s arsenal for a very good reason. Tokyo Marui has built a reputation on creating airsoft guns that give the Energizer Bunny hives; they simply keep going and going and going….
Recently Rob of Pegasus MilSim fame handed me a newly acquired TM AK-47 to work on. This gun was a Timmy Chang special with upgraded internals and a G&P metal body kit on it with a broken buttstock that sported a large 6″ crack running down the length and a missing buttplate. The goal was to see if I could install some real steel furniture on her and revitalize the beast.
Initially I approached the project with the idea that I would be strictly modifying the real steel furniture to fit the TM. In the end it wound up being a little bit of both….
Lets examine some critical weakness of the TM design:
|
|
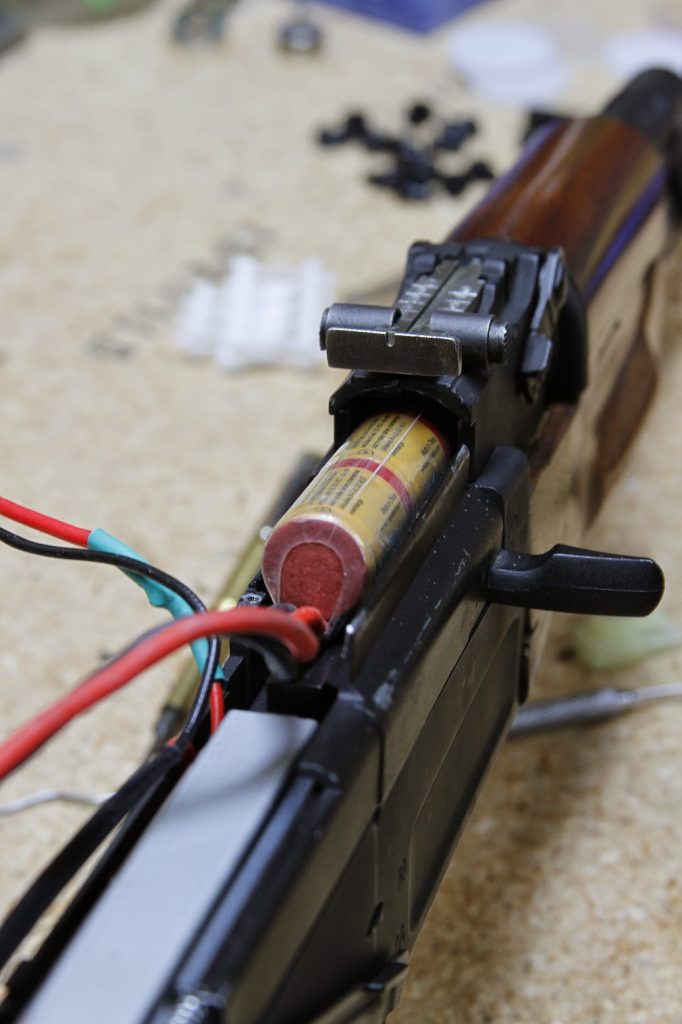
Being a dependable workhouse does not mean it’s without faults. One of the major design flaws I see with regard to the TM AK-47 is primarily with the buttstock construction itself. It is a large hollowed out space with very thin walls throughout. Essentially this is so it can house a decent sized battery. The TM can of course be wired to the front, as is found on their underfolder versions. I would certainly recommend that most folks wire to the front as you can make better use of stick batteries such as 8.4v – 9.6v NiMH, or 7.4v and 11.1v LIPO’s.
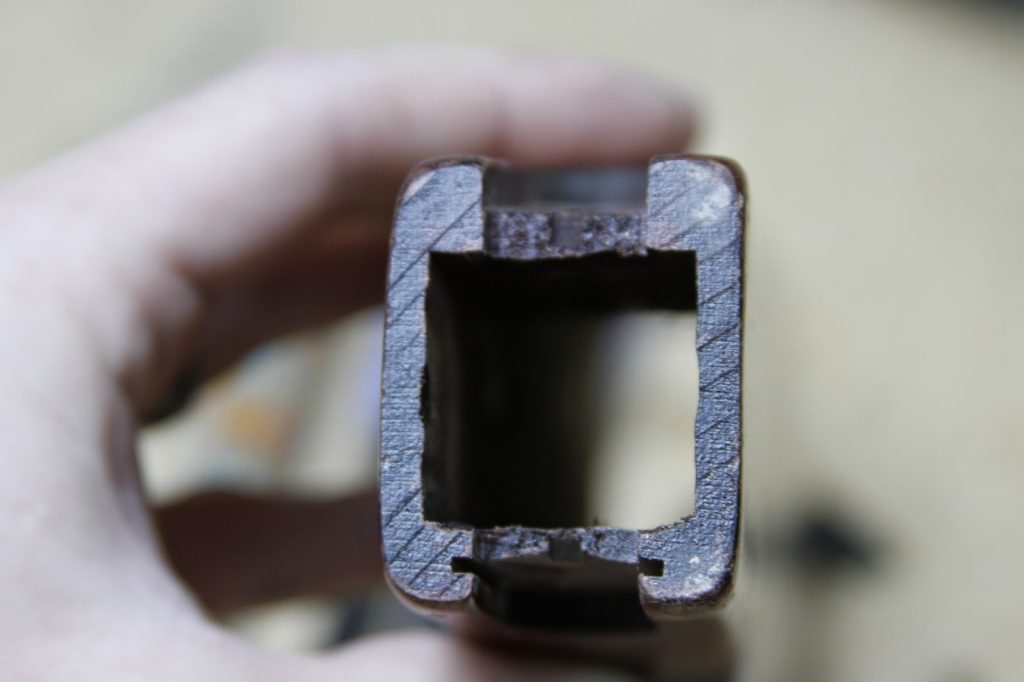
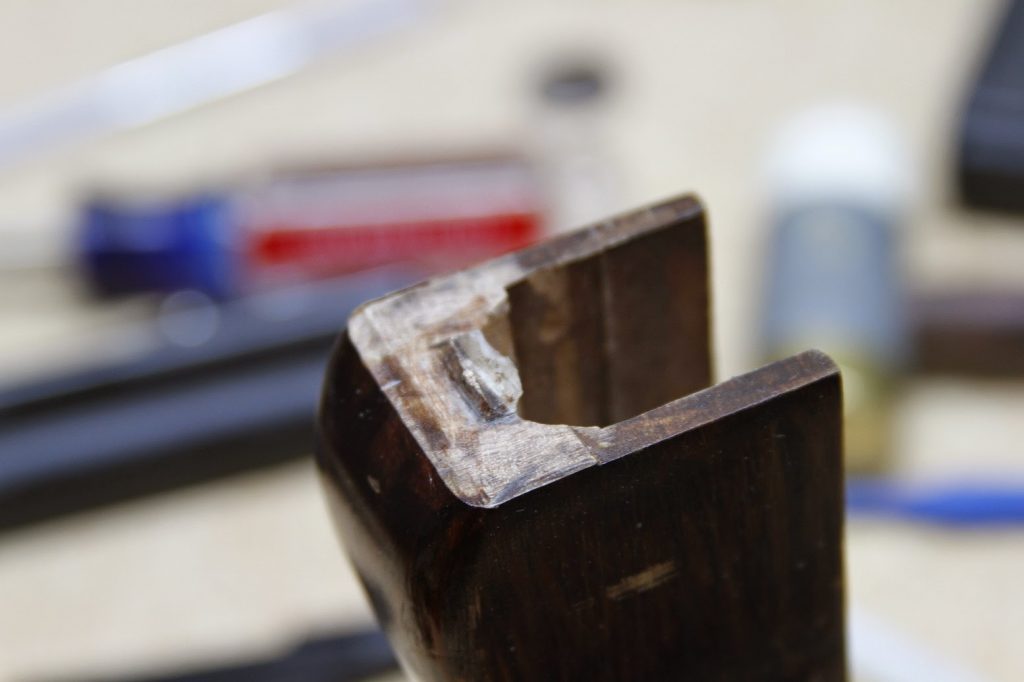
As you can see from the photograph on the above right, the area’s specifically where the tang stock screws affix are very thin – even more so than the vertical sidewalls. By rough measurement, it’s about a 1/4″ thick, albeit less so in the bottom portion. It’s not uncommon to see these areas stripped out or cracked. In this case, two of the screws had stripped the wood out. In the words of the old Soviet saying: “This is weakness!”
 |
Somewhat odd on the TM is the use of what I would call a “reverse tang.” This is a large rectangular piece of hollow metal that extends into the buttstock and acts as a channel for rear wiring. On a real steel AK, the buttstock has a substantial amount of wood that sits inside the receiver, thus facilitating an incredibly strong buttstock. The design of an AEG allows for none of this, however, as the gearbox takes up all available space in the receiver. The reverse tang design means that you can only have very thin amounts of wood for the stock screws to bite into. Rather than repeat this effort only to have it break at a latter date, I decided to instead mill off the reverse tang. The option, of course, exists to rear-wire this by simply boring a hole into the front end of the stock so the wires can pass through.
|
|
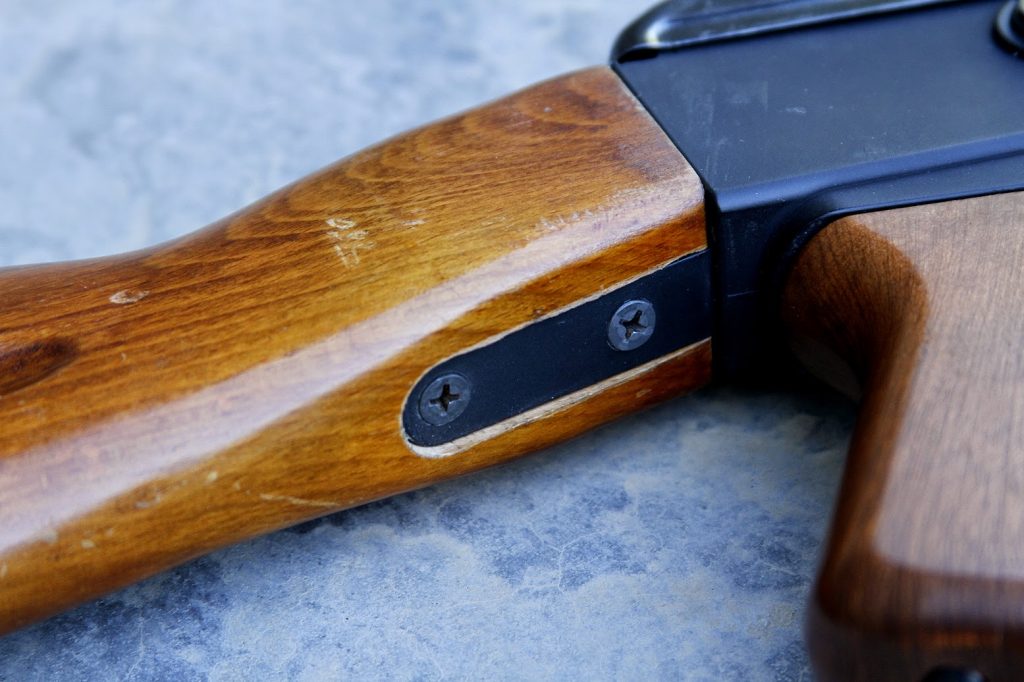
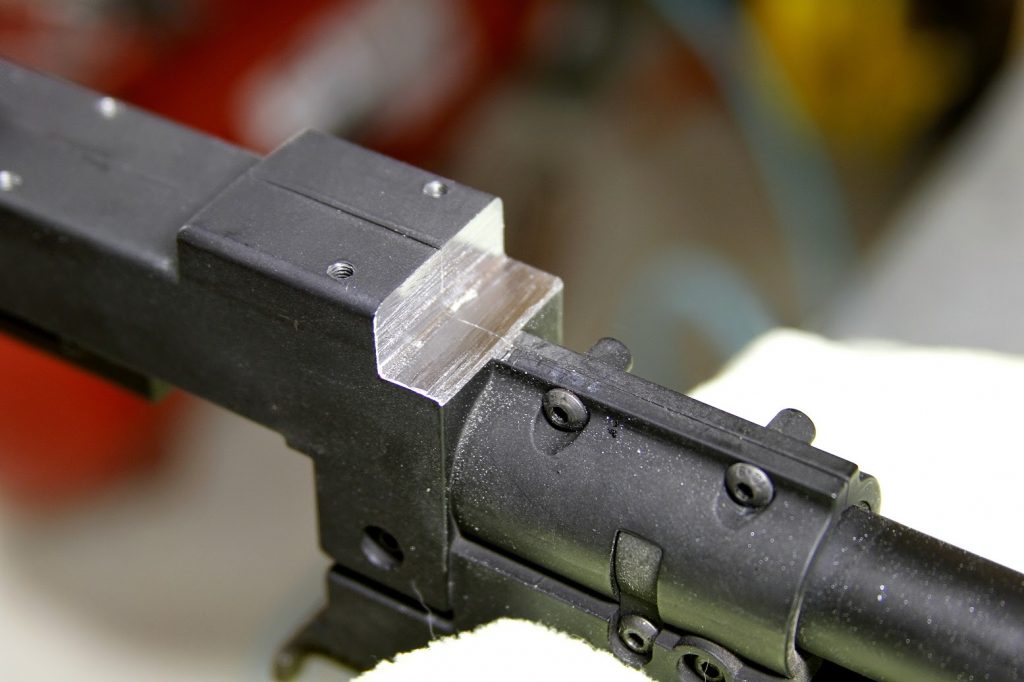
Affixing the buttstock required that the underside have a slot milled into it to accept the bottom tang and the slot on the top lengthened slightly to accept the top tang. All told there are four screws attaching the receiver to the buttstock. Contrasted against the measly 1/4″ or less of material on the old buttstock, each screw now has over 1.5+” of material to bite into. In other words, it’s very strong now.
The Front End
|
|
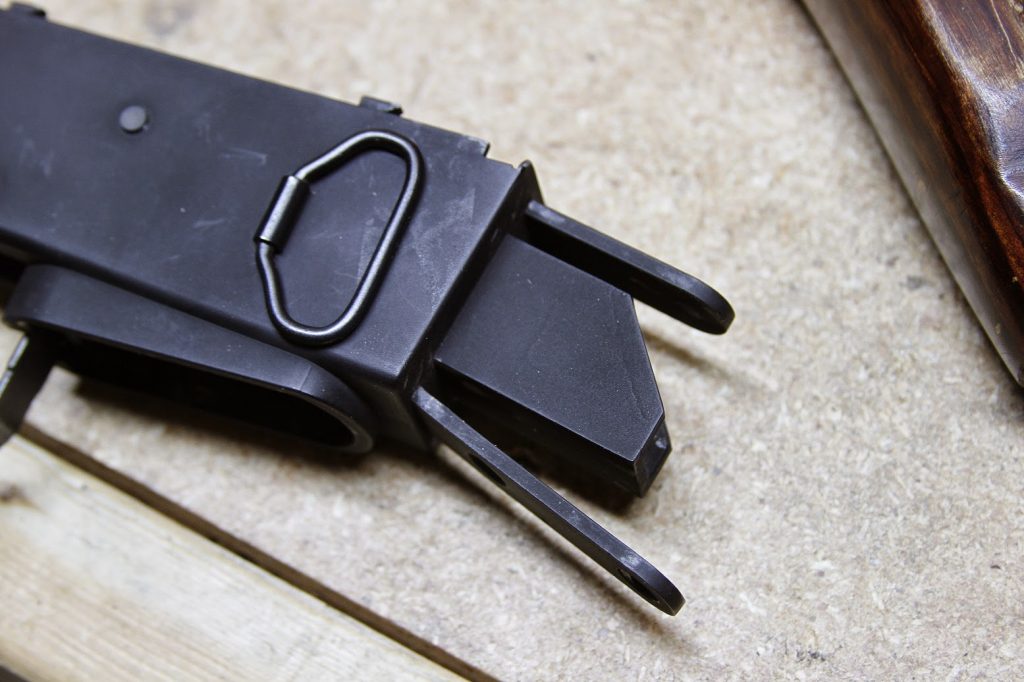
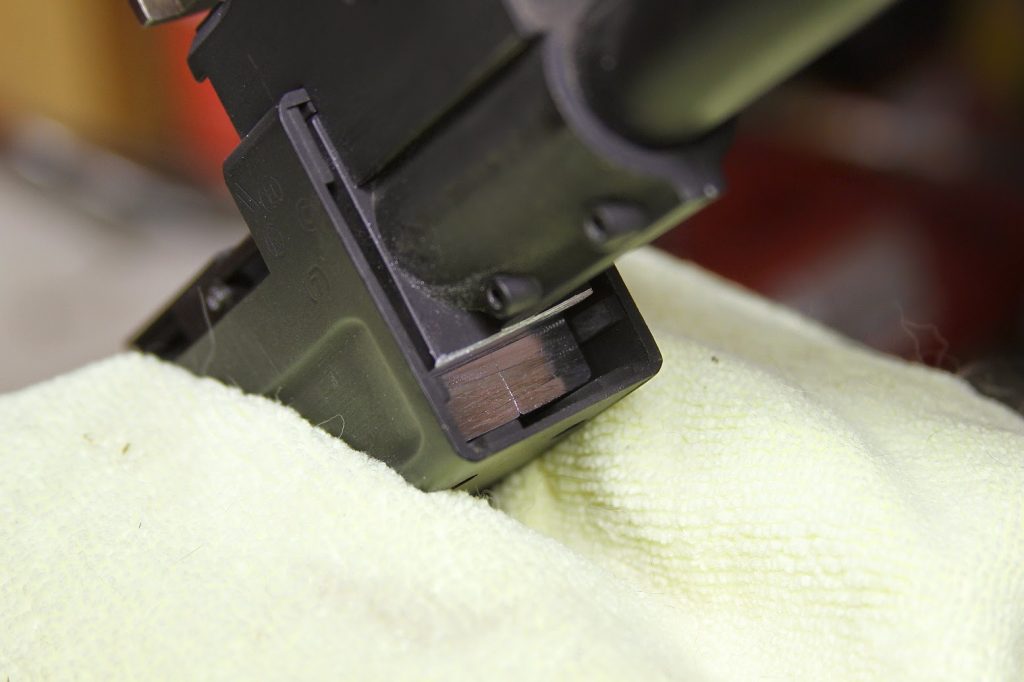
Modifying real steel forearms to the front also required a bit of engineering to figure out. Again, another critical weakness of the TM design is that forearm has a very small amount of wood (or faux wood, depending on what you have) that fits into the barrel trunion area.
Over a period of heavy use, this can break off or get wore down to the point where it is just a nubbin’. As you can see from the photo of the original forearm, it’s barely there at all. In truth, there is practically nothing except the front mount and the dummy cleaning rod keeping this forearm in place.
|
|
Again, rather than repeat the problem, I chose to modify the body kit slightly. I milled off a small chunk of metal to create a hollow space that would be filled with a properly fitted wooden tang that wouldn’t be easily broken.
If you lack a milling machine, this can be modified by cutting on the vertical and horizontal axis with a hacksaw and finished out with a file to clean up your cut. You don’t want to go too far as it will affect the integrity of mounting point for the body screws.
|
|
|
|
Minor thinning of the rear forearm tang is necessary to make it fit into the metal body kit as it has slightly thicker dimensions than a real steel AK. The front end requires a bit of hand fitting too. Essentially you have to thin it down enough to fit inside the retainer cap. Same concept applies to the wood that fits over the gas tube.
|
|
Battery Considerations and Modifications
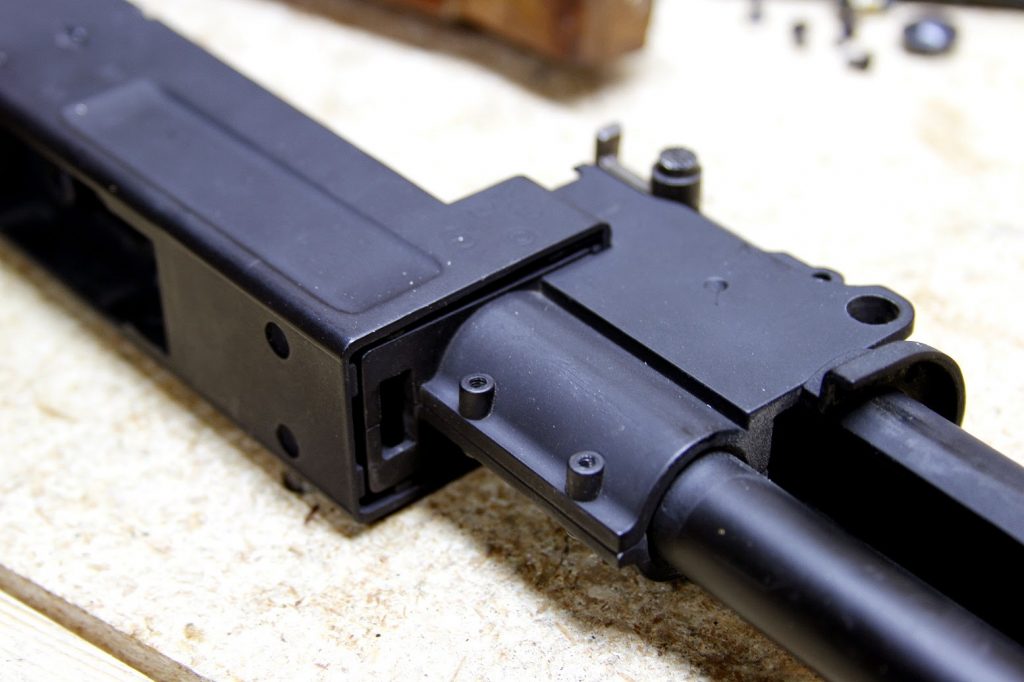
 The TM has a large plastic tray that fits on top of the gearbox that also helps retain the fake charging Unfortunately the design of the tray restricts a lot of the room available inside the receiver for a battery. Attempting to install an 8.4v or 9.6v NiMH, for example, proved impossible as it prohibited the battery from sliding into the gas tube. Removing the tray is as easy as taking out one screw and lifting it away. With it removed, you can now easily slide in 8.4v or 9.6v sticks in addition to the larger diameter 7.4v and 11.1v LIPO sticks.
handle.
Removing the tray means you will have to figure out a way to retain the charging handle assembly somehow. This is easier than it sounds, however, and if you have a few odd’s and ends’ laying around you can solve it in short order. Simply remove it from the plastic battery tray, taking care to retain the long spring it comes with. Now you can either replace this spring with a slightly shorter one or simply cut it in half. You will need something to prevent the spring from slipping over the crook of the guide rod that the charging handle rides on (it’s also important to note that this assembly keeps the dust cover in place too.) I used a threaded nut with a flange scavenged from an old K-Pot harness to keep the spring from slipping. Basically anything will work as long as it keeps the spring from slipping backwards. If it slips backwards, it can come off the guide rod and render your charging handle useless.
Assemble your spring retainer over the guide rod, then the spring, and then the charging handle in that order, taking care to ensure the guide rod slips into its socket on the front of the receiver. The caveat to this modification is that you won’t be able to retract the charging handle back as far as before. It’s about equivalent to what you get with a Real Sword, though, and you can still access the hop up adjustments.
|
|
The Finished Assembly
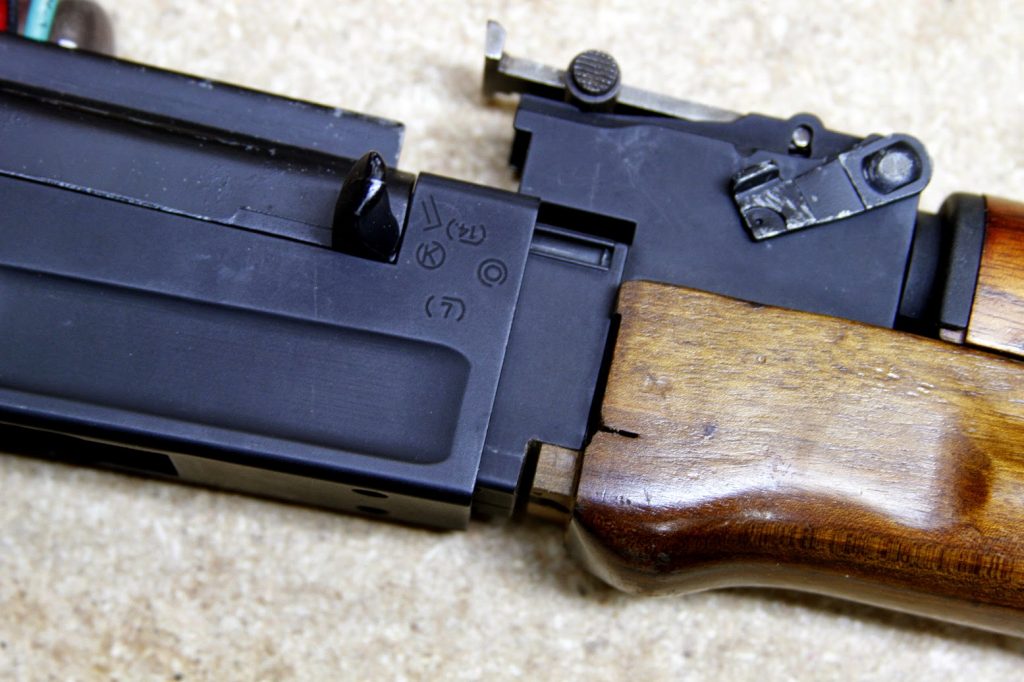
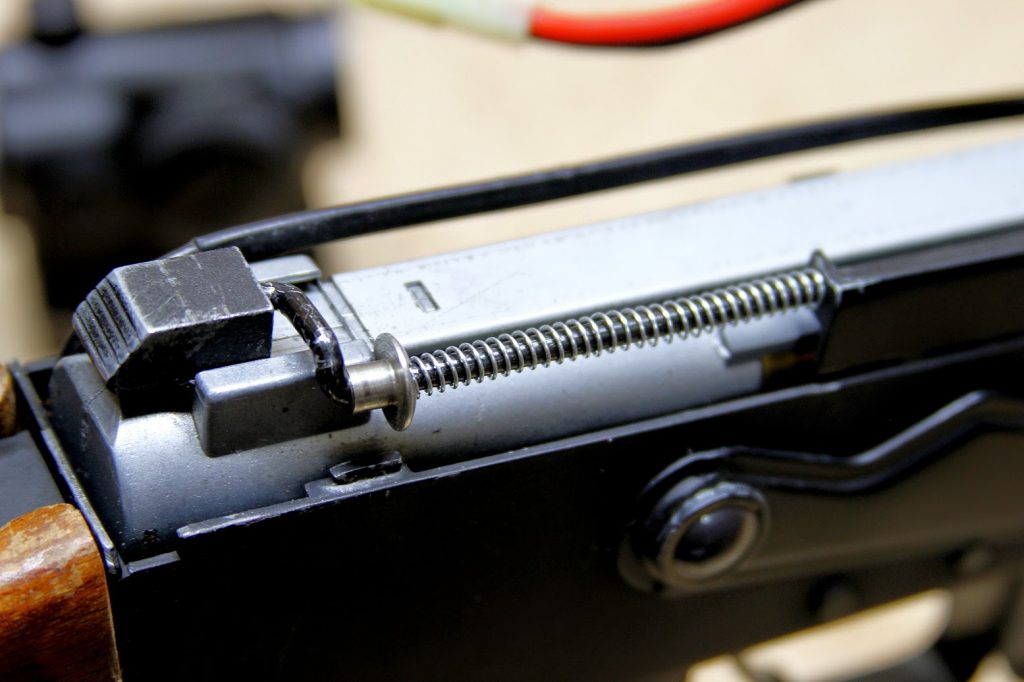
The final touch was the installation of a real steel AK-47 rear sight. This is a drop-in fit and requires no work to make it fit. The main advantage to this is that you are replacing the cast pot-metal constructed TM sight with a hardened steel assembly that’s designed to carve you an igloo from the frozen Siberian tundra. Overall the feel and fit of the real steel furniture is leagues above the factory offerings, and certainly enhances the overall impression and handling of the rifle.
|
|