 So I’ve finally gotten around to having some time to install the Generation 2 Tru-Hop bucking!
The Tru-Hop is what I would personally call the first commercially manufactured drop-in R-Hop bucking. Let that sink in for a little bit; because what the Tru-Hop is offering is all of the benefits of an R-Hop without the labor involved. I’ve installed hundreds of R-Hops now, and while they do get a little easier to do over time as your technique evolves, you can’t escape the labor factor they represent. Moreover, if you screw up, cut it wrong, or get the inner surface off a little bit, it can mess up your shots.
The Generation 2 version is made from a new material and promises to work well in a wide range of temperatures (-50°C to 230°C/ -58°F to 446°F). Comparably speaking, the feel and softness of this bucking most closely approximates a Guarder clear 50° degree bucking, though the material does not quite feel like silicone. It has a more tacky and very grippy feel. I personally prefer softer buckings regardless of the FPS of the rifle it will be going into due to their superior performance in less-than-perfect weather. While the old rule of thumb was always harder buckings + high FPS (typically 70°+ type), I have found over the years that one can safely use softer buckings and often enjoy better performance to boot, especially the colder it gets.
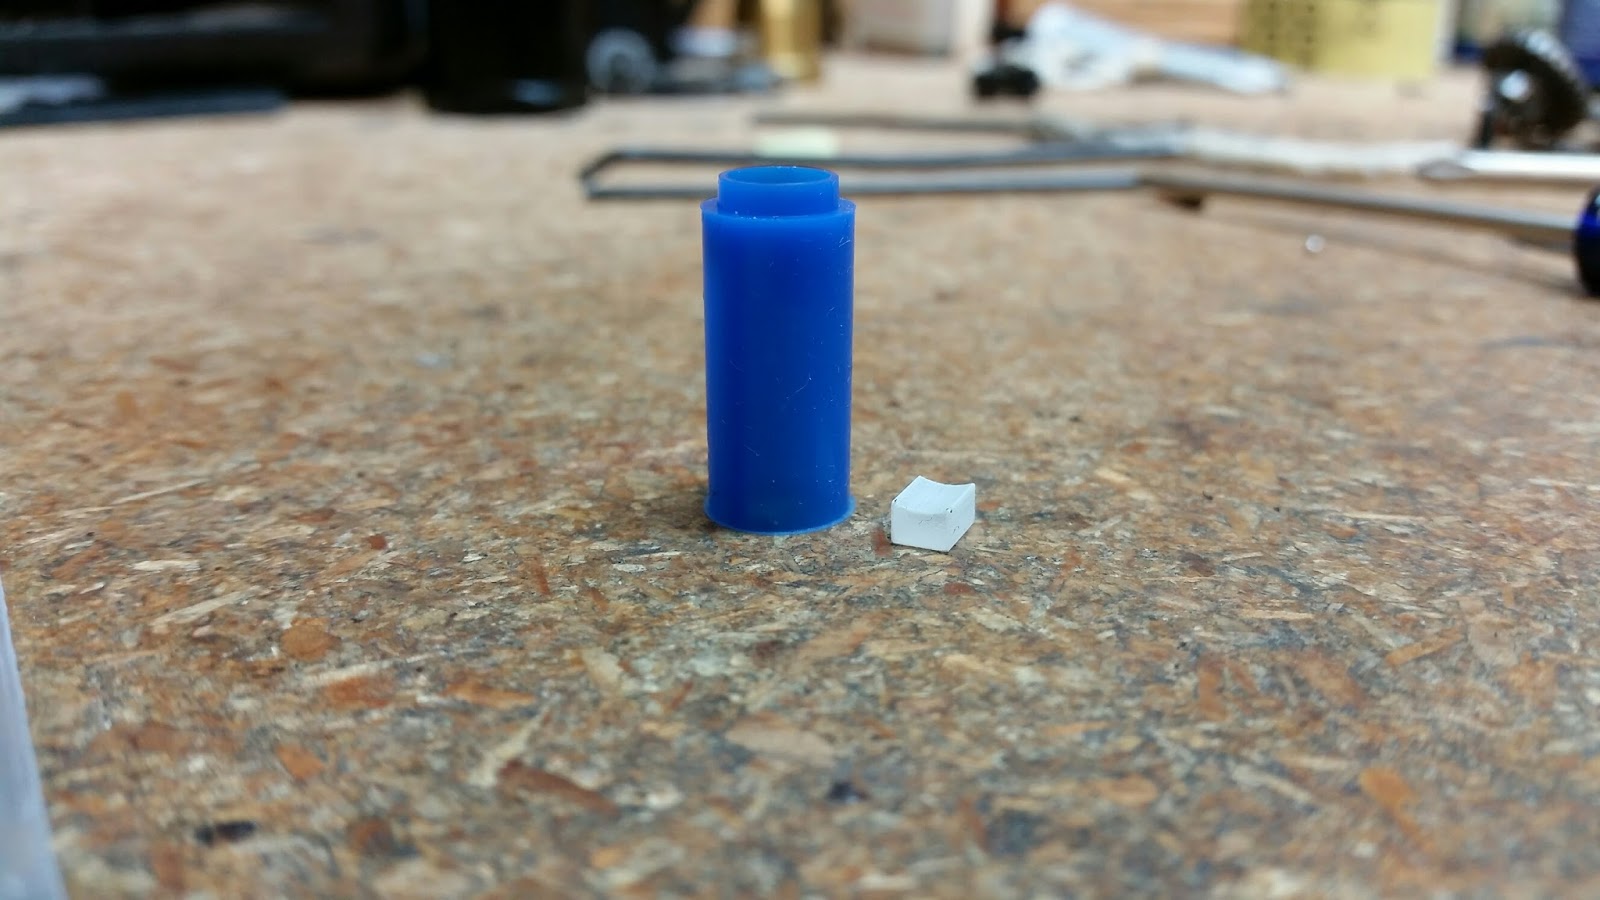
The real hallmark of this bucking is the concave contact patch that is molded in. This patch basically ‘fills’ the hop up window of your barrel and provides more surface area for the BB. For anyone who has ever made their own R-Hops, or even used the rather expensive Z-Kits, you can appreciate that you are getting a perfect concave inner surface for the BB with the Tru-Hop.
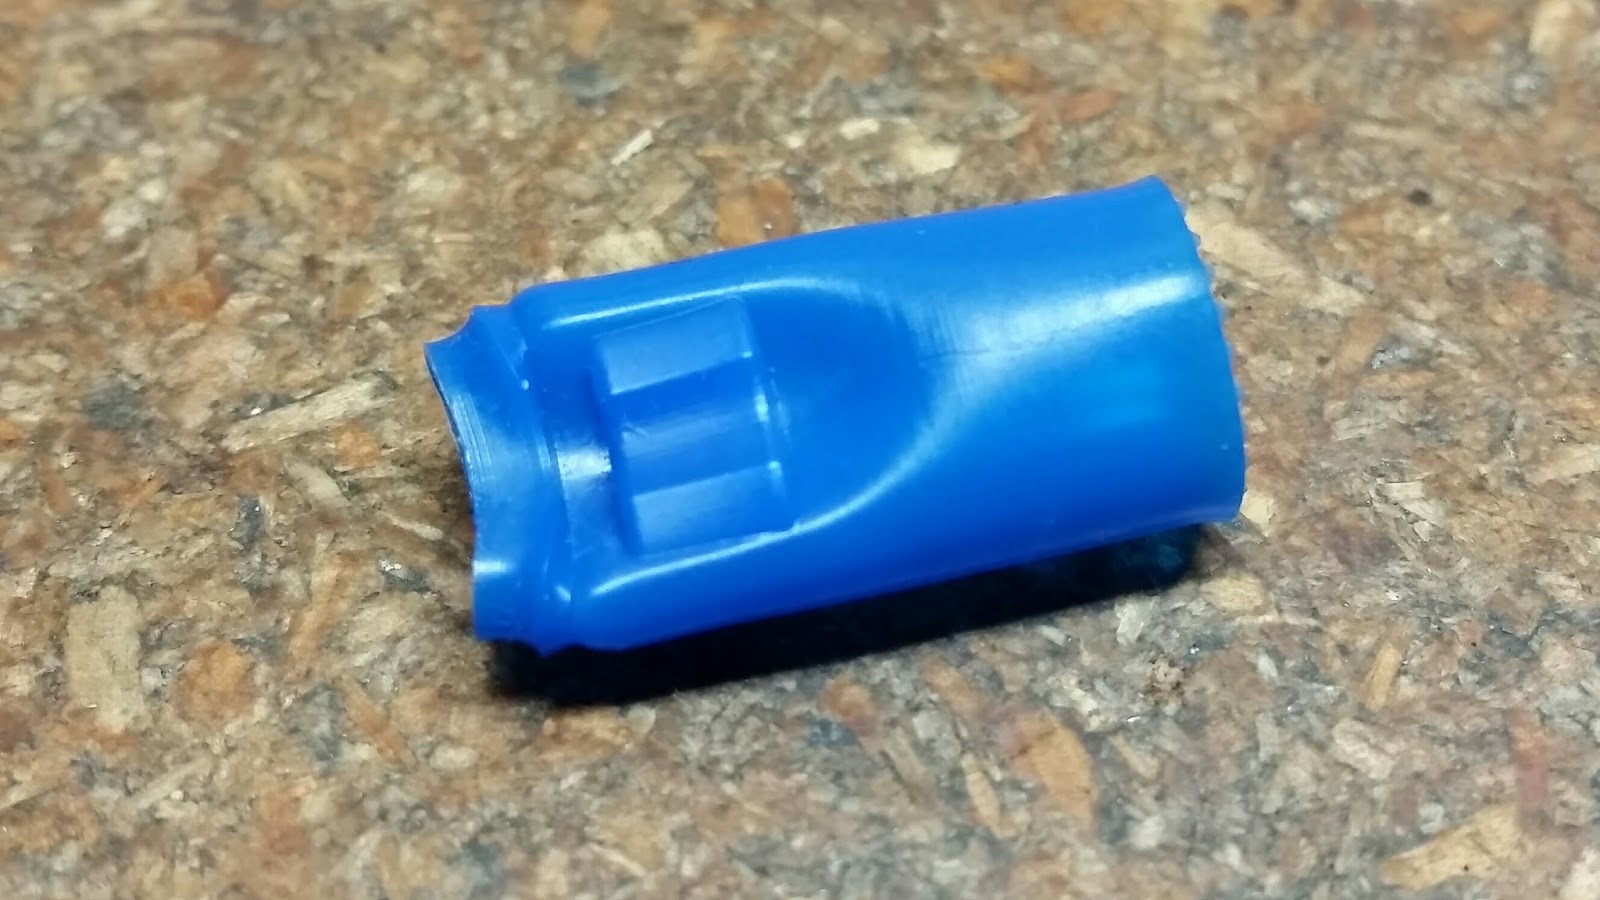 |
| The contact patch (bucking has been turned inside out). |
Overall the fit and finish of the bucking is nicely done, with no weird molding issues, excess flashing, nor off-center centering splines in relation to the contact patch (something I have encountered often with Maple Leaf buckings).
Included with the bucking is what looks to be a 3D printed concave nub. Use of the nub will require modification of the hop up arm in the same fashion as is required for an M-Nub. Based upon my testing, you can also use traditional round nubs, as well as M-Nub material with this bucking as well.
The concave nub is not compatible with all barrel types, and works best if you have a square cut barrel window too. Being that it is made from a plastic material, you can of course sand it to fit. Retail cost on the Tru-Hop varies between $14 – $16 from most venues.
 |
| The concave nub. |
Installation
Installing the Tru-Hop is relatively straightforward. If you are at all familiar with swapping out your hop up bucking, you can install the Tru-Hop. Unlike a traditional R-Hop, this bucking does not require careful cutting, sanding, or multiple test fits. Modification of the hop up arm will take a few minutes, but again, this is optional depending on your preference.
For my test platform, I decided to try this out in my Real Sword SVD with a Prometheus 650mm 6.03 stainless steel barrel. This rifle already had an R-Hop / Prometheus Purple bucking combo installed by me well over 6 years ago so I had plenty of experience with how it currently performed in relation to the new bucking. The hop up chamber arm had already been modified to acccept an M-Nub, so I decided to leave this alone for the time being and use that with the Tru-Hop. Notwithstanding, a quick drop-in test of the concave nub revealed it would have to be modified to fit the Real Sword hop up chamber.
I discovered that the Tru-Hop is a little hard to slide onto the barrel at first. The grippy material creates a lot of friction and it takes a few tries to get it slide into place. You could get around this with a little lube, but it’s not entirely necessary. Thickness wise, this bucking was actually a tiny bit thinner than a Prometheus Purple, so it slides in easy into the hop up chamber (once you lube it up at least).
Interestingly, before swapping buckings my FPS was registering right around 525 FPS with .20g BB’s. After swapping to the Tru-Hop bucking, it was shooting even hotter – now it was hitting 545 FPS! I am guessing that I had a little bit of a compression loss between the old bucking and the air nozzle, or maybe the new bucking interfaces better than the old.
Testing
For anyone who has done their own R-Hop, the real win is when you achieve perfect alignment of the contact patch and you have straight shots. I am happy to report that not only does the Tru-Hop have great alignment resulting in excellent straight shots, it also shoots far!
I had to re-calibrate my reticle for the new point of aim after
replacing the bucking and the associated barrel pull that involves. For testing ammo, I used ASG .40g BB’s. As it was getting dark, I had to do a very quick and dirty test for the range side of things. Using a Leica Rangemaster rangefinder to verify distance, I was able to ring a steel 55 gallon drum at 120 yards aiming just a touch high of dead center 9 out of 10 shots, which is about 20 yards better than what I was doing with the old R-Hop installation. The drum itself measures out to approximately 23.5″ wide x 35″ inches tall. At that range it’s also difficult to see the BB’s, so the drum provides some good auditory feedback at least. It may be possible to extend that range slightly (certainly by elevating or “mortaring” the rifle too), but that’s about the longest distance I really have available around me.
Update: Found a slightly smaller 30 gallon steel drum to try out. The measurements on this are 19″ wide x 29″ tall. I also learned that it’s pretty hard to try and take a photo through your rangefinder with a cellphone and try to line up two view ports and attempt to focus too – hence the blurry image (which was the best I could produce out of 20 or so attempts hah). I think it would be easier if the rangefinder had a tripod mount and I could simply focus on lining the camera up instead of both items at the same time.
Using the same ASG .40g BB’s, I was able to hit this 10 for 10 aiming for the broad white stripe in the center of the drum at 100 yards. Pushing it out to 120 yards, I had slightly less luck than I did with the 55 gallon drum, hitting it only 7 out of 10 times, and this was with some minor elevation added in – I was aiming at the center-top of the blue stripe on the drum. Again, the rifle was not benched, and I was shooting from a kneeling position.
 |
| 30 gallon (19″w x 29″ tall) steel drum at 100 yards. |
As for actual groupings, I couldn’t say exactly due to the fact that it was getting dark, I wasn’t benching the rifle, and I didn’t have someone available to eyeball a proper target for me. But overall, the size of a drum roughly approximates the size of an individual kneeling, so it’s definitely shooting “minute of man” as they say in real steel parlance, which is more than good enough for me.
I plan on conducting some more precise testing as time allows. I’m especially interesting in what kind of groupings I can get out this, as well as different ammo brands and weights.
All in all, my initial impressions of the Tru-Hop are very positive. Time will tell how well this bucking holds up to actual use – unfortunately the Airsoft season is drawing to a close up here for the year so I’ll only have maybe one or two events to put it through its paces. But tentatively speaking (emphasis on tentatively), I would say that this bucking has the potential to render the traditional R-Hop installation obsolete. It is most certainly leagues easier to install than an R-Hop, and that in itself is worth the price of admission.

 |
| Svetlana is going to be happy. (image courtesy of Brian Neale) |