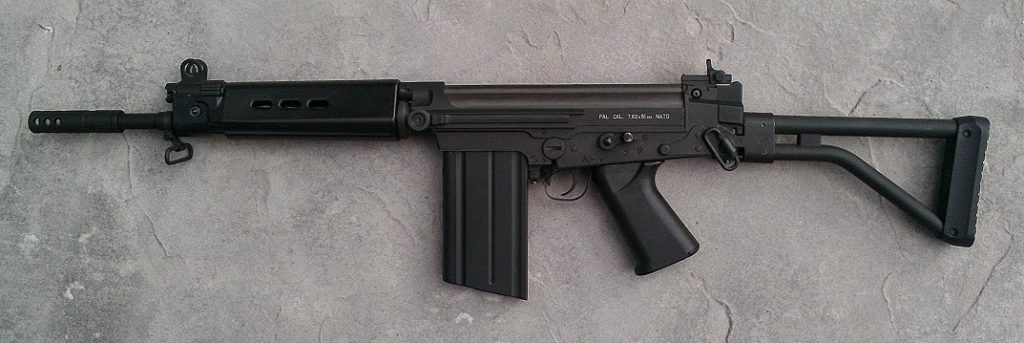
 I have always liked the FAL design from an aesthetics standpoint. It’s also a rifle steeped in history,
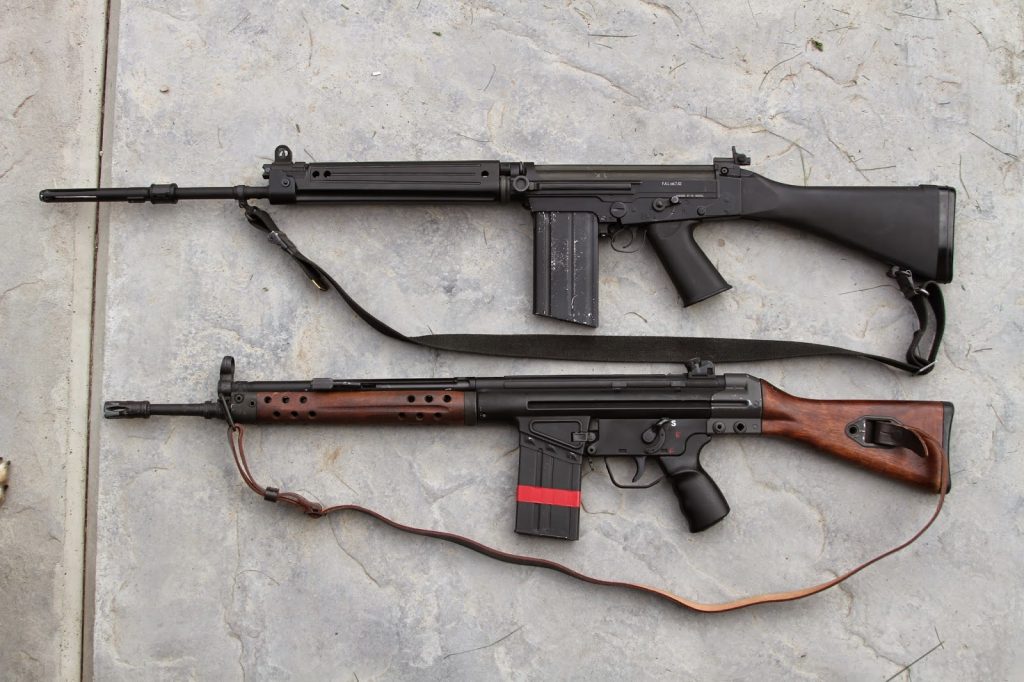
having enjoyed massive adoption and proliferation during the cold war era. Among the rifles you can be guaranteed to find in just about every corner of the world, you will find the AK pattern rifles, the FAL, HK G3, and the M16/M4 variants. There are few airsoft companies that actually produce an FAL, and you could count them all on one hand – most of which are unfortunately discontinued too. This makes sourcing parts quite difficult, especially considering there are two distinct main designs (the Classic Army and the King Arms), and neither of them shares compatibility.
King Arms makes the better L1A1 versions of the FAL, which had a very brief production lifespan and is now since a discontinued offering. Like most unique designs out there, they can’t seem to get a leg up in the market against the overwhelming mountain of M4 variants stacked against them. Using the uber-strong
version 3 gearbox as the power source, this gun takes upgrades well and makes an excellent long-range field gun with phenomenal accuracy once you change out the bucking.
|
|
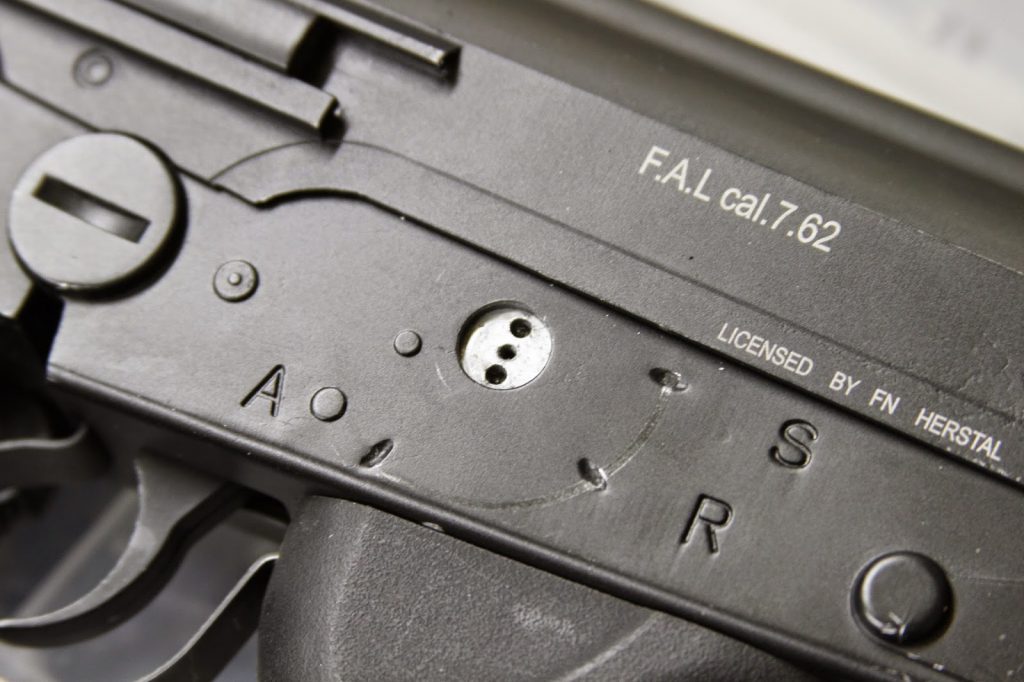
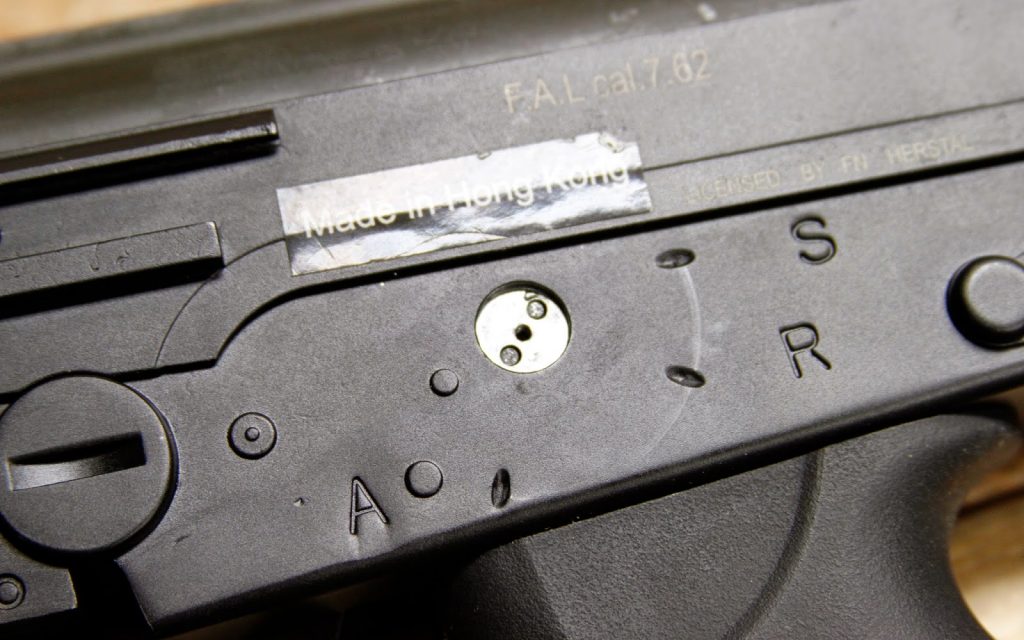
It has what I would call a needlessly complicated selector switch mechanism however. The exterior switch itself is a point of fragility, being made of cheap cast pot metal. The fundamental design of the switch is entirely dependent on a pair of tiny cast 1/16″ studs that interface with the internal selector gears. These studs are unfortunately made of the same cheap casting the rest of the selector switch is made of. There are two separate racks of internal selector gears and myriad of other bits and bobs inside that the selector switch has to apply force against in order to rotate. Due to this, it is not uncommon to find that these tiny studs break off during the course of normal operation, thus rendering the entire mode of fire mode selection, and even simply putting the rifle into safe mode … completely useless. Now you may be thinking “So what? Just order a new switch!”
|
|
Well, King Arms apparently thinks their selector switches are made of Adamantium and will never break because they simply do not offer this as a regular replacement part. Furthermore, King Arms refuses to deal with individual customer requests – rather, preferring you utilize one of their many dealers (whom will be making the same requests to King Arms on your behalf… oh the irony). The closest I came to obtaining a replacement switch was via a rather complicated process that would have involved international shipping charges from Hong Kong to England to Canada and finally to the US. At the price I was ultimately quoted, it would have been nearly cheaper to purchase a whole new rifle. At this point, your best bet if you have one of these guns is to find a boneyard gun to use as a source for parts.
|
|
That being said, the highly anticipated boneyard gun that arrived was afflicted with this same selector switch problem. Dammit. I was a little annoyed at this point. So, instead of throwing the FAL against the wall in a hulk-like rage, I decided to apply the “this is weakness” philosophy to the problem and come up with a better solution.
I had previously toyed with the idea of using a real steel selector switch as a possible mod. Being made of heat treated steel and solid as a rock, it would have been ideal. Unfortunately this was simply not possible from a design standpoint. It would have involved the removal of critical components for its strength and even then, it wouldn’t have fit.
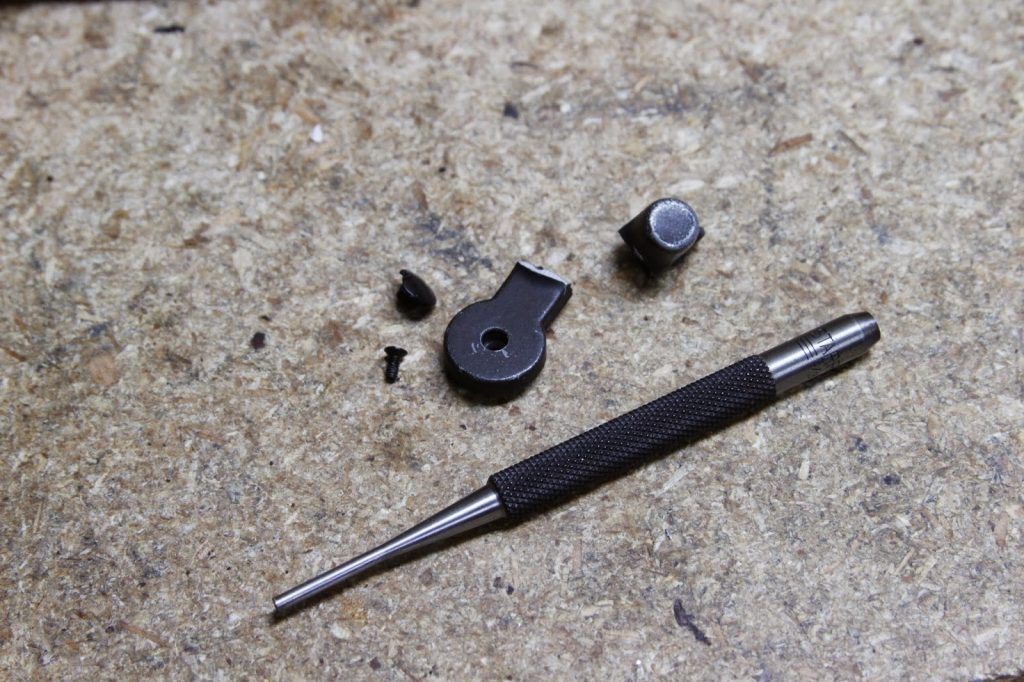
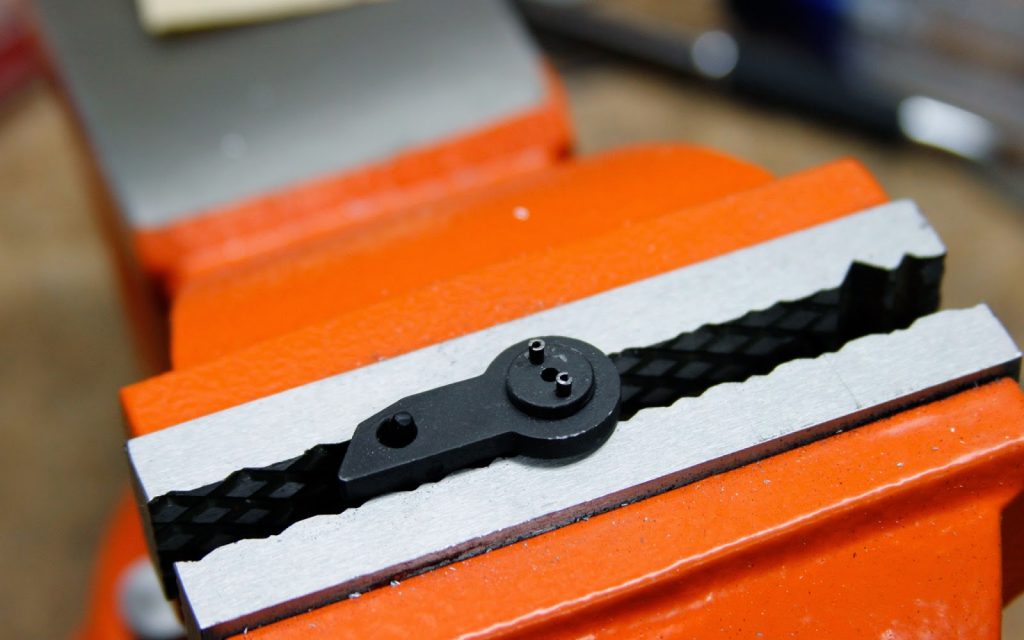
The second idea was to mod the King Arms selector switch itself. If it is still largely intact – minus the studs – then why not make new studs so it can interface again? Looking at the switch, the missing studs provide a perfect template for a drill bit…
1) Take a tiny 1/16″ drill bit and drill right on top of the old stud casting marks. Don’t drill too deep, otherwise you will punch through the other side of the switch. Make sure your holes are straight. A drill press is best for this. You can freehand if you’re steady and not amped on too much caffeine, however.
2) Take two 1/16″x1/4″ steel roll pins and carefully tap them into the freshly drilled holes. You can use superglue or epoxy as extra insurance if need be, but it is hardly necessary as the fit is quite tight. When tapping these into place it is absolutely critical that you fully support the entire switch otherwise you risk breaking it in half.
3) At this point, you will note that the roll pins are too long. You merely need to file them down until you can completely seat the selector switch flush against the receiver of the gun.
Congratulations, you’re done! Now reassemble the switch and you’re good to go. The new steel roll pins will be immensely stronger than the old cast studs and shouldn’t break off.
|
|