As a Version 3 gearbox owner, you may have noticed that occasionally you get an odd selector switch problem now and then out of your AK. Granted, these instances are rare and far between, but to the uninitiated they can be frustrating to track down and properly diagnose. This article will show you a few things to look out for. We will also delve just a bit into the trigger switch assembly too, as that is part of the system.
|
|
Before attempting to diagnose your selector switch issues, first determine whether or not you are operating with a fully charged battery. While this seems rather obvious, it is fairly common for folks to overlook this part, and futilely exclaim their gun is broken when it is a simple matter of a dead battery.
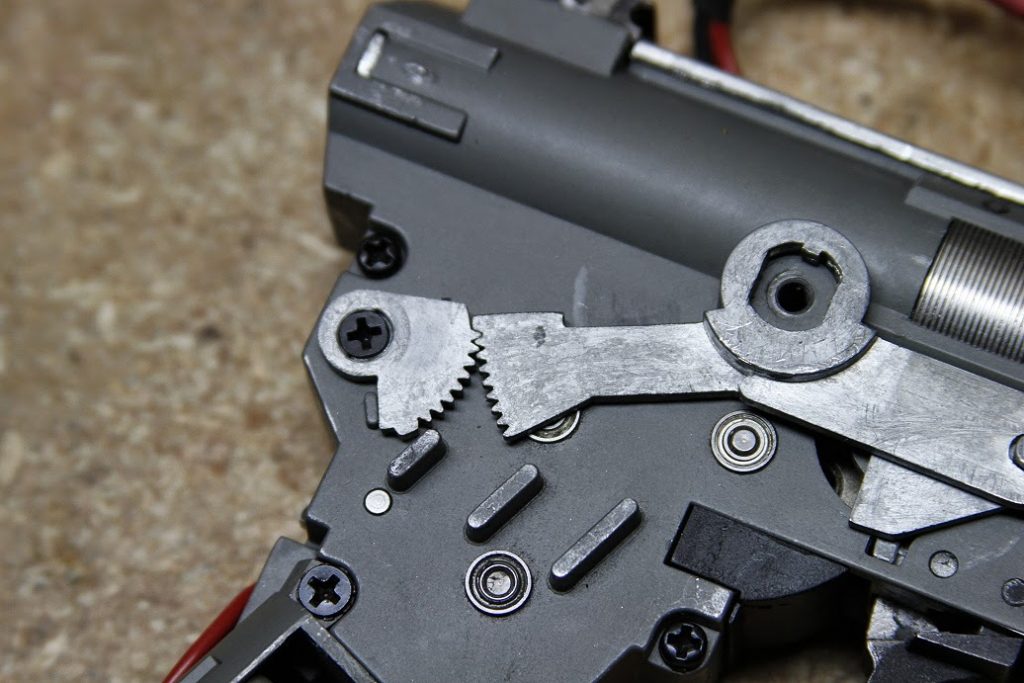
As we are working from the outside in on this guide, after you determine your battery is fine, look immediately at the external selector switch for damage. Occasionally during a game, you might suddenly notice that your external selector switch is stuck and is unable to move from its current position. Before you panic, remove the dust cover and take a peak inside the receiver at the internal selector gears as pictured above. A few things can jam these up and prevent their movement, and one of those is debris or BB’s. If you reload with your muzzle pointed skyward and your mags do not have the last round feed feature, you can occasionally get BB’s rolling backwards inside the receiver. Sometimes one of these will get stuck in between the teeth of the selector gears and jam them. This is a pretty rare problem, but I’ve seen it happen to a number of guns. The quick fix is to simply pop out the jammed BB and get back into the game. Depending on how badly the BB is stuck in there, you may or may not have to remove your gearbox from the receiver to dislodge it.
|
|
Another problem with regard to the external and internal selector switches can be attributed to “slop” or being worn out, or even built out of spec. Generally slop or wearing out doesn’t occur, except in situations where the gun has been heavily used. You can usually spot slop by slipping the selector switch to the semi-auto position and then slowly (with the top cover removed) examine its travel as you slide it upwards into the full auto position. If while observing this you see that the internal selector gears have not moved, then you have evidence of “slop.” With slop, you might have noticed that this is why your AEG no longer works correctly on full auto when it is engaged in the full auto slot. You may also notice that if you push the selector switch just a touch higher, to where it rests just above the full auto notch, that you can usually engage the full auto mode. If this is the case, either your external selector is out of spec, worn out, or the internal selector switch gears are worn out. More particularly, the worn out section is where the external selector switch fits into the internal selector gear.
One potential fix is to simply move the internal selector switch up exactly one gear tooth (as pictured above.) With AEG’s that have out of spec or very worn exterior selector switches, this has solved 99% of the problems I encounter. Be warned: on a brand new or lightly used AEG, doing this can mean that your semi-auto position is now a full auto position! For guys who want their AEG’s to strictly shoot full auto only on both selector switch positions, you could conceivably do this. Be sure to fully test for proper function if you mess with the selector switch gears.
|
|
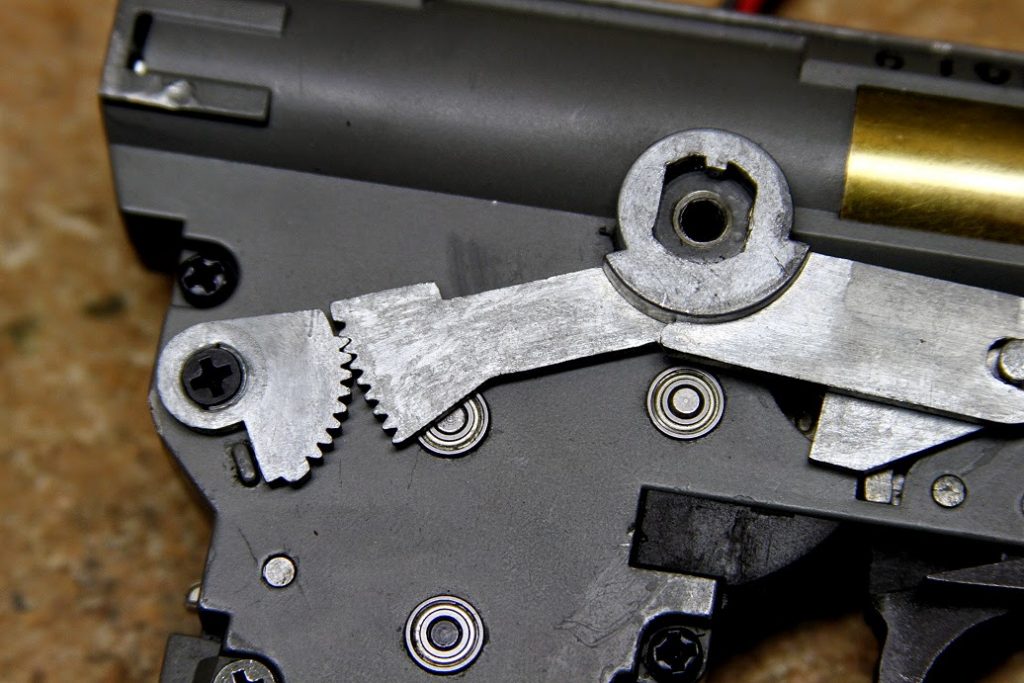
Keeping in mind that we are working on the internal selector gears, you should take the time to also examine them for broken or damaged teeth. If this is the case, you could be experiencing slippage or incorrect meshing – which can cause a variety of issues such as inadvertent full auto in the semi-auto mode, failure to engage in the correct fire mode, or simply not working.
This also applies to the left side of the gearbox and the selector switch plate (the plastic part.) On a Version 2 gearbox, a stripped selector plate is usually the most common issue I’ve encountered. On a version 3, I have yet to see a stripped selector plate, but it is a good idea to examine this area while you’re digging around.
|
|

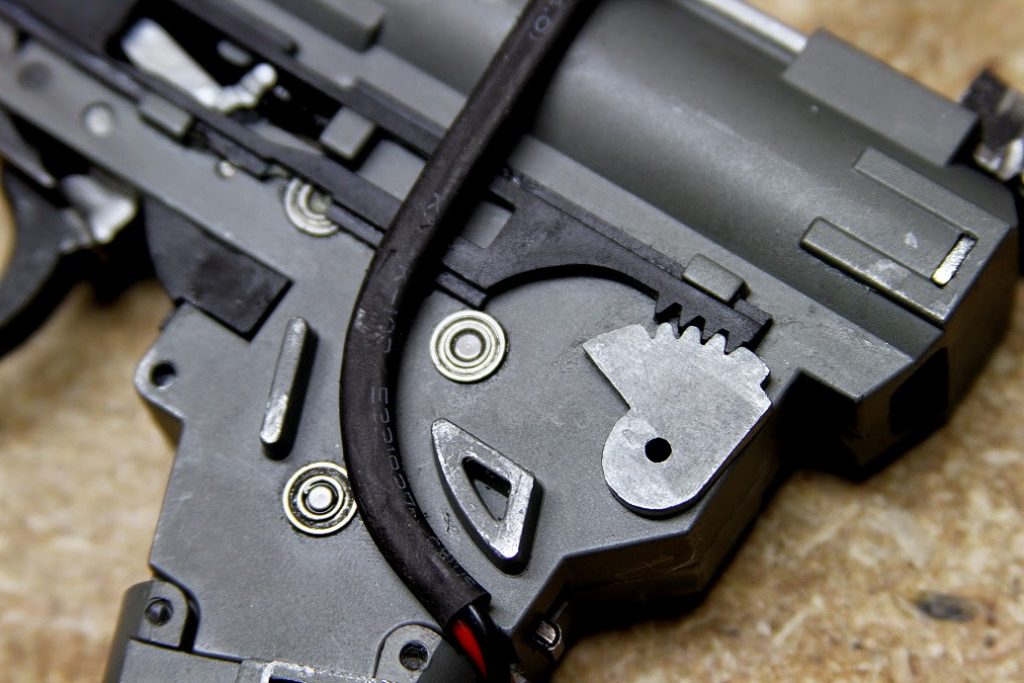
Removing the selector plate next, we will be looking at the trigger contact surface for damage or burn-through. Again, not a real common problem. If you’re shooting an extremely high ROF AEG with heavy duty LIPO’s with a high C rating you might see this area burned out. Typically, however, the most you might see is some slight wear and maybe a bit of carbon buildup. You can scrape the carbon off with a razor blade.
It’s also a good idea to make sure the selector switch plate can move freely in its track and that nothing is binding or preventing it from moving properly. On some gearboxes I’ve examined, there can be some issues with it dragging badly against the trigger return spring that pokes out of the triangular notch on the left side. Sometimes if these springs have been replaced or are incorrect, they can be slightly too long and thus hit the selector switch plate. You can either trim the spring to correct length so it sits flush with the gearbox, or simply radius the corner of the selector switch plate that hits the spring. Doing the latter is sometimes the more preferable and quicker option.
|
|
Next we are taking a look at the trigger contact switch. Most Version 3 designs have a dual contact system – basically two tabs that engage the trigger switch plate and complete an electric circuit. These tabs, like on any AEG can wind up deformed with time and heavy use. If this happens, they don’t aren’t necessarily making 100% contact with the trigger switch plate, which can result in a non-firing condition.
There are three ways of fixing this:
- Method #1 is to slightly bend or flex the tabs upwards, away from the gearbox body so they can make full contact with the selector switch plate. The biggest problem with this method is the tabs are very fragile, and if you bend them up too much, you can risk breaking them off. In which case you’ll be looking at a new trigger switch or scrounging for new contacts in your box-o’-scrap-parts.
- Method #2 is to build up the surface just a bit with silver solder. Some guys like to “bridge” both contacts with solder as well. This design, in fact, is what is found on the semi-auto-only SVD. The biggest thing to pay heed with when soldering the contacts is it has to be done just right. Too much solder and you can cause excessive friction and binding with your selector switch plate – sometimes even preventing it from sliding over the contacts entirely!
- Method #3 is to remove the metal contact from the selector switch plate. This is best accomplished with a dental pick. Taking some pliers, give the contact plate just the tiniest bend, so it forms a slight arch. Doing this will ensure it mates against the surface of the trigger switch tabs. As with the above methods, don’t ham-fist it. Generally this solves 99% of the non-contact problems I encounter. If they’re more severe, I would consider the first two methods.
|
|

Moving in deeper, we are now looking at the guts of the trigger switch, including the trigger trolley. What you are looking for in here is evidence of excessive carbon build up, burned out contacts, gunk (including grease, oils, etc.) that are causing bad connection. Guys who tend to over lube their gearboxes can sometimes find their gearsets have slung gloop into here. You want this area to be nice and clean. We are also looking for broken wires here too. As these are simply soldered on to the yet-again-fragile trigger contacts, pay attention to not torquing them too much.

Examine the trigger contacts for signs of burnout. This can be hard to spot sometimes, but can manifest as a small hole, a large section burned off, or a completely dissolved contact. Generally, unless it’s truly severe, you can get away with a little burning for awhile yet. On a Ver. 3 these parts are typically replaceable without having to purchase the entire switch assembly. Another issue can be that you have a warped trigger switch – this is something that has been occurring on some LCT guns in particular of late – they simply aren’t designed to take the heat generated during sustained firing and thus warp. Friday at the Factory Syndrome can hit any airsoft manufacturer, even ones held to high esteem. Fortunately it is a easily fixable problem.
Additional areas to examine: check the ‘shelf’ on the trigger trolley – this is the flat piece on the left side of the trolley that engages with the cutoff lever. Additionally, you should also examine the cutoff lever and spring, and ensure these parts are not worn out or broken. If the shelf on the trigger trolley is severely gouged or worn out, it will cause issues, as will an overly worn cutoff lever.
And there you have it! Without going too much deeper into other issues that could cause trigger and selector switch related issues, such as tappet plates, cutoff levers, etc. These are generally the most basic and common issues encountered. That being said, the Version 3 selector and trigger design is quite tough, and does not often encounter these problems.