Maintaining Your Gas Blowback Magazines

This is a really common question from just about every airsofter out there. What is the best way to maintain my GBB magazines?

#1 is to mind what you feed it. The best method is to use green gas
that already has a silicone lube mixture inside it. The more popular
alternative is a propane bottle with a fill adapter because this is much
cheaper. Care must be taken with this
latter step, however. It is highly advisable that you apply several
drops of fine silicone lube to the top of the propane bottle before
screwing on the adapter. I recommend doing this for at least every 3rd
magazine fill.

The number one killer of GBB magazines is worn,
cracked, or dried out o-rings. An o-ring leak will obviously bleed off
whatever gas you have stored in the fill chamber slowly, or quickly,
depending on how bad your leak is. The best measures are preventative
measures. Keep your o-rings hydrated and they will last a long time. Raw
propane gas has a tendency to dry things out. This can be exacerbated
by temperature extremes too. Freezing, or shooting extremely fast (if
your gas allows it) in cold temperatures can adversely affect the
performance of the o-rings.

There are lubes out there designed
to “breathe new life into” dry o-rings. They are usually marketed under
the name of “Gas Blowback Magazine Saver” or the like. I have used
these with good success – most of them do work well. Generally you
depress the valve on the back of the magazine, place a few drops of the
lube into the top of the gas chamber opening, and then fill your
magazine with gas. Typically you leave the mag sitting upright for a
period of time up to 24 hours or so. I prefer to vent the contents of
the magazine afterwards, rather than fire it through the weapon as the
lube can tend to find its way down your barrel otherwise.
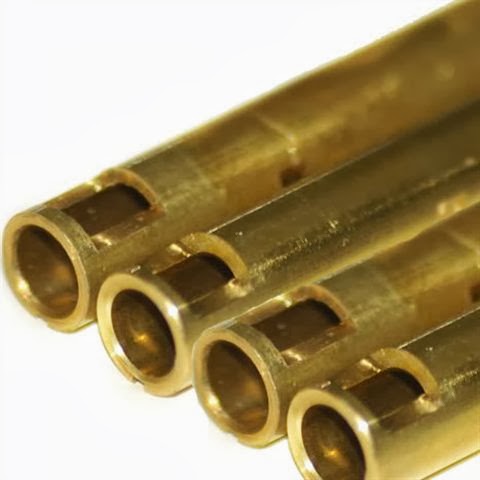
#2,
after o-rings, valves are the weakest link in the GBB magazine. These
are usually made of brass, plated brass, or in some cases, aluminum, or
steel. 90% of the time, they will be brass due to brass having good
self-lubricity properties. Potential for brass to be damaged, especially
when screwing it into harder metals, such as aluminum or steel are
there. It can be easy to damage the threads or chew out the slot for
your screwdriver, or even bend valve if you monkey too hard with it. The
valve usually contains two or more o-rings depending on design. These
o-rings are usually the ones that die over time. Finding and replacing
these o-rings can be a real pain, to impossible in some cases. 90% of
the time, you’re simply better off saving yourself the time, grief, and
agony by just biting the bullet and replacing the valve altogether.
Additionally, some valves are rather complicated affairs of engineering,
and don’t lend themselves easily to being dissembled without completely
compromising the structure to the point of making it impossible to
reassemble. If your valve is bad, try to rehydrate the o-ring first. If
this doesn’t work, take it apart, replace what o-rings you can access or
can determine to be bad. If that still doesn’t work, replace the valve.
Valves can be expensive, so once again, preventative maintenance is the
key here to ensuring long life.

I have read of some folks
using automotive gasket sealer to seal the valve to the magazine body. I
really don’t recommend this because it can be near impossible to remove
a bad valve due to this stuff. Remember: most valves are brass. It
doesn’t take much effort or a bad slip to chew up the slot and
completely trash your ability to remove a valve.

Another
common issue with valves is the valve plunger fails to depress
consistently or drags. This is usually the result of gunk, debris, or
bad manufacturing process (a machining burr) preventing it from working
properly. Blow it out if you can. If it doesn’t work after this, then it
is likely a defect and should be replaced. Plungers are another item
that is difficult and time consuming to fix.
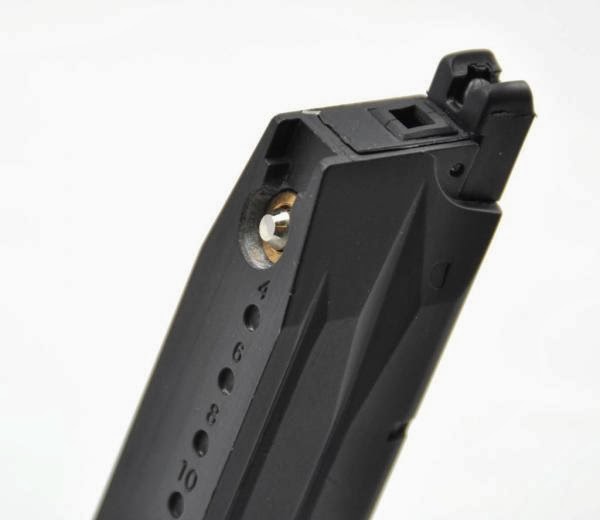
#3 is relatively
simple. On GBB pistol mags, it pays to keep your feedway for your BB’s
clean. Lube and debris tends to collect in this channel during firing.
If you observe closely, it is not uncommon for this to severely
contaminate the cleanliness of your BB’s. This translates itself
directly to your barrel, which translates to decreased accuracy. The
feeble pipe cleaner is your friend here. Lock your spring back, double
up the pipe cleaner in half, and clean that channel out. Your BB’s will
thank you and your barrel will thank you.

#4, I have never
personally seen or heard of a case where the gas chamber of a magazine
was cracked or compromised in such a fashion as it leaked like a sieve.
Typically these are milled or case from a solid block of steel or
aluminum. It would be very hard to destroy one. Your o-rings and valves
will go out first before you ever destroy the main gas chamber.

Accuracy Upgrades Part II: Barrels

One of the most common questions surrounding barrels is “which bore diameter is best?”

General consensus on the interwebs is that the smaller the bore diameter, the better your accuracy will be. Typical ‘small bore’ sizes usually start at 6.03mm and go down to 6.01mm to 6.00mm. There are even ultra rare sizes such as 5.99mm diameter barrels too.

Larger bore sizes tend to start at 6.05mm to 6.08mm and beyond.

One of the first things you need to realize with any barrel is that its performance is largely at the mercy of the BB’s you feed it. Lets take, for example, one well-known high quality BB on the market today: the 6mm Bioval. Bioval advertises their BB’s as having an average diameter of 5.92mm, which is billeted as being smaller than most manufacturers. Most well known brand name quality airsoft BB’s tend to have an average diameter of 5.98mm +/-. That +/- figure represents the margin of manufacturing deviancy possible. If you were to take a pair of dial calipers (or even better, a micrometer) to your BB’s and measure each and every one, you will find that they are not uniformly 5.92mm as in the case of Bioval’s, or 5.98mm or whatever else they are advertised as. Generally the more expensive the BB, the more uniform the diameter consistency versus a cheaper BB brand will be. Cheap BB’s can have some pretty wild diameter fluctuations to the tune of ungodly numbers that shouldn’t even be fired down the cheapest hand-forged-barrels-from-scrap oil-drums-sourced-in-the-landfills-of-Papau-New-Guinea.

Bringing the discussion back to barrels – slinging your 5.98mm +/- BB’s through a 6.00mm diameter barrel doesn’t leave a very big margin of error. If your BB diameter is too large, it will cause jams and accuracy issues as it is being forced down too tight a bore and/or ‘shaving’ itself along the way. On ultra-tight bores, if it is shaving the BB’s, it will eventually decrease the diameter even further as the BB’s leave their residue behind. BB residue is also bad for accuracy too. The
smaller the bore you go, the narrower the range of BB brands you will be able to choose becomes – ironically, this also means the cost of feeding your AEG becomes exponentially greater, as ultra-high precision BB’s are more expensive than their less precise counterparts.

For small bore diameter barrels, I feel 6.01mm is the absolute smallest one should go, while 6.03mm is a good compromise to account for those who use a wide variety of BB brands.

One school of thought suggests that a larger bore diameter is actually MORE conducive to accuracy than a tighter bore. There are a fair number of well known tech
guru’s who have conducted the testing and even used specially manufactured clear acrylic barrels with high speed photography to capture the BB’s ‘flight pattern’ so to speak and determine just how exactly the BB’s act when traveling down a barrel. Testing seems to suggest that when exiting the hop up chamber the BB travels along the top of the bore and generates its spin along the way (in somewhat similar fashion to the Tippmann flatline barrel in paintball.) Thus, the
less friction and obstruction imparted on the BB by the barrel the better it will be for accuracy. Additionally, it was determined that there were negligible gains on longer barrels over 450mm’s in length. My own testing has seemed to confirm that larger bore diameters (6.05mm) tended to to result in slightly better accuracy (the caveat being that your gearbox and hop up unit are operating in perfectly tuned harmony too.) I have several setups where I transitioned from a 6.01mm to a 6.05mm bore and noted demonstrable accuracy gains and range improvements. Although I would also argue that there can also be such a thing as too wide of a bore. My personal preference is for bores around 6.03 to 6.05mm.

So there you have two polar opposites in barrel thinking. Which one is correct? Well, you have to realize again that there is truly no precise clear cut answer for which barrel diameter is best for you. A combination of factors effect barrel accuracy, including your hop up, gear box performance, BB’s and overall bore cleanliness.

The Enemy: Teflon Tape

Fixing compression: new o-ring’s and Dow 55 or rubber conditioner.

The enemy: Teflon tape.

I’m sure you have heard of Teflon tape mods to fix cylinder head leaks on a V2 gearbox or air nozzle leaks on a bar 10 and all the random theories and “quick fixes” that you can do with a roll of Teflon tape on your Airsoft gun. The truth is Teflon tape dissolves in most lubricants, has a very low tensile strength, is designed for low pressure water applications, and easily goes everywhere in a working gearbox where it shouldn’t.

I have opened more gearboxes than I could count that looked like an Easter basket after their “mod” came off their cylinder head and wrapped its way around everything in a gearbox. Truth is, this method is more expensive then doing it right the first time. I’ve also seen hundreds of cases now where Teflon tape will partially dissolve and turn into a nasty gear-clogging goop inside your gearbox. At $30 an hour, I make a decent chunk of money fixing these so called “mods” for kids.

If your cylinder head leaks then replace the o-ring and lube with Dowe 55 or power steering pump leak stop. Instant 5 year fix. Teflon will do one or two games
before it fails. A basic o-ring cost’s $0.50 from most stores and saves you a lot of cleaning and headache.

POSP 4×24 SVD scope

This is my review for the POSP 4×24 SVD scope from Kalinka Optics. Actually you could say it’s also a review for the copy-cat optic ehobbyasia sells as well because I now have experience with both. So previously I’ve been using a POSP 4×26 from ehobbyasia.com. This scope retails for about $99 and is relatively inexpensive for an SVD style scope. It is not however the genuine POSP scope, despite it also being purportedly made in Belarus. Judging by the construction, I’d almost be tempted to say the components are made in Belarus and it is
eventually assembled in China or wherever.

shop.ehobbyasia.com/russian-posp-4×26-sv…ed-sniper-scope.html

While relatively serviceable, it did have a number of quirks and frustrations built into it that I had to deal with.

1) The optics weren’t exactly the sharpest nor the brightest. The illuminated red reticule wasn’t evenly illuminated – instead only the center would be brightest while it faded off at the edges.

2) The reticule itself was installed crooked on my example. This made sighting in a PITA.

3) The extensible sunshade was a loose fit and required a ring of electrical tape applied underneath to keep it wedged in place.

4) The wiring contacts were installed loosely into plastic fittings and stripped out very easily.

5) The wiring itself was unnecessarily long and snagged on your gear unless you kept it taped up and out of the way.

6) The bulb housing underneath the scope was too long and rubbed against the top of the SVD dust cover. Possibly affected the ability of the scope to properly mount right too.

7) The switch assembly was installed loosely and rotated around inside its socket. It also had a cheap white plastic piece that slipped over the switch that fell off and got lost in the woods right away.

8) The locking lever was easy to adjust but the lever itself was easily bent if not careful.

9) The rubber lens boot and eye-cup fit and worked perfectly.

10) The printed 1/4 MOA reticule adjustments on the windage and elevation knobs did not coincide with the actual function of the scope. I had to rotate each individually multiple times to get the point of impact to move a mere inch or two. The zero seemed to drift of its own accord too. I would have to re-zero in the middle of a battle sometimes because it drifted so much.

11) The scope is largely unsealed against water in several critical areas; namely the battery compartment which has no seals at all.

12) The finish is cheap and easily flakes off. There is some nice black anodizing under parts of the scope, however. Why they couldn’t have simply left the scope with just the anodized finish is strange.

Overall, I will say that it worked most of the time. If I had to put a percentage on it, I’d say 80%. The times that it didn’t work made me frustrated enough to toss it into the garbage can and start anew. I especially didn’t enjoy the fact that I was having to do a zero in the middle of a battle because the blasted thing wouldn’t stay put. This did give me an excuse to use my iron sights a few times though.

So . . . .

Enter the genuine POSP 4×24 SVD scope from Kalinka Optics. This would be my third order with them, and I was very impressed with the PK-A red dot I purchased previously. In typical fashion, my package arrived within two days of my placing the order over the internet.

It’s amazing what an extra $70 will buy you. The feeling was akin to when I was comparing my Lowa combat boots to my Danners and realized my Danners felt pretty darn crappy in the quality department. This scope is night and day nicer than the one ehobby sells. Comparatively speaking to the points addressed with the above scope:

1) The optics are sharp and noticeably brighter. The reticule is also larger and more visible.

2) The red illuminated reticule is evenly lit and highly visible when turned on.

3) The reticule is actually installed straight!

4) The objective lens doesn’t use an extensible sunshade, instead it is threaded and allows for the fitment of a sunshade or an amber colored lens filter.

5) The wiring is very tidy and cut to appropriate lengths. There simply isn’t any loose or extraneous wiring flapping about. All contacts are securely installed into metal. Overall appearance is a lot more streamlined and clean looking.

6) The switch assembly has a metal safety guard installed to prevent inadvertent activation in addition to featuring a rubberized cover. It is also securely attached and does not rotate around.

7) The adjustment knobs are easy to use and accurately move the reticule into the desired position. It was a retarded kind of easy sighting my SVD in with this scope. It required approximately only 4 clicks to the right on the windage knob to get my rifle shooting dead center on paper. That was it.

8) All points of entry are sealed nicely, and the battery compartment is sealed with o-rings.

9) The bulb housing is small and clears the dust cover on the SVD easily. There are also a number of military-grade bulbs and color varieties available from Kalinka Optics should you want a different reticule color (the default is red).

10) The locking lever is strong and the mounting bracket is rock solid once installed. This scope also has the added benefit of being ‘hot swappable’ with optional accessory brackets so you can install this scope on your AK mounts if so desired.

11) There is no rubber boot cover for the objective lens. Instead it uses a flip up style scope cap similar to the Butler Creek variety we use over here. The rubberized eye-cup is supposed to be the newer version that is designed to conform more ergonomically to your face. However, this is the one part of the scope I did not like. For some reason I could not get a clear view through the scope while using this piece. The view was simply too occluded no matter how I had the eye-cup
mounted. You can use the scope without the eye-cup, of course, but I chose to use the older accordion style eye-cup from the ehobbyasia scope and that works perfectly on the POSP (you can see this from the pictures).

12) The finish is a nice evenly applied industrial looking thing.

13) All markings are etched in Russian, including the manual which is entirely written in Russian, with the sole exception of “Made in Belarus” etched into the scope. Overall this gives it a more authentic appearance keeping in line with the SVD’s origins.

Honestly, I can say that if you want to buy a 4×24 Dragunov style scope, for a mere $169 this is the way to go. Kalinka Optics offers a huge variety of POSP and Military PSO style scopes in various magnifications and classes so you certainly have a lot of options to choose from. Plus it sure beats waiting around for that ‘vaporware’ PSO-1 scope from Real Sword to materialize in someones inventory….

Accuracy Upgrades Part 1: Barrels.

If you’re like me, you probably want to crank out as much performance out of your AEG as possible. Most internet advice points immediately to swapping out both the barrel and hop-up as your first step. I think this is only partly true in most cases.

It is probably true that you should at least swap out the hop up bucking and nub. Stock hop up rubbers are almost

all universally junk. There are very few manufacturers that install decent buckings in their guns. So swapping out the barrel would seem to be the next logical step in one’s desire to achieve utmost accuracy, right?

Not quite . . . I would recommend that you swap out your bucking first, and then test it with your stock barrel. While AEG
manufactures excel at installing crappy buckings in their guns, they usually manage to get a pretty decent barrel in their setups. Typically these will often have a barrel diameter of 6.05mm (most common) to 6.03mm (not as common) to 6.01mm (very rare.) You may be pleasantly surprised by the performance the stock barrel coupled with a good hop up
upgrade will do for you. For the budget minded airsofter, this is a more cost effective route to experiment with as well.

Realize too, that there are a lot more factors affecting accuracy and range than just the barrel and hop up. Any of the following affect accuracy and range – listed in the most likely order:

  • Crappy BB’s (always buy high quality BB’s)
  • Crappy hop up bucking / ripped or torn bucking
  • Bad compression
  • Crappy barrel
  • Bad interface between hop up chamber and air nozzle (massive FPS loss here)
  • Bent, damaged, or scratched barrel
  • Cracked nozzle
  • Cracked piston head
  • Cracked cylinder head
  • Poor support for the inner barrel within the outer barrel (too much barrel flex will cause accuracy issues, such as poor grouping)
  • Your BB’s are hitting an obstruction, such as a suppressor or muzzle device (always ensure that your barrel is long enough to pass through a suppressor or that the hole diameter is large enough)
  • Cracked gear box (extreme worst case scenario – everything starts falling apart at this point)

Personally if it was me, I would tackle accuracy and range in this order:

1) Shoot high quality BB’s FIRST. No your .12g Crossmans’ in the 50,000 round “Battle Pack” you purchased at Wal-Mart for $10 don’t count.
2) I would replace the stock bucking with a quality aftermarket one
3) Then I would crack open the gearbox and check for proper compression, and while it was open, examine all parts for damage and check the shimming.

If all that checks out, and the gun still isn’t quite performing to my standards . . . then I would consider looking into a barrel upgrade.

On an aside: one of the first things you should do with any new AEG is swab the barrel out. Some of these guns have been sitting on shelves or store racks for months or years. The barrels are often times full of dust, grime, or dried up silicone oil, all of which can impact your accuracy. I bought a KWA SR-12 a few years ago – while it was brand new, it produced some pretty grimy patches when I swabbed the barrel out. Just sitting on the shelf in the open air market produced that