Tuning the VFC SCAR – Part I

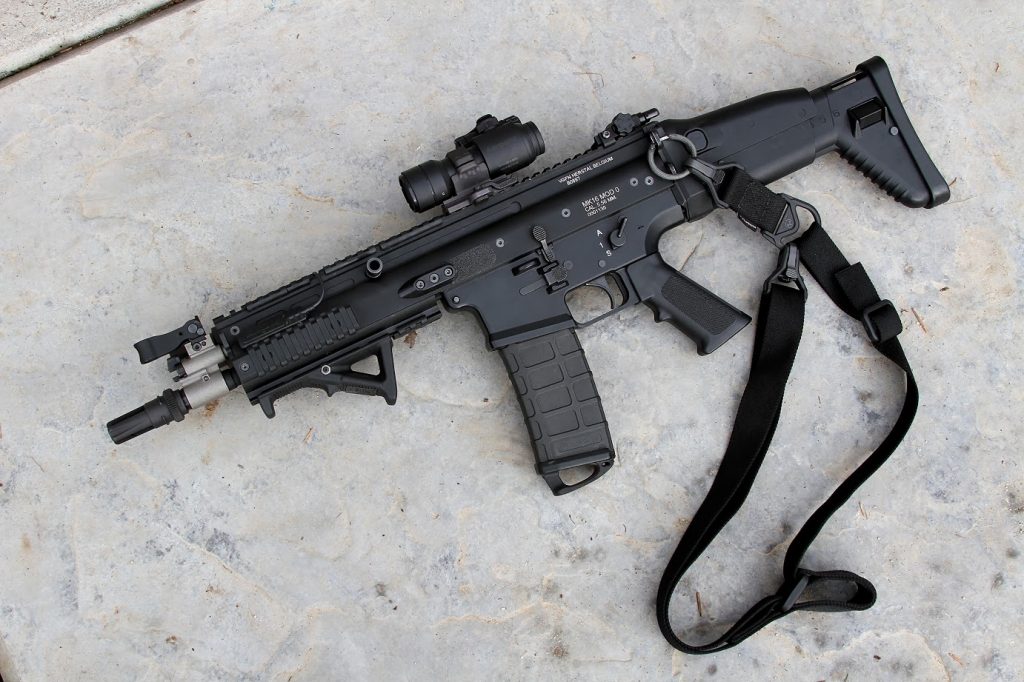
VFC builds what is perhaps the best SCAR replica on the market. Externally they nearly match the real steel version 1 to 1. As an upgradeable platform, they make an excellent choice, as you won’t have to touch the externals at all, save for what you prefer to bolt on the plentiful rails. They have been known to have some internal issues, however, and we will be discussing these issues and how to diagnose them in this article.

The gearbox engine used in the VFC SCAR is a Version 2 design. It does use a few proprietary parts though, and it features an ambidextrous selector switch which can be problematic for some aftermarket purposes. For the most part, you will be well served by the stock internals. Depending on your goals and to get the best performance out of your SCAR, a few tweaks and upgrades will be necessary.

As always, clicking any of the pictures will bring up a larger view.

Shimming and Tappet Plate Interference

From self-shimming to shimmed set.

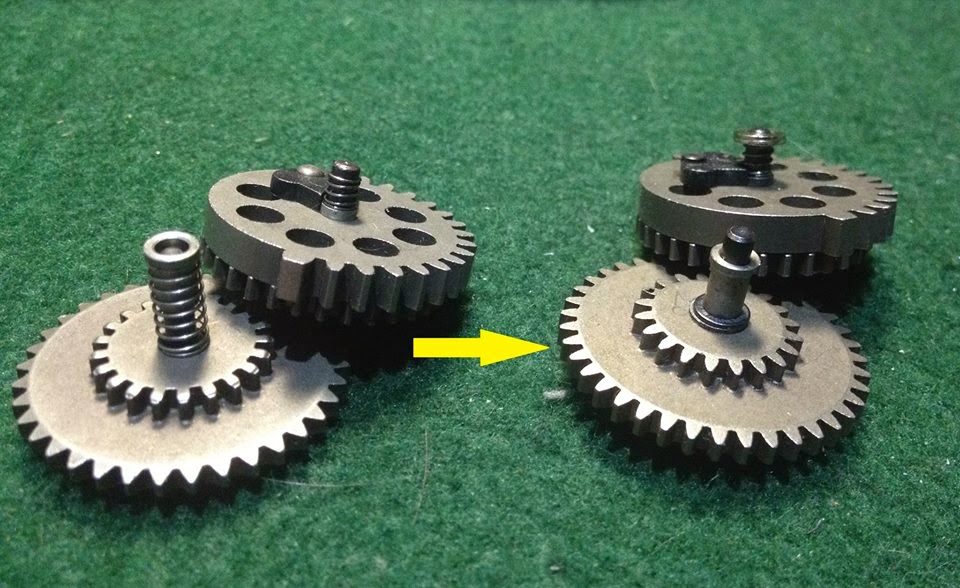
VFC uses self-shimming gearsets in their SCAR system. This is basically a conical spring that fits to either side of the gear and is supposed to keep things centered. In theory this works most of the time, but nothing is going to be as good or healthy for your gearbox as a true shimming job. The benefits of proper shimming are more precise gear alignment, quieter operation, and less margin-of-error (i.e. better lifespan.) If your gearset came with spacers, you can use those to help obtain proper shimming height. You may also use the sector gear spring as a 1.5mm spacer in compressed form.

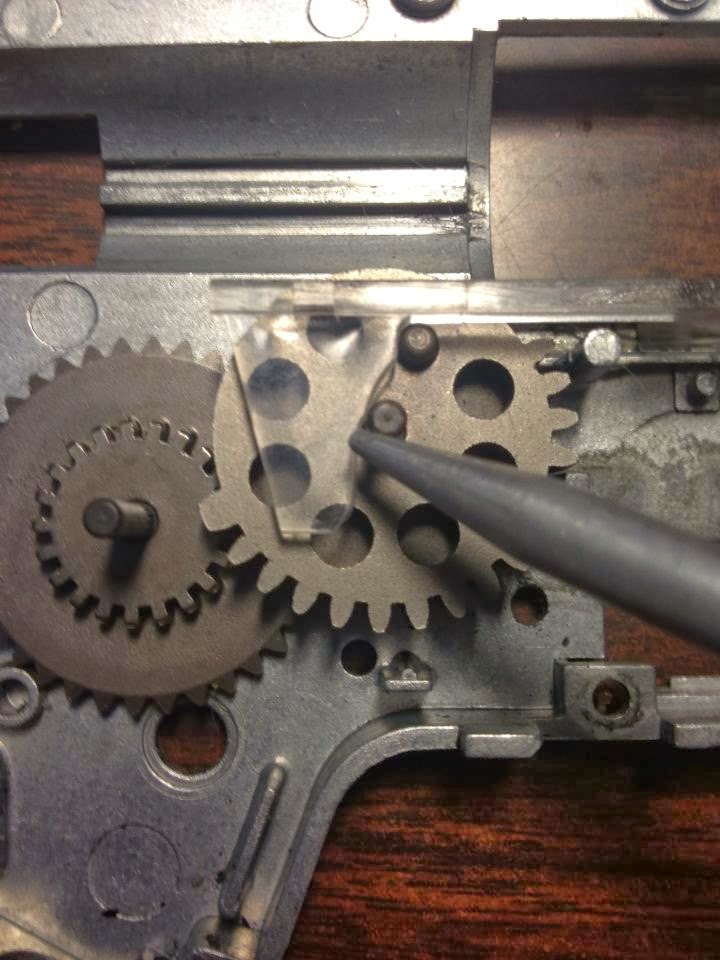
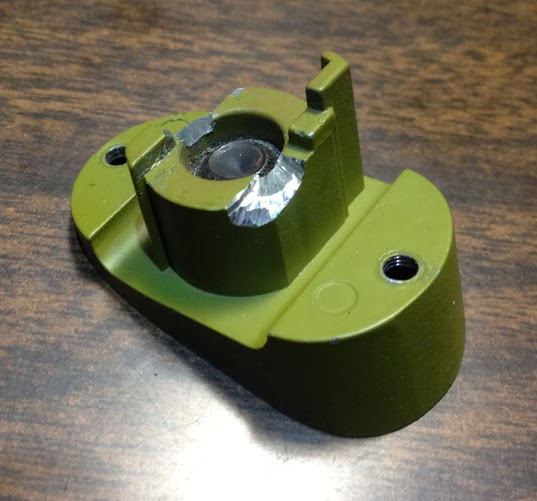
Replacing the self-shimming parts may introduce issues with the tappet plate, however. Upon closer examination, you may see that the tappet plate now binds on the shim and / or the bearing surface. This can cause immediate issues with FPS loss as the tappet plate and air nozzle are not allowed to fully cycle forward and create a good air seal with the the hop up chamber:

Here you can see where the tappet plate might be encountering interference from the bearing surface and / or shims.

Check the engagement area where the tappet plate seats against the sector chip. It should not prevent the tappet plate from seating fully forward as shown in the following photo:

The tappet plate and air nozzle should seat fully forward. There should not be any gap between the gearbox and the front face of the tappet plate.

An alternative view illustrating the area where shims would rest on the gear surface and interfere with the tappet plate.

Solutions

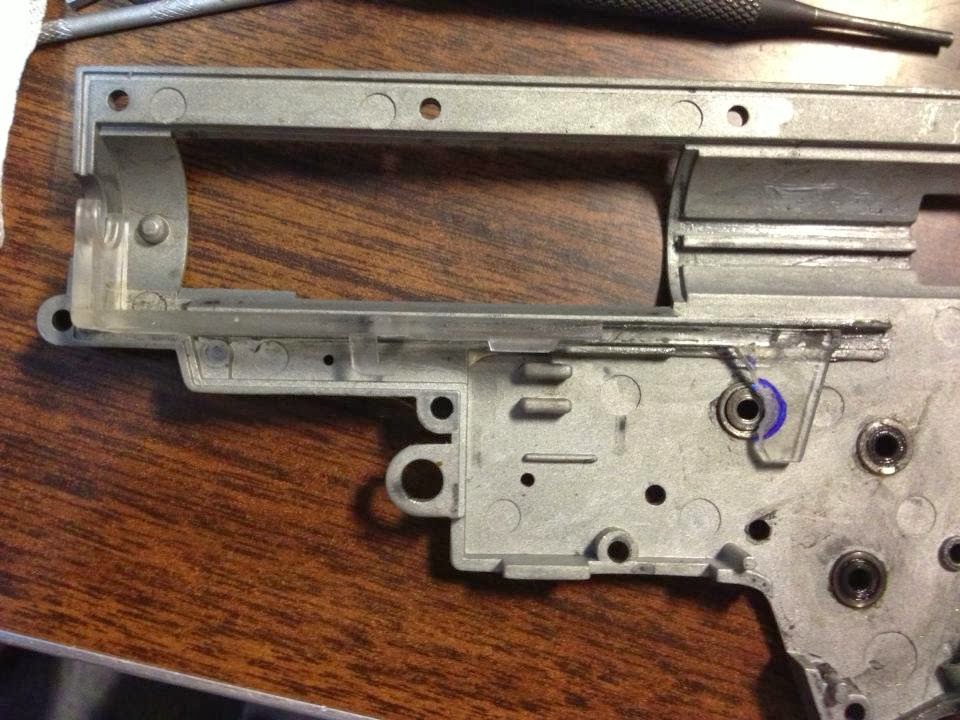
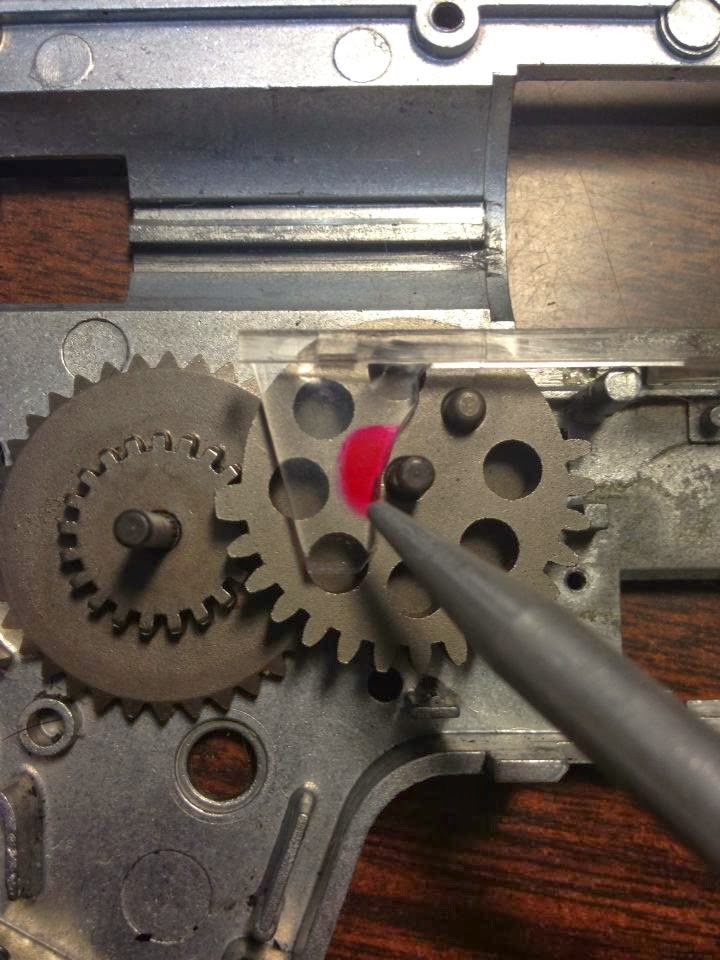
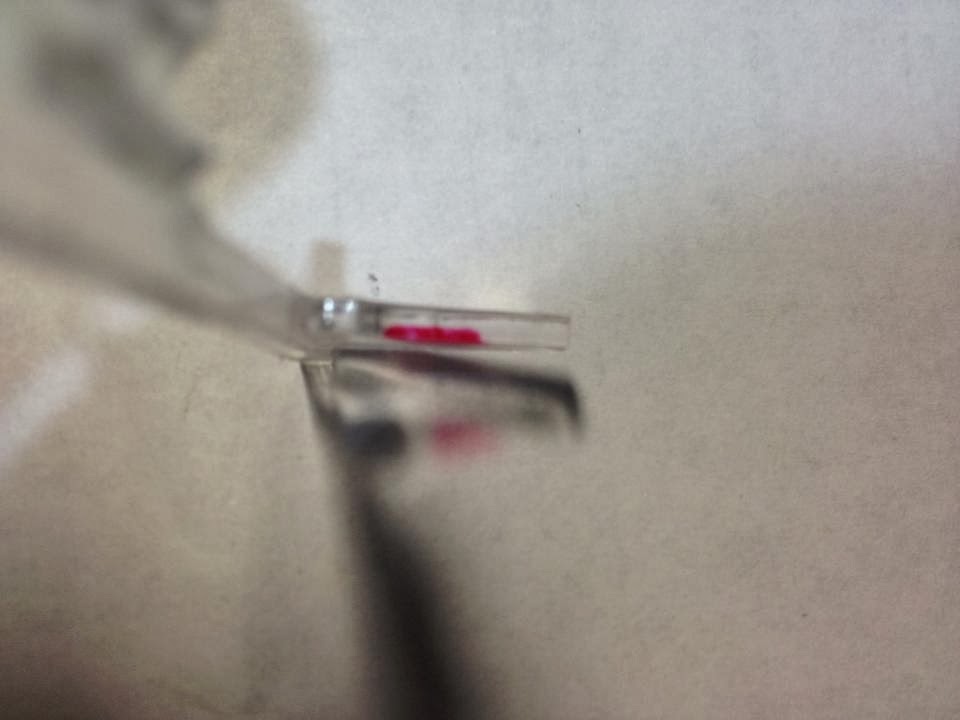
One remedial solution to the above problem is to file down the tappet plate to where it no longer binds on the shims. This is accomplished by thinning down the tappet plate:

In the case of this particular SCAR, thinning was necessary on the right side of the tappet plate. The red marked area is a rough approximation of material that may need to be removed in order to obtain proper clearance. Slow and steady is the key here. File a little, and check often.

Air Nozzle and Hop Up Chamber FPS Loss

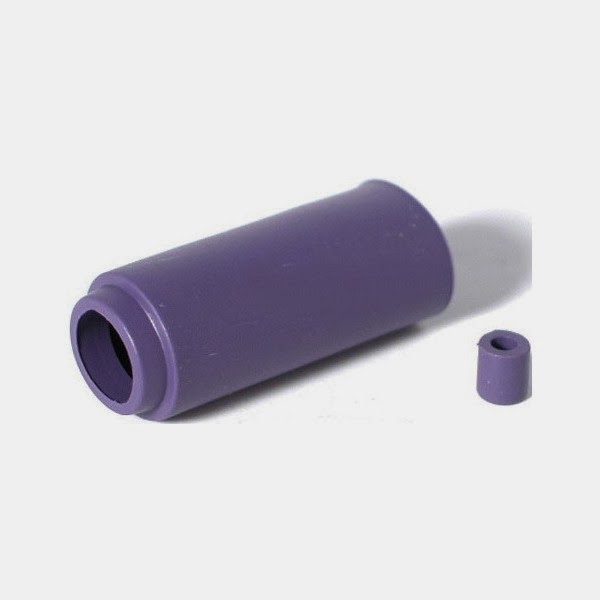
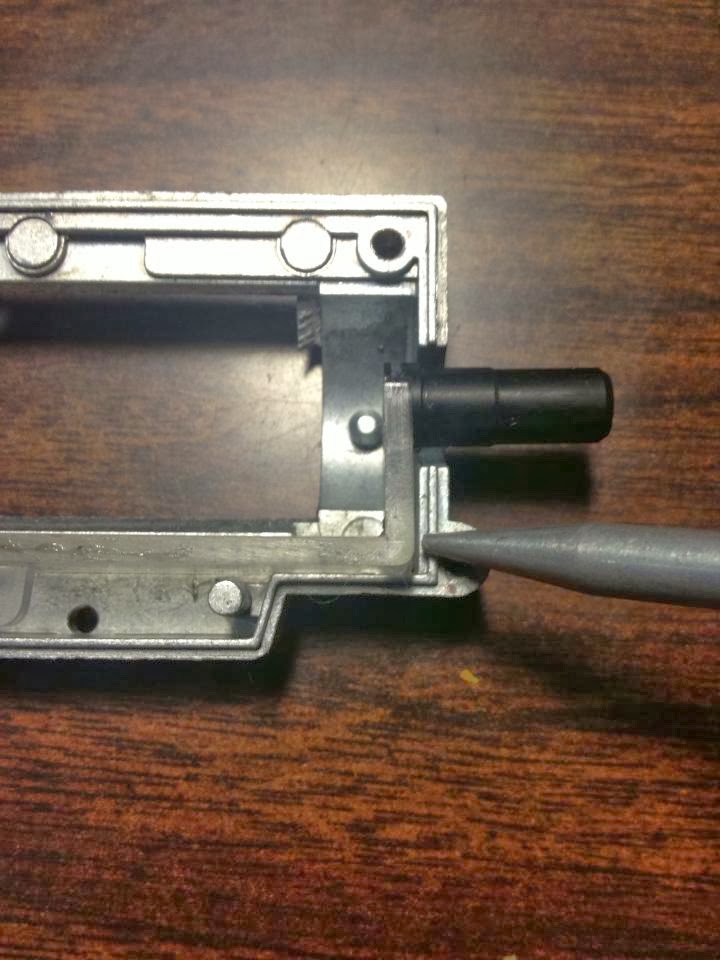
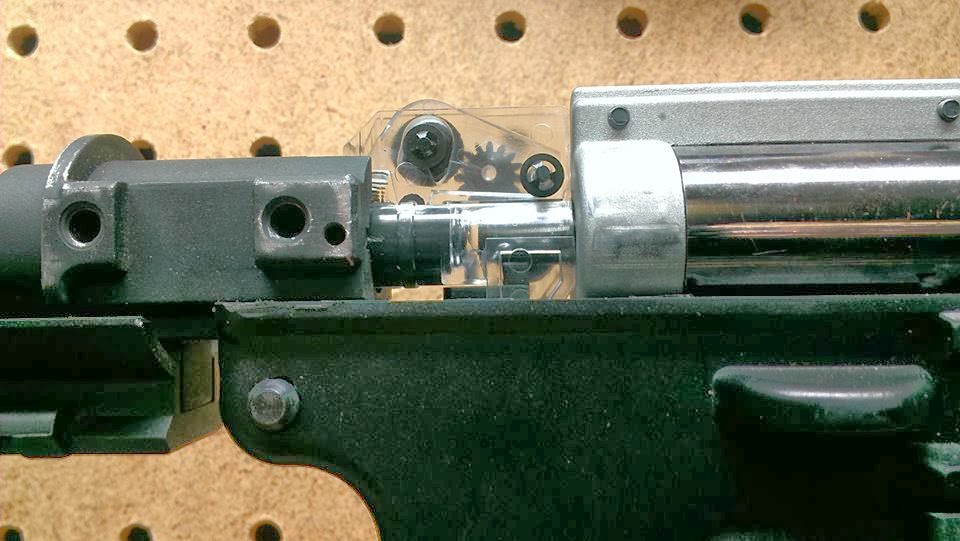
If you need to replace your air nozzle due to damage or wear, it is vitally important you replace it with as close an example to the stock nozzle as possible. The stock VFC nozzle measures approximately 21.16mm in length. If you have too short of a nozzle you will likely run into the following issue:

That little gap you see between the air nozzle and the hop up bucking is responsible for a massive FPS loss in this particular example – it chronoed in at a pathetic 117 FPS. Not good at all.

Here you can also see the support/guide that rides just underneath the nozzle.

On a side note, it is recommended to discard the two set screws housed in the outer barrel – these can cause issues with the hop up chamber not seating back far enough and if cranked down too tight will actually crack and damage the hop up chamber. Obviously a cracked chamber can also result in lost FPS too.

Noisy Gearbox

This is probably the most common ailment to the VFC SCAR, and you will have doubtless read complaints elsewhere on the internet about the awful noise emanating from the gearbox. Besides proper shimming (which goes a long ways
towards quieting down this beast), the problem can be fixed by modifying the motor plate. The design of the VFC motor plate interferes and tends to lift the motor wires to cause height and angle problems. In some cases, this will cause such severe binding as to prevent the gearbox from cycling at all. It’s almost the same as an improperly adjusted motor height screw.

Here you can see the small modification done to the motor plate. This can be accomplished with the use of the ever-handy Dremel. After performing this modification, you should experience instant improvements with regard to noise, angle, and efficiency.

The motor plate seems to be a basic Version 2 design, so if you completely wreck it, it is an inexpensive replacement part found just about everywhere.

I’ll cover the installation of a Magpul grip in the future for those who prefer this style of grip. It requires some different techniques to get it to work properly with the VFC SCAR. 

VFC Tuning and Air Compression Checklist

This is a general guide for tuning VFC gearboxes.

Pre-tuning

  1. Velocity check, rate of fire check.

Bushings:

  1. Original bushing removal.
  2. Bushing glue removal.
  3. Ball bearing install.

Shimming (molybdenum grease is highly recommended for gear lubrication):

  1. Grease cleaning.
  2. Gear teeth check.
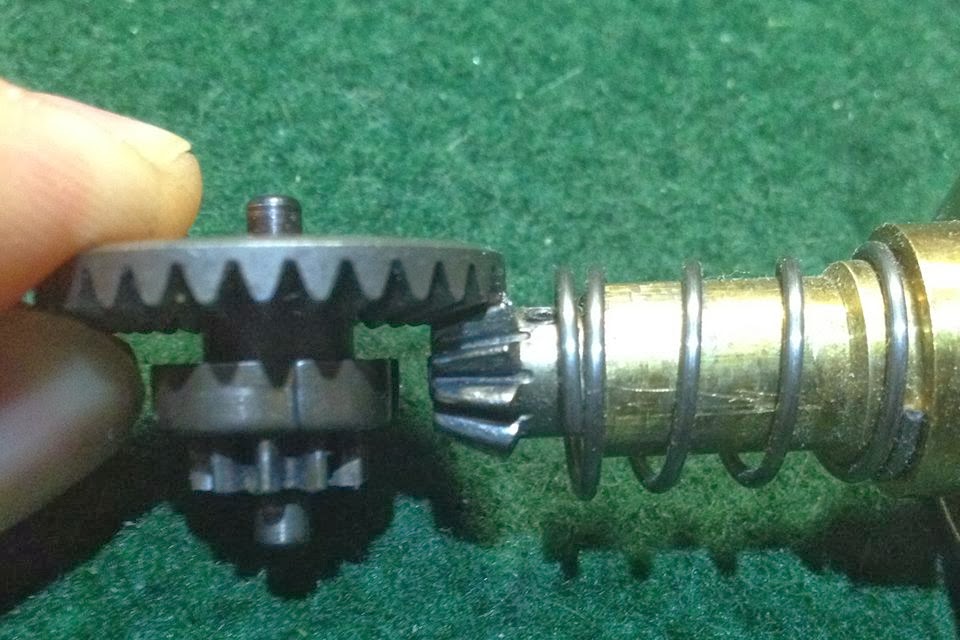
  3. Bevel gear and motor gear match. Gear movement inside of gearbox should be no more than 0.2mm after gearbox is closed with screws.
  4. Remove spur gear spring, use proper shims to match bevel gear.
  5. Sector gear, shim between spring and bushing to match spur gear.
  6. Tappet plate movement check. File tappet plate if there is interference with sector gear shim (in the case of the SCAR)
  7. Close gearbox with all gears, piston, cylinder and tappet plate installed. Make sure it closes tightly without force.
  8. Rotate gears and check if piston can be pulled to the rear of gearbox smoothly
  9. Attach motor for gearbox test WITHOUT cylinder, tappet plate, piston, spring, and spring guide.
  10. Adjust motor height for best result of noise

Air compression

  1. Check compression of piston, cylinder and air nozzle. VFC normally has an excellent air seal.
  2. Clean and lubricate if there is air leak. Use Silicon grease only for o-rings

Gears, Pistons, Springs, and other Parts

I don’t wholly consider it necessary to replace the stock gears in most AEG’s unless they’re truly awful. VFC gearboxes, for example, (including gears) are designed to be M150 ready, and have been tested with a 12 volt car battery at room temperature. My current setup is running a Guarder SP-110 spring, and is shooting at just under 400 FPS with .20g BB’s.

Out of personal preference, I have replaced the motor on my SCAR with a Tokyo Marui EG-1000. These motors are very durable, quite, and simply run and run and run. Not really a necessary swap, just personal preference.

Most internal parts are standard Version 2, and finding upgrades is relatively easy. Unfortunately, a few of the main components can be a lot harder if not impossible to upgrade. These parts are the ones made from clear polycarbonate and include: the piston, the tappet plate, selector switch plate, and the hop up chamber. With the exception of the hop up chamber (which is truly proprietary), you can find aftermarket parts that can be modified to fit if you’re patient and willing to spend the time and money searching. For the most part though, VFC spares are inexpensive and relatively easy to find and it isn’t really worth the expense to source parts that need modding.

The VFC SCAR runs very well with Magpul PTS P-Mags. They can be a slightly snug fit, but this is easily remedied by taking a bit of sandpaper to the inside of the magwell – although it isn’t truly necessary for function.


Acknowledgements

Much of the technical information, VFC tune-up guide, troubleshooting tips and the internal gearbox photos contained herein are graciously provided by Sonic who has spent many tireless hours mastering the VFC. Without his help, much of this would still lie in the realm of mystery 😀

Prometheus Purple Hop Up

We’ve talked before about AEG performance mods, and the role the hop up bucking plays. I’d like to introduce one my personal favorites: the Prometheus Purple (soft type).

I’ve been using this bucking for several years now, and it has rapidly become one of the first AEG upgrades I reach for. It has in some circles reached legendary status for its out-of-the-box performance. In my own circle, there’s not an AEG in my arsenal that hasn’t had at least one Prometheus purple bucking it at one time or another – most are still outfitted with one. Some of my oldest AEG’s are still running the first install, despite having many countless thousands and thousands of rounds through them. Actually, I haven’t worn one out yet, except for one or two instances where I’ve destroyed one prying it from a very tight hop up chamber. I keep several spares in my field kit at all times – though I haven’t had to reach for one yet. Obviously this bucking works very well when paired with a Prometheus brand barrel too.

Prometheus makes many types of buckings, but the soft type Purple is perhaps their best. I would say it’s slightly softer than a stock KWA or Real Sword bucking, but not nearly as soft as a Guarder Clear (which is another great bucking), and certainly a bit harder than a stock Tokyo Marui bucking. It’s in that “just right” category, really. I generally disfavor very hard buckings myself; mostly due to poor performance in inclement weather. Softer buckings tend to wear out faster obviously, but I feel this is offset by the gains in performance. And as an upgrade, a bucking is one of the cheapest parts you will purchase in your AEG’s performance upgrade cycle.

These may or may not run a bit tight depending on your hop up chamber. With most Ver. 2 style hop ups, they seem to fit fine, whereas the Ver. 3 seems to be a bit tighter. In some cases, you may have to trim them for length to be able to affix the barrel retainer clip properly. A sharp razor blade does the trick, and doesn’t affect performance in any way.

I have experimented with different nubs in conjunction with the Prometheus bucking, but it seems to work the best with the one it comes with, although it is quite forgiving with what you pair it with. This bucking is also a good platform to use for building your home-brew flat-hops too. I once relegated this type of experimentation to KWA hop ups, but even in that modified state the KWA hop up is still a disappointing piece of crap.

These buckings can be a bit of a pain to find – few US retailers actually stock them (or have them in stock), and they typically run about $11 – $16 each.

Performance Rating – rating key areas on a scale of 1 – 10, 10 being the best: 

Fit and Finish – score 10. This is a high quality molding. There’s no seams, rough edges, pock-marks, or unwarranted flashing. These bucking’s have always arrived in a soft pliable state, and I’ve not yet received one that has been dried out or torn.

Install – Score 8. With the obvious caveat “No two hop up chambers are alike”, install is generally 90% of the time a drop in fit.

Performance – score 8. I would personally rate it higher, but I’ve also seen greater performance from other types (custom types.) To be more concise, I would say this bucking would rate a 9 or 10 over a stock bucking, but in the face of competition from a custom installed flat-hop, R-Hop, or any of the like, it may fall behind in final performance. If you don’t want to spend time on a custom bucking (and the hours of fiddling and fussing getting them to work just right), this is the way to go, however.

Lastly, be aware there are other factors involved in accuracy and range, not the least of which is what is going on in the heart of your gearbox.

Durability – score 9. I simply haven’t worn one out yet. I have damaged one pulling it from a very tight hop up chamber, but that was because I was being very forceful. Any other bucking would have suffered similar fate, actually.

Price and availability – score 6. A lot of folks complain about the price on these. They are more expensive than most buckings, yes. But I’ve generally noted that the end performance makes believers out of even the most die-hard naysayers. For the truly cheap bastards, nothing will really appease them unless it’s simply granted for free.

Conclusions

While there are a few other buckings out there that may provide better accuracy and range gains (somewhat subjective depending on platform), for an excellent general-purpose “first upgrade” that will give marked improvements on range and accuracy without extensive installation or grief, I would definitely recommend the Prometheus to anyone.

Midwest Industries AK Scope Mount

Recently I was looking to mount an Aimpoint to one of my AK’s. I had several options available to me,
including the well-known Ultimak railed gas block, and the Texas Weapon Systems AK Dogleg. Rather than bolt a bunch of rails onto this particular AK at the expense of increased weight, I decided to utilize something that worked with the built in scope rail. Enter the Midwest Industries AK scope mount.

Midwest Industries makes several versions of this mount that allow you to pick something that best suits your application. I chose the version with the integrated 30mm ring – this would also save me the additional expense of purchasing both a railed mount, and a scope ring to affix the Aimpoint to the mount.


Quick Specifications

  • Total weight of 6.4 oz.
  • Hardcoat anodized 6061 aluminum and melonite coated steel construction.
  • ADM fully adjustable locking lever.
  • Retails for $109.95.

Overall feel and design of this mount is that it is a solid piece and crafted well. There are obvious areas where material has been milled away to create as lightweight a mount as possible. The mount itself does not exhibit any flex or twisting, and I would say is among the beefiest of AK side rail mounts on the market today. This is not to say the mount is overly big – rather the contrary, it is fairly small, and gives you exactly what you need. No more, no less.

The biggest point of contention I have found regarding this mount is with the round holes bored into the riser arm. Some folks do not find them “aesthetically pleasing” to the eye. Beauty is in the eye of the beholder as they say, and I do not find them unnerving myself, rather the contrary. I especially like the innovative use of the American Defense Manufacturing (ADM) locking lever, which is a great improvement over the older Combloc style locking interfaces commonly found on AK scope rail mounts. The ADM lever allows for a large margin of tool-less adjustment and should fit just about any size AK rail out there. I tried this mount out on a variety of AK’s, real steel and airsoft, and it fit every single one with only minor adjustments needed in some cases. Personally I feel ADM mounts are every bit as good as LaRue Tactical mounts are – if not actually better because they do not require tools for making adjustments, which make them more field friendly than the former.

The ADM locking mount in the open position. Adjustment is attained by compressing the lever and rotating the nut on top clockwise or counterclockwise depending on your needs.

The other really great feature this scope mount brings to the table is how incredibly low it sits over the rifle. As you can see from the photo on the right, there is the barest of gaps between the dust cover and the sight. Obviously this allows for excellent co-witness as well. While co-witness is only an secondary consideration in this day and age, more attention should be paid towards cheek-weld, which this mount lets one accomplish without hassle.

Once mounted, the scope mount is rock solid and does not wiggle at all. The caveat being that you have properly adjusted the mount first, of course. The ring portion of the mount is equally solid too.

Repeatability

A primary concern for most would be whether this mount allows for repeat return-to-zero should it be removed. I can attest that it will – provided you haven’t made any adjustments to the locking nut. Obviously one should adjust the mount first, then zero it to their rifle, after which you can mount and un-mount it to your hearts content without fear of losing zero. Of interesting note, I was able to swap the entire assembly from one AK to another without having to adjust the Aimpoint at all. The MI AK scope mount does situate itself perfectly over the center-line of the rifle, so that is most likely is the contributing factor. Within the world of airsoft, the side rails varied wildly in width and tolerance, save for the real steel rails I have personally mounted myself.

Summary

I have been using this mount for the better part of a year now and mounted to a variety of AK’s. Overall I am very pleased with it and its performance and quality. I have not developed any criticisms or complaints as of yet, although some would obviously balk at the price, and perhaps the aesthetics might displease others. Price notwithstanding (quality gear ain’t cheap), I personally find the aesthetics suiting to the rifle. Many have asked me how the MI mount compares to another well-known AK mount – the RS Regulate series of AK mounts. I would personally posit that the MI mount is superior – but I could be partially biased – even though I have owned both types now. I prefer the cleaner lines, and the ADM locking lever of the Midwest Industries mount myself. I greatly dislike that RS Regulate has chosen to step away from mounts that feature integral rings, for example. Rather, they have modified the design to where you now attach a scope ring or mounting bracket via a few screws to the main body of the mount. This has introduced a formerly unknown failure point, and I have sheared the screws off once already on my RS Regulate mount during a carbine class. Until they return to an integral one-piece design, I can’t really recommend them as an option anymore, and would instead recommend folks look strongly at the MI mount if they’re considering a side rail mounted option.